Our Location
1250 Beacon Street
Brookline, MA 02446
Stop your washing machine shaking violently with our guide on proper leveling, shock absorber maintenance, and more for a smoother laundry day.
Almost 20% of homeowners have had their washers shake hard or move during a spin cycle.
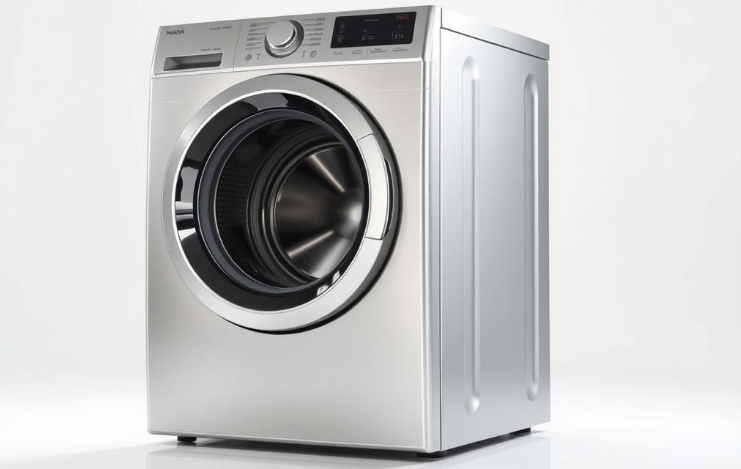
When a washer moves, it can damage tiles, stretch water hoses, and wear out parts. This is common in brands like Samsung, Whirlpool, LG, Maytag, and GE. We’ll show you how to level your washer, check the shock absorbers, and what tools you’ll need.
Start by unplugging the washer and shutting off the water. You’ll need a socket wrench, a leveling tool, and gloves. These steps help you find out if the shaking is due to being unlevel or if the dampers are worn out.
This guide is about stopping washing machine shakes on your own. You’ll learn to make your washer stable without needing a repair person. If it keeps shaking, it might be something inside like the bearings or transmission that needs fixing or replacing.
Vibration in washing machines starts during the fast spin cycle. The drum spins with the wet clothes, using centrifugal force. If the load isn’t balanced, the drum shakes. This shaking moves to the washer’s cabinet and the floor.
Technicians often find that balance issues cause most complaints about washing machines. Checking the load and the machine’s balance is a quick fix before calling for help.
A main reason for shaking is uneven load distribution. A heavy item, like a denim jacket, can cause the drum to wobble. Suspension or shock issues also cause front-loaders to shake more.
If the tub bearings are worn or drum supports are loose, the washer will wobble a lot. New machines need shipping bolts removed, or they’ll act up. If the washer’s feet are loose or damaged, it will move and shake more.
Both overloading and underloading your washer is bad. Too many clothes prevent proper tumbling, while too few clothes lead to imbalance. Stick to mid-sized loads for the best stability.
Brands like Whirlpool, Samsung, and LG provide guidelines on how much to load. Mixing bulky and smaller items helps balance the load, reducing shakes.
An uneven floor can tilt your washing machine, throwing off its balance. Even a small tilt can make it move during fast spins. The type of floor also affects how much the machine moves.
Many problems get fixed by just adjusting the washer’s feet or rearranging the clothes inside. This shows floor and loading issues are more common than parts breaking. For easy fixes, always check load and leveling first.
| Issue | Typical Cause | Quick Check | First Fix |
|---|---|---|---|
| Rocking or thumping | Uneven load or missing shipping bolts | Open door, redistribute clothes; inspect rear for bolts | Balance load; remove shipping bolts if present |
| Vibrating machine across floor | Loose feet or uneven floor | Place a level on top; push gently during spin | Adjust feet; use a rubber anti-vibration pad |
| Persistent aggressive shake | Worn shock absorbers or bearings | Listen for grinding; check for excessive drum play | Inspect suspension; consider part replacement |
| Intermittent imbalance | Load size extremes | Note which cycle and load type causes it | Use mid-sized loads; mix bulky with smaller items |
A washer that’s level reduces shake, keeps its parts safe, and makes laundry days smooth. Proper leveling makes sure the drum’s balance is right and every foot touches the floor evenly. This lowers shaking and stops the machine from moving around the room.
The tools needed are straightforward and cheap. A 24-inch carpenter’s level or digital level will show the machine’s tilt accurately. To adjust, you can use a wrench or pliers, and a tape measure to ensure the right space. For temporary fixes, anti-vibration pads or cardboard can help.
Get these tools ready first. A long level checks tilts in every direction. You’ll mainly need a 7/16″ wrench or an adjustable one for different sizes. Don’t forget a tape measure to check the space around your washer.
Start with nothing in the drum and the power off. Then, move the washer so you can easily adjust it.
After you level it, run a quick spin to see if it moves. If the drum still moves, it might show worn feet, broken suspension, or an uneven floor.
If the feet are missing or broken, replace them. Use shims if needed. On wood floors, a little movement is okay. On concrete, aim for perfect flatness to keep it stable during washes.
Following these instructions helps keep your machine stable. It’s the first step to fix any shaking issues. Try this before you call for help.
Front-load washers and many modern top-load models rely on dampers. These keep the tub steady during spin cycles. When dampers wear out, the machine might bang, sway, or move across the floor. Spotting these signs early can save time. It helps fix shaking issues before they spread to mounts or the tub.
Signs your washer needs attention:
How to inspect dampers safely:
When diagnosing causes of washer shaking, knowing how to replace parts helps. Use either original equipment manufacturer (OEM) parts or trusted aftermarket shocks that fit. Many people find fixing a shaking washing machine easy with basic tools. A guide or video specific to Whirlpool or Maytag models can guide you.
| Symptom | Likely Fault | Quick Check | Typical Fix |
|---|---|---|---|
| Loud banging during spin | Broken or weak dampers | Compress and extend damper by hand | Replace shock absorbers with OEM or matching part |
| Drum hits outer tub | Shock absorber worn washer or failed mounts | Inspect mounts and bushing condition | Replace dampers and faulty mounts |
| Persistent vibration with balanced load | Suspension rods or dampers failing | Check both dampers and top-load springs | Replace damaged rods, springs, or dampers |
| Visible fluid or rust on damper | Leaking or corroded damper | Visual inspection of damper body | Install new dampers from Whirlpool, LG, or reliable aftermarket |
An unbalanced drum can make a washer loud, move suddenly, or “walk” across the floor. Adjusting the way you load clothes can often solve this issue quicker than replacing washer parts. To stop your washing machine from shaking, start by evenly distributing clothes and not overloading.
Balance the drum by mixing big items with smaller ones. For instance, wash a blanket or rug with some towels and shirts. This prevents all the weight from being on one side.
Never wash heavy things by themselves. Throw in some towels or similar items to keep the spin balanced and smooth.
For front-load washers, stop and spread the clothes out if it’s banging or vibrating too much during the spin. For top-load machines, make sure to place clothes evenly around the middle, not just on one side.
Packing your washer too full can mess up the wash and leave residue. Clothes don’t move freely, so they don’t get properly cleaned or rinsed.
Stuffing the washer puts extra pressure on its parts. This can lead to faster wear and tear, causing the machine to shake. Overfilling is also a big reason why washers start to fail sooner than they should.
Too much load might also make your washer move, damage your floor, or strain the pipes. Stick to the maker’s advice on how much to fill it, usually about 75% full for a mix of items. This can help keep your machine stable.
If your washer still shakes after you’ve balanced the load, check if it’s level or if the shock absorbers are okay. Sometimes, you might need to get a professional to take a look and find the exact problem.
Before starting, closely examine the washer feet and base. These feet spread the drum’s load to the floor and soak up minor shakes. If the feet are in bad shape, missing, or not tight, the washer might tip, move around, and shake more during spin cycles. Checking them first can help you figure out if adjusting the washer feet will fix the shaking.
First, inspect each foot pad for cracking, squished rubber or parts that are gone. Old machines usually have rubber that’s worn down, losing their grip. Find any rust or worn-out threads on the studs and make sure the lock nuts and holding pieces are secure. If lock nuts are loose, feet can become loose over time, leading to a shaky washer.
To adjust the washer feet, you’ll need a wrench. Twist each foot to either raise or lower the corner until the machine is even. Then, lock the nuts tight to keep your settings. Double-check the level when the washer is loaded as it may shift slightly after settling.
If the floor is bumpy or soft, consider getting tougher stainless steel feet to replace old ones. Using anti-slip pads, rubber mats, or special washer mats from places like Home Depot or Lowe’s can add grip and stop your machine from moving. The right parts and how you place them can stop your washer from shaking during fast spins.
If you need new feet, make sure they match the original thread size and pitch or check the maker’s parts list for your model, whether it’s Whirlpool, Maytag, Samsung, or LG. When putting in new feet, adjust them so the weight is evenly spread. This evens out the washer and makes any future repairs simpler.
| Check | Symptom | Action |
|---|---|---|
| Rubber pad cracked or flat | Reduced grip, sliding during spin | Replace pad or foot; use anti-slip pad under foot |
| Loose lock nut | Foot backs out, machine tilts | Tighten lock nut after leveling; retest with load |
| Stripped threads or rust | Cannot secure foot at desired height | Install OEM or heavy-duty replacement feet |
| Uneven flooring | Persistent rocking despite adjustment | Use leveling shims, rubber mat, or solid platform |
| Feet correctly adjusted but still vibrating | Ongoing shaking during spins | Combine feet check with shock absorber inspection and load balance |
The floor under your washer affects its stability. Concrete slabs offer a solid base, reducing washer movement. Meanwhile, wood, tile, and vinyl floors may increase vibration or cause the machine to slide.
To fix shaking, choose solutions that fit your floor and washer issues. Minor adjustments can fix most shaking problems. But, violent shaking or a moving washer may need stronger measures.
Concrete floors are best for minimizing washer movement and vibration. Washers on concrete usually don’t need extra support.
Wood subfloors can bend. This bending may worsen vibrations, making some solutions less effective.
Tile and vinyl floors can be too smooth. This smoothness can make the washer move or shake more during spin cycles.
Anti-vibration and anti-slip pads help on many floor types. Tuff-Block and SuperRubber brands offer pads that prevent washer shaking.
Plywood platforms anchored to the floor provide a stable base. Ensure the platform is level and firmly secured to prevent wobbling.
Adjustable shims can fix slight height differences under the washer. But avoid soft materials that might compress over time.
Concrete pavers or washer/dryer stands can correct uneven floors. Make sure the stand can support the weight and bolt it down for heavy spins.
If the problem persists on soft or sloping floors, think about moving the washer to a concrete area or getting a professional to reinforce the floor. Sometimes, professional leveling is necessary for severe sloping issues.
Choosing the right specs helps avoid common shaking issues and saves repair time. Check the manual before setting up the machine. This ensures that you follow what the maker suggests and fit the machine correctly in the intended space. Small steps during installation can prevent the machine from shaking badly when it spins.
Manufacturer guidance
Look at manuals from brands like Whirlpool, LG, Samsung, and Maytag for shipping bolt removal, floor type recommendations, and space needs. You must take out transit bolts before you begin using the machine. If you don’t, you might hear loud noises and feel extra vibration, leading to the need for repairs.
Here are steps to ensure your washing machine is balanced and shakes less.
Capacity shows how big the drum is in cubic feet. Manuals often mention how much weight, in pounds or kilograms, you should not exceed. Going over these limits can harm the suspension and bearings, causing the machine to shake a lot. Overloading not only needs more repairs but can also cancel your warranty.
Certification and warranty
Newer models, especially those with ENERGY STAR, usually have better suspension and dampening systems. Always keep your manuals and installation receipts. An improper setup, like not leveling the machine or leaving shipping bolts in, can cancel your warranty and increase repair costs.
| Item | Why it matters | Recommended action |
|---|---|---|
| Transit/shipping bolts | Prevent drum movement during transport; cause severe vibration if left in | Remove before first cycle; follow brand instructions |
| Leveling and feet | Uneven feet let the washer rock and walk | Use a level; adjust and lock feet to balance washing machine properly |
| Clearances | Close walls or cabinets can amplify vibration | Keep manufacturer-specified space around unit |
| Load weight limits | Overloading stresses suspension and motor, leading to violent shaking | Follow capacity guidelines in the manual; spread bulky items evenly |
| Warranty terms | Improper installation may void coverage for vibration damage | Document installation and retain receipts and manuals |
An unbalanced washer can really disrupt your laundry day. Before you start taking anything apart, try some simple fixes. These tips will help you deal with common issues and decide if you need a professional, making fixing a shaky washing machine easier and quicker.

Start by checking if your washer is level. Place a carpenter’s level on top of the drum. Adjust its feet until everything is even, then make sure the adjustments are secure. If the feet are worn out, consider replacing them or adding anti-vibration pads. To check your work, run a spin cycle without any clothes.
Laundry that’s not spread out evenly can also cause problems. If your washer starts shaking, stop it and even out the load. Also, remember to remove any shipping bolts from a new washer to prevent shaking.
If your washer keeps vibrating, check for loose parts. Tighten any bolts you can find and look at the belt. Sometimes, fixing a washer’s wobble is as simple as replacing shock absorbers or the belt.
If you hear grinding noises or see severe shaking, call an expert. These signs could mean your washer has bearing or transmission problems. Leaks combined with shaking might mean there’s an issue with the tub seals or bearings.
For problems beyond simple fixes, get in touch with a professional. Especially if your washer is still under warranty. Authorized repair services won’t void your warranty and can safely handle complex repairs.
| Issue | DIY Fix | When to Call a Pro | Approximate DIY Cost |
|---|---|---|---|
| Uneven feet | Adjust feet, tighten lock nuts, use a level | N/A | $0–$20 |
| Worn anti-vibration pads or feet | Replace pads or feet, add rubber pads for grip | Persistent vibration after replacement | $10–$50 |
| Unbalanced load | Redistribute laundry mid-cycle, avoid overloading | Recurrent imbalance despite proper loading | $0–$0 |
| Faulty shock absorbers or dampers | Replace shocks if visible wear or looseness | Noise or sway remains after replacement | $30–$120 |
| Worn bearings or transmission | N/A (requires disassembly) | Grinding, metallic scraping, leaking with shake | $200–$600+ |
Keep your washer running smooth with regular care. Doing small checks every few months can catch problems early. This helps avoid your machine moving too much when it spins.
Make sure the machine is level every 6–12 months, especially if you’ve moved it. If it’s not level, your washer might shake more.
Look at hoses, the drain pump, and the filter for blockages or signs of wear. Change rubber hoses every five years, or if you see cracks, to prevent leaks.
Use hot water and a cleaner or vinegar to run a cleaning cycle as suggested by the maker. This helps keep the drum and seals clean, preventing imbalances.
Check if any bolts or screws are loose and inspect for worn seals. Tightening them helps reduce vibration and wear on parts of the machine.
Don’t overload your washer. Stick to the brand’s recommendations to avoid damaging parts.
Regular care helps avoid damage to parts like shock absorbers and drum bearings. Stopping imbalances early can save parts from wearing out fast.
Keeping your washer clean and parts secure saves on water and energy. It also prevents shakes that could lead to damage.
Write down when you check levels, swap parts, or call for service. This helps with warranty claims and can increase the machine’s value.
If your household uses the washer a lot or it’s over seven years old, consider a yearly check-up. A pro can catch issues early and fix them before they get worse.
| Task | When to Do It | Why It Helps |
|---|---|---|
| Level check | Every 6–12 months, after moving | Reduces common washing machine shaking causes and preserves suspension parts |
| Hose and filter inspection | Every 6 months | Prevents leaks and weight shifts that lead to shaking |
| Cleaning cycle | Monthly for heavy use; quarterly otherwise | Removes residue that can unbalance the tub and require washing machine shaking repair |
| Hardware and seal check | Every 6 months | Stops loose parts from amplifying vibration |
| Professional inspection | Annually for high-use or older units | Finds early wear to maintain washing machine and prevent washing machine from shaking in the future |
Many think modern washers don’t shake. But, in reality, spin cycles cause forces that need proper setup, balanced loads, and good components to manage motion. Here, we’ll tackle those myths and show how washer design impacts movement.
Debunking Misconceptions on Vibrations
Newer machines still vibrate during high-speed spins. Whirlpool and LG work to minimize this with counterweights and enhanced suspensions. Yet, leveling, the size of the load, and the type of floor still play a role. To fix a shaking washer, ensure it’s level, adjust the load, and examine the feet and shocks.
It’s not just front-loaders that shake; top-loaders can too. Top-load machines might have different systems and may seem steadier, but imbalance issues can still arise. Knowing the causes of washer shaking helps in finding a solution.
Rubber pads don’t solve everything. They lessen motion on smooth floors, but won’t fix issues like worn shocks, loose weights, or bad leveling by themselves. Use pads along with checking and fixing parts for a complete solution to washer vibration.
Washing just one heavy item by itself can cause problems. Pair heavy items with others of similar weight for better balance. This often fixes many shaking issues.
Understanding Washer Design and Functionality
Washers use counterweights, suspension springs, shock absorbers, and tub bearings to control motion. Counterweights balance the drum’s spinning. Springs stabilize the tub. Absorbers reduce movement. Bearings allow smooth drum rotation. Worn parts increase vibrations.
Design choices affect a washer’s dynamics. Brands strive for larger capacity and faster spins for better cleaning. But, these features can make vibrations worse if the washer isn’t installed or maintained well. Remember this when looking for vibrating washing machine solutions or when fixing shakes.
To debunk myths: level your washer, ensure balanced loads, check shocks and weights, and use pads as part of a full solution. These actions help clear up misconceptions about washers and keep them running smoothly.
It can be hard to choose between fixing or getting a new washer. Simple repairs like adjusting its level or tightening bolts can fix shakes. But if problems keep happening, it might be time for a new one.
Things to think about before getting a new one:
Remember, ongoing shake issues can have many causes. If your machine’s body or drum is damaged and it still shakes a lot after you’ve tried to fix it, getting a new one might be a better deal. Use the warranty and how long it’s supposed to last to decide when to get a new washer.
Small changes can often fix major shaking. First, make the washer level with a carpenter’s level and secure the lock nuts. Don’t forget to remove shipping bolts from new washers. Also, during a cycle, spread out large or bunched up items and tighten any screws you see. These easy steps can quickly fix a washing machine’s shake in many cases.
Put anti-vibration pads under the washer’s feet, or use a special rubber mat. This helps lower shaking that goes to the floor. Make sure hoses are placed correctly and clamps are tight. It helps to evenly distribute heavy items like towels or blankets. If the washer still vibrates, consider replacing old feet or shocks with new, sturdy parts.
Have a check-up every 6 to 12 months to make sure everything is level and parts like shocks, feet, and hoses are good. It’s important to use the right amount of laundry and not wash big items alone too often. If your washer still shakes after trying to fix it yourself, get help from a professional. They can check if it needs more support or to be moved. Doing simple things each day and changing parts when needed can stop your washer from shaking and make it last longer.