Our Location
1250 Beacon Street
Brookline, MA 02446
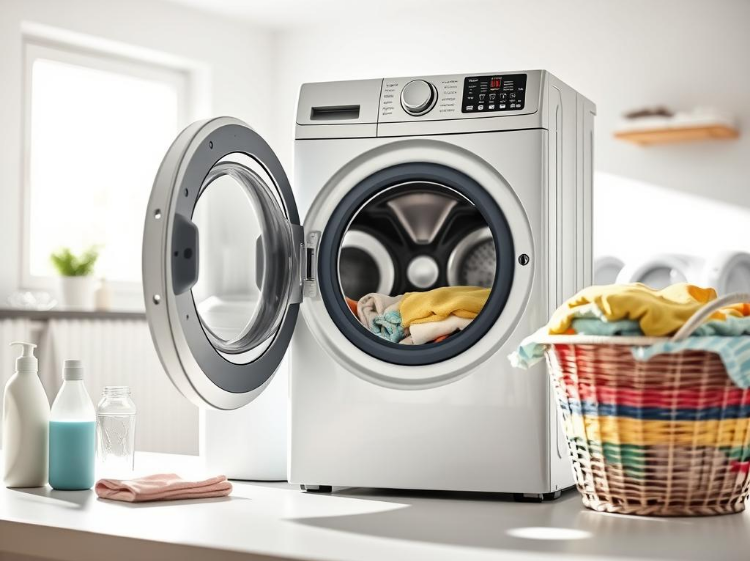
Is your dryer making metallic noise? Discover our easy guide for inspecting pulleys, belts, and drums to silence that noisy dryer quickly.
About 25% of U.S. homeowners have had a loud appliance within five years. A noisy dryer is common and often easy to fix without calling for help.
This guide helps you figure out why your dryer, from brands like Whirlpool and Samsung, is noisy. If you hear clanging, rattling, or banging, it might be issues with parts like pulleys or belts.
We will show you how to fix a noisy dryer. You’ll learn what tools you need, safety tips, and when to replace parts. We’ll also tell you when it’s best to contact a professional, especially for tricky models.
First, make sure to turn off your dryer. If it’s electric, unplug it, or shut off the gas supply for gas models. You will need a set of screwdrivers and a multimeter. Also, know your dryer’s model number to buy parts. This advice is aimed at those who know a bit about fixing appliances and want to ensure safety.
It’s common to hear a metallic sound from a noisy dryer. Simple checks can reveal why. Start by listening at different times – spin, tumble, or when it’s just on.
Parts hitting the dryer’s cabinet or drum cause metallic sounds. Loose drum baffles, a damaged belt, or a misaligned blower wheel can strike metal and make loud noises.
Worn rollers or idler pulleys can cause metallic rattling. This happens when metal shafts are exposed. Bearings wearing out in Whirlpool or Maytag dryers also create a constant metallic rattle as it turns.
Objects like coins, zippers, or screws stuck in the drum or lint trap also make distinct noises. Problems with glides or rollers in LG and Samsung dryers show similar noises.
Squeaking or squealing often means a worn belt or dry drum rollers. The noise gets higher as the drum speeds up.
Thumping or heavy banging can be due to broken glides or damaged drum supports. It can also mean a large object is hitting inside the drum.
Grinding or scraping usually signals worn bearings or motor problems. Clicking or ticking might be caused by small metal objects near the drum seal or a failing timer relay.
Regular maintenance can prevent a noisy dryer from needing expensive repairs. Cleaning the lint trap and checking the exhaust vent helps reduce vibration and heat.
Check the drum rollers, idler pulley, and belt every six to twelve months. Keep a record of each noise and when it happens. This helps fix metallic noises faster.
Pulleys are key parts behind the drum, making your dryer turn quietly and evenly. The motor pulley drives the belt, and the idler pulley keeps the belt tight. This tension prevents slipping and lets the drum spin smoothly.
Pulleys are made of metal or hard plastic and have a bearing. They help manage belt tension and adapt to changes as the drum spins. Good pulley function reduces motor strain and keeps the drum in place. This means you’re less likely to hear unexpected metallic sounds during dryer use.
Here’s a quick checklist to help figure out dryer noises without a pro. Turn the drum by hand with the dryer off. If it’s rough or makes grinding sounds, the pulley bearings might be worn. Look for a pulley that wobbles, has cracks, or moves too much at the shaft. These are signs you might need a new pulley.
Noisy problems include metallic scrapes, squeals, or random clanks when the drum moves. Signs of issues are belt slipping, uneven drum spinning, or a smell of burning rubber from a belt touching a broken pulley. These signs help you decide if you need to fix or replace something.
| Symptom | Likely Pulley Issue | Quick Diagnostic Step |
|---|---|---|
| Metallic rattling in dryer | Worn bearing or loose pulley | Spin drum by hand; listen for rough rotation |
| Squealing when drum starts | Dry or damaged pulley bearing | Inspect pulley face and shaft for play |
| Intermittent clanking | Cracked pulley or broken mounting | Check for visible cracks and wobble |
| Belt slipping or burning smell | Pulley misalignment or seized idler | Observe belt tracking while hand-turning drum |
To further diagnose dryer noise, jot down each problem and compare it to the checklist. This makes repairs faster, reduces guessing when ordering parts, or calling for help.
The dryer belt wraps around the drum and goes over the motor pulley and idler. To check it, you might need to take off the front or back panel of the machine. First, make sure to cut off the power or turn off the gas.
To examine the belt, open up the service panel and take a look. Check for any signs of damage like cracks, glazing, or frays. You should also push on the belt to feel its tension; it shouldn’t be too loose.
Turn the drum with your hand to see how the belt moves. A belt that’s not centered or touches the metal parts too much can cause noise and wear out faster.
Write down the belt’s part number and your dryer’s model before you buy a replacement. You can find belts specific to your model or universal ones from brands like Whirlpool, Maytag, and GE.
If you hear a loud thump or a slapping sound, the belt might be hitting the sides. These sounds can be very loud.
A squealing or whining noise often means the belt is slipping. This problem can get worse when the dryer is full.
If the drum isn’t turning well or stops sometimes, the belt could be worn out. Signs like glazing, cracks, or frays mean it’s time for a new belt.
| Inspection Step | What to Look For | Possible Symptom |
|---|---|---|
| Visual check | Cracks, glazing, frays, missing chunks | Drum stalls; dryer makes metallic noise |
| Tension test | Firm, not overly stretchy | Loud squeal or slipping under load |
| Rotate drum by hand | Belt tracking centered on drum | Metallic scraping in dryer from rubbing edges |
| Record part info | Model and belt part number | Ensures correct replacement belt |
The dryer drum is central to the machine, where clothes get dry by tumbling. It rotates smoothly thanks to rollers or bearings. The belt and motor help it move without issues. When everything is aligned, the dryer works quietly and efficiently.
How the drum operates
The drum, a rotating cylinder, holds clothes as warm air flows through. It’s supported by wheels or rollers at the front and back. Drum glides or felt seals prevent harsh contact at the front.
If any support fails, the drum may tilt, causing it to rub against the dryer’s frame. This friction often leads to a loud, metallic noise as parts or fasteners scrape against each other.
Identifying drum problems
Start by examining the drum for dents, sharp edges, or foreign objects like coins. A scraping sound typically means the drum is hitting the dryer’s side. Banging noises suggest that baffles are loose or supports have broken. A constant metallic sound could indicate a loose seam or fastener inside the drum. If the drum wobbles or doesn’t rotate evenly, it might be out of alignment or have failing bearings.
If you smell burning or notice the dryer is too hot, it could be due to increased friction. This situation can quickly harm the belt, rollers, or drum glides if ignored.
Tips for maintaining the drum
After each use, clean the lint trap and check for trapped items. Clean the drum and lint trap area regularly to prevent debris buildup. This helps avoid loud banging noises.
Check the drum glides and rollers every six to twelve months. Only lubricate them if the maker recommends it. Sealed bearings usually don’t need oil.
Don’t overload the dryer, as it puts too much strain on supports and belts. This may lead to a loud, metallic noise. Always secure metal fasteners on clothing and use dryer sheets with care to minimize wear and tear.
Before you start looking into your dryer, make sure you have the right tools and safety equipment. This makes the inspection easier and helps you find the source of any dryer noise. You won’t have to guess what’s wrong.
Start by gathering basic tools such as Phillips and flathead screwdrivers, nut drivers in 1/4″, 5/16″, and 3/8″, a socket set, and pliers. These tools will help you open most parts of the dryer.
Next, add some special tools for dealing with electrical parts and tight spaces. A multimeter is great for making sure there’s no power and for checking the motor. You’ll also want a torque driver and a small puller or pry bar for working with pulleys and belts. It’s smart to keep an extra belt around, just in case the old one is worn out.
Don’t forget about tools that help you get a closer look at things. A bright flashlight or headlamp and a small mirror can show you spots that are hard to see. Use a soft-bristle brush and vacuum to clean out lint that might be making noise in the drum.
It’s also a good idea to keep your smartphone handy. Use it to take pictures of the dryer’s model and serial numbers. This makes it easier to find parts online from places like Whirlpool, RepairClinic, and PartSelect.
When it comes to safety, being careful with electricity is a must. Use a non-contact voltage tester to make sure the dryer is off before you touch any wires. If you have a gas dryer, turn off the gas and think about getting professional help if you need to work near the gas line or burner.
Make sure you wear protective gear like gloves, safety glasses, and a dust mask. This will keep you safe from sharp edges, flying debris, and lint dust. Keep screws on a tray so you don’t lose them, and clear the area to avoid tripping. It’s also helpful to have someone around to help you lift or move the dryer if needed.
| Item | Purpose | Recommended Use |
|---|---|---|
| Phillips & Flathead Screwdrivers | Remove panels and control covers | Standard assembly and disassembly |
| Nut Drivers & Socket Set | Loosen nuts on pulleys and mounts | 1/4″, 5/16″, 3/8″ sizes for most dryers |
| Pliers & Pry Bar | Grip and gently pry tight components | Pulley and belt removal |
| Multimeter | Check power and motor continuity | Confirm circuits are dead before work |
| Non-Contact Voltage Tester | Quickly verify power is off | Essential for safe electrical checks |
| Flashlight & Mirror | Illuminate and view hidden areas | Inspect bearings, pulleys, and drum edges |
| Soft Brush & Vacuum | Remove lint and debris | Reduces risk of metallic rattling in dryer and overheating |
| Work Gloves, Safety Glasses, Dust Mask | Personal protection | Prevent cuts, eye injuries, and inhalation of lint |
| Smartphone | Document model numbers and parts | Compare replacement parts and follow guides |
| Replacement Belt / Puller | Swap worn belt or remove stuck pulley | Have on hand if dryer makes metallic noise linked to belt/pulley |
Start by listening to the dryer when it’s empty or lightly loaded. Pay attention to when noises happen: right at the beginning, during a steady spin, or when changing directions. Understanding these sounds early on helps pinpoint problems and guides your inspection.
While the dryer is on, note the sounds it makes. Is it a metallic scrape, a clank, or maybe a soft rattle? Check if the sound varies with how full the dryer is or the cycle speed. Use a tube to focus on sounds from different parts and a block of wood to check if pressing changes the noise.
Record the sound’s timing, pitch, and when it happens. A consistent scrape that follows the drum’s rotation could mean an issue with the drum glides or baffles. Sporadic clattering might point to something loose, like fasteners or parts of the blower. Good notes make fixing a noisy dryer easier.
First, make sure the dryer is off. For electric models, unplug them or turn off the breaker. For gas models, shut off the gas and then unplug. Always confirm the power is off before you start working on it.
Refer to the manual to remove panels properly. Start by taking out the lint trap, then unscrew the top panel, and finally remove the front or back access panel. If the front comes off, disconnect the door switch carefully.
Organize screws and parts in a labeled tray. Taking pictures as you disassemble can make reassembly easier. This careful approach prevents future noises caused by loose parts.
Look at the belt for signs of wear like cracks, glazing, or fraying. Make sure it loops correctly around the pulleys. A misaligned or worn belt can cause unusual sounds and damage parts quicker.
Turn the idler pulley by hand to feel for roughness or listen for noises. Check for any signs of damage like wobbles or cracks. A failing idler can lead to steady noises as the drum rotates.
Inspect the drum rollers for damage or wear. Spin them to listen for any grinding. Old rollers often make a metallic scraping sound as the drum moves against other metal components.
Look at the front drum glides and seals for wear. These parts wearing out can lead to metal rubbing against metal, a typical issue during noise troubleshooting.
Next, check the blower wheel and motor mount. Ensure the wheel is tight and clear from the housing. A loose motor can cause vibration and noise.
Finish by securing all fasteners and checking the internal parts. Loose pieces can cause loud noises as they get hit during operation. Refer to your notes for the next steps in fixing the noise after identifying problematic parts.
A noisy dryer can be a huge nuisance. Use this guide to find and fix the noise quickly. First, do some easy checks. Then, if needed, move on to more complex solutions. Doing this helps avoid unnecessary costs on parts or service.
Start by removing any objects from the drum, lint trap, and blower housing. Things like coins or pins can make your dryer sound loud.
Next, check for loose parts. Tighten any loose screws on drum baffles and other parts. Adding thread locker helps prevent screws from loosening again.
Check the belt and idler pulley next. If these parts are worn, they can cause loud banging noises. It’s often best to replace both parts at the same time.
Worn drum rollers can also be the culprits. They lead to a rumbling sound. Replace them and clean their shafts to fix the issue.
If your drum is scraping against metal, it may be misaligned. Realign it and replace any worn seals to stop the noise.
Use lubricants only where you should. Never oil up sealed bearings. But, you can oil serviceable bearings with high-temp oil, if the manufacturer allows it.
For electrical or gas issues, get a pro involved right away. Working with wiring or gas by yourself is dangerous.
Grinding or burning smells from the motor are bad signs. These problems might mean you need a new motor, which requires a pro’s help.
If you’ve tried everything and the noise won’t stop, a technician can help. They have the tools and knowledge to fix even tricky problems.
Lastly, always check your warranty before doing any repairs. If you have a brand like Whirlpool or Samsung, their service center might save your warranty and fix gas problems safely.
Keeping a dryer quiet and efficient is simple with regular tasks. Doing small tasks often prevents problems from growing into big, noisy repairs. Here are steps to keep your machine running smoothly and to tackle noise when it happens.
After every load, clean the lint screen. Fabric softener build-up can block airflow. Every few months, wash the screen with soap and water to remove this residue.
At least once a year, clean out the exhaust duct and exterior vent. If you use your dryer a lot, you may need to do this more often. Bad venting can make your dryer hot and wear out parts quickly, leading to noisy problems.
Vacuum inside the cabinet around important parts like the motor, blower, and heating elements. This removes lint that can cause vibration and noise. It also reduces the chance of metallic scraping noises in dryer components.
Every 6–12 months, check the belts, rollers, pulleys, and drum seals. Look for any signs of wear like cracks, frays, or loose parts and replace them to avoid metallic noise.
Make sure to balance your laundry loads and not to overload. This reduces stress on the drum and belt. It also prevents movements that can lead to metallic scraping noises.
Secure zippers, snaps, and buttons before drying. This stops metal parts from catching inside the drum, which can damage it and cause noise.
Pick the right heat and cycle settings for each type of fabric. Using lower heat can prevent moisture build-up. This helps avoid rust on metal parts that can make noise.
Have a pro from a trusted service center, like Whirlpool, Maytag, or Samsung, check your dryer once a year. They can spot wear early and help figure out any strange noises before they turn into big problems.
| Task | Frequency | Why It Helps |
|---|---|---|
| Lint screen cleaning | After every load; wash every 3 months | Improves airflow; reduces heat and strain that cause noisy dryer metal sound |
| Exhaust duct and vent cleaning | Annually or more for heavy use | Prevents overheating and accelerates component wear that leads to metallic scraping in dryer parts |
| Interior vacuuming | Every 6 months | Removes lint near motor and blower to lower vibration and avoid loud metal noises |
| Visual checks of belts, rollers, pulleys | Every 6–12 months | Early detection of wear helps you troubleshoot dryer noise and prevents the dryer from making metallic noise |
| Load balancing and fastening clothes | Every load | Reduces impact stress and prevents objects from causing a noisy dryer metal sound |
| Professional tune-up | Annually | Expert checks catch subtle issues and keep the dryer running smoothly |
This guide tells you when it’s time to replace pulleys, belts, or drums. It also shows where to find quality parts. Follow these tips to fix a noisy dryer and deal with metallic sounds.

Change a belt if it’s cracked, shiny, frayed, or loose. Belts typically last between 5–10 years.
Switch out drum rollers or idler pulleys if they’re noisy or worn. Always replace rollers together or as a full set for uniform wear. This helps avoid future problems.
A drum should only be replaced if it has big dents, cracks, or rust. It’s often cheaper to replace just the damaged part than the whole drum.
If a belt breaks, think about changing the idler pulley and rollers too. Doing this can save you time and prevent future issues with your dryer.
Parts from OEMs like Whirlpool and LG usually work best. You can find parts from RepairClinic or PartSelect, and even big stores, to save money. Always check if the part fits and the warranty before you buy to avoid problems later.
Make sure you use your dryer’s model and serial number to get the exact parts. It helps to compare part numbers with the manufacturer’s diagrams when you can.
Look for durable parts, like metal pulleys with sealed bearings and strong belts. Reading reviews, checking return policies, and avoiding poor-quality parts will prevent dryer issues.
| Part | Signs to Replace | Recommended Source | Quality Indicator |
|---|---|---|---|
| Replacement dryer belt | Cracks, glazing, fraying, loss of tension | OEM (Whirlpool, LG) or RepairClinic | Reinforced material, correct part number |
| Idler pulley | Noisy bearings, excessive play | Manufacturer parts store or PartSelect | Metal pulley, sealed bearing |
| Drum rollers | Flat spots, wobble, loud bearing noise | Authorized service centers or local shops | Replace in matched sets, quality seals |
| Drum | Dents, cracked seams, severe corrosion | OEM or authorized repair center | Exact fit, corrosion-resistant finish |
| Drum glides | Excessive wear, squealing | Appliance parts retailers | Genuine glides, durable composite |
It’s helpful to know about repair costs ahead of time. Here’s a simple guide on the costs of fixing dryers, including parts and labor. This info will help you decide if it’s better to fix or replace a noisy dryer.
Fixing belts is fairly cheap. The part costs $15–$40. Adding labor, the price can go up to $50–$150, depending on the dryer.
Replacing idler pulleys and rollers won’t break the bank either. Each part is $10–$40. If you buy a set, it’s about $30–$80. For labor, expect to pay $80–$200, based on your dryer’s design.
The price jumps for drum replacements. Parts are $150–$400. Labor could be $150–$300 or more, due to the need to take the dryer apart.
Motor repairs cost the most. You’ll spend $100–$350 on parts. Labor is another $150–$400. This repair is at the high end of the price range.
Most repair shops also charge for a service call, usually $75–$150. This fee might count towards the total repair cost.
The type of dryer affects the cost. Front-loaders and high-end models tend to be more expensive to fix. This is because their parts and repairs take longer than older models.
The brand is important too. OEM parts for well-known brands or older models can be costly. This can also make repairs take longer, increasing the cost.
Labor costs differ across the country. City technicians often charge more than those in rural areas. How easy it is to get to your dryer also affects the cost.
How bad the damage is also plays a role. Fixing a simple issue is cheaper than fixing something that caused more damage. The more things that need fixing, the higher the cost.
A warranty can save you money. If your dryer is still under warranty, it might cover the parts and labor. This can reduce your expenses.
| Repair Type | Parts | Labor | Typical Total Range |
|---|---|---|---|
| Belt replacement | $15–$40 | $50–$150 | $65–$190 |
| Idler pulley / rollers | $10–$80 (kit) | $80–$200 | $90–$280 |
| Drum replacement | $150–$400 | $150–$300+ | $300–$700+ |
| Motor replacement | $100–$350 | $150–$400 | $250–$750+ |
| Diagnostic / service call | $75–$150 applied to repair | $75–$150 | |
If your dryer makes a metallic noise, the repair cost depends on the issue. It could be from a loose drum, worn rollers, or a failing motor. Use the provided cost ranges to help decide between repair and replacement.
Start by figuring out when the noise happens to speed up diagnosis. A quick diagnosis can also lower labor costs and the overall bill.
If your dryer starts making metallic noises, it may need some parts checked. Note when the noise starts and its type. Metallic scraping sounds suggest issues with rollers or glides. Clanging could mean something is loose or trapped.
Before checking for noise causes, always turn off and open the dryer safely. Check the belt, idler pulley, drum rollers, drum glides, blower wheel, and fasteners.
Do yearly maintenance to avoid future issues: clean the lint trap after every use, vacuum vents yearly, inspect parts every 6–12 months, and replace anything worn out. Quick fixes include removing trapped items and tightening screws. Replace old belts or rollers early to save time and money later.
Acting quickly can save on repairs, reduce downtime, and lower safety risks. If you smell gas or can’t fix it yourself, call a professional. They’ll handle gas connections or motor issues safely.
Regular maintenance keeps your dryer quiet and efficient. It saves energy and extends the appliance’s lifespan. With routine care, your dryer will stay quiet and efficient for many years.