Our Location
1250 Beacon Street
Brookline, MA 02446
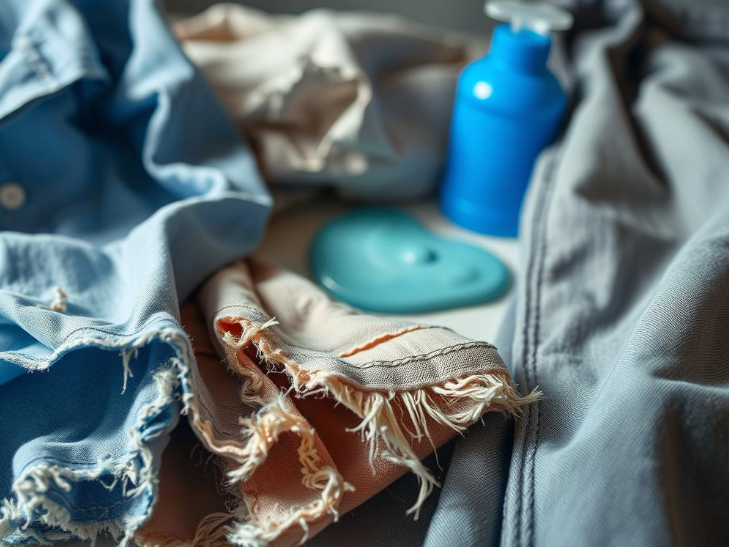
Discover quick fixes for a washing machine leaking water, including hose, pump, and clamp inspections, in just 15 minutes. Tackle leaks today!
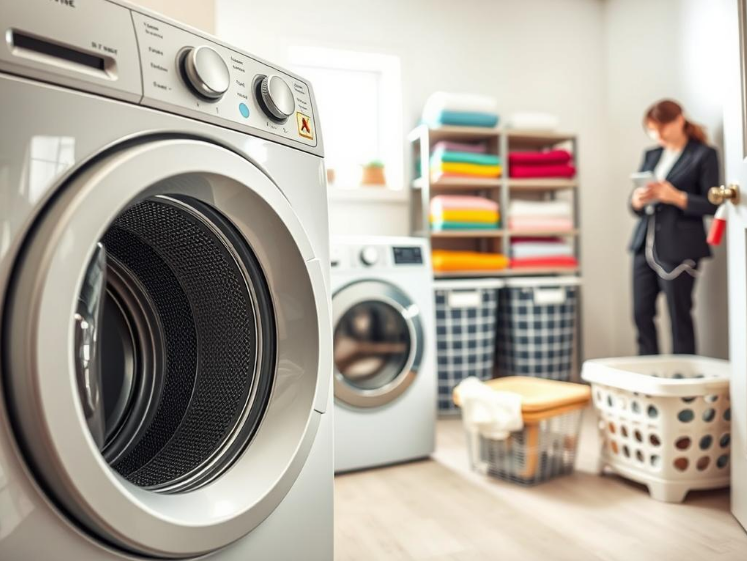
About 20% of homeowners will face a leaking washing machine at some point. Luckily, most leaks can be fixed quickly, often in less than 15 minutes.
If you’re a homeowner, renter, or a DIY enthusiast in the US wanting to fix a leaky washer fast, this guide is for you. It shows you how to quickly reduce water damage. Plus, you’ll learn how to handle simple repairs without needing to call for help.
Before diving in, make sure to cut off the water and power for safety. Then, grab some towels, a bucket, and a flashlight. You’ll often find the problem areas without much trouble — like the water inlet hoses, the drain hose, and the pump near the machine’s bottom.
Many issues are straightforward, like a loose clamp or a hose with a crack. Some brands like Whirlpool, GE, and Samsung even use the same types of hoses. Replacing an old rubber hose with a braided stainless steel one can prevent new leaks. However, some problems might need new parts or a professional’s help.
Keep reading to discover step-by-step ways to find and fix leaks from your washing machine. You’ll learn basic repair steps and know when it’s time to call an expert.
Washing machine leaks can be small drips or large puddles. Finding the source fast is key to keeping floors safe and repairs low. Here are three common causes you can check yourself.
Stuffing too many clothes into a washer, like a Whirlpool or LG, can push water out. Too much laundry causes imbalance and puts strain on hoses and connections.
You might see water splash during fill or spin cycles. Suds might appear around the door, and water can gather under the machine after use. Stick to your washer’s recommended load size to avoid these problems.
Hoses can wear out from constant use and mineral buildup. They might crack, bulge, or become brittle after 5 to 10 years. Leaks usually appear where hoses connect or if there are splits.
Switching to braided stainless-steel hoses can make leaks less likely. Still, check hoses often. Tighten them if they seem moist at the ends.
The drain pump gets rid of water. It can leak if seals wear out, housings crack, or objects block the flow. This might cause a gurgling sound or issues with draining.
Bosch, Maytag, and GE make common pump replacements. To fix a pump leak, start by clearing any blockages. Then look for damage to seals or the housing itself.
| Cause | Common Signs | Quick Action |
|---|---|---|
| Overloaded drum | Splashing, suds at door, uneven spinning | Reduce load to recommended size; rerun balanced load |
| Worn inlet or drain hoses | Wet connections, visible cracks, bulges | Inspect and replace hoses; use braided stainless-steel |
| Faulty drain pump | Water from bottom, gurgling, no drain | Clear debris; test pump; replace if seals or housing fail |
Start by turning off the water and power to the washer. This prevents shocks and further damage. Keep towels, a bucket, and gloves nearby. These steps help in safely fixing a washing machine water leak quickly.
Gently pull the washer out to look at the hoses, clamps, and pump. Search for puddles, rust, or white spots that show leaks. Shine a light on fittings and the washer’s bottom. Spotting these signs helps you figure out how to fix the leak.
Next, check all the connections by hand. Feel for any loose inlet hose nuts and drain hose couplings. Use pliers gently to tighten them without damaging the threads. Look at all clamps for wear or rust. Check the door seal of front-load washers for any damage or soap residue that could cause leaks.
If the leak stops after tightening and cleaning, do a quick rinse to make sure. If it still leaks, write down what you found and think about getting expert help. These actions can fix many common leak problems in washing machines.
Start by finding the inlet and drain hoses to check their condition. This can show if leaks are due to an old inlet hose or a drain connection that’s not tight. Doing this first can save time in fixing any leak issues safely.
Inlet hoses are located at the washer’s top rear and connect to hot and cold water with 3/4-inch fittings. The drain hose, which is larger, goes from the pump to either a standpipe or utility sink. Depending on the washer, the placement of these hoses can vary, and some portable models have shorter connections.
Check for damage like cracks, splits, or blisters, and any signs of bulging or mineral crusts at the connections. Stains from oil or grease suggest there have been leaks. If a hose feels brittle or has soft areas, it should be replaced. Remember, rubber hoses last about five years, but braided stainless hoses have a longer life span.
Make sure hoses are straight and not kinked. They should have some slack, allowing the washer some movement during spinning. Use strong stainless-steel clamps for secure connections at the pump and standpipe. Set the drain hose height as per the manual, typically between 18 and 30 inches, to avoid issues.
To reattach inlet hoses, start by tightening fittings by hand. Then, use pliers for an extra quarter to half turn, but don’t overtighten. If you still find leaks at the washer’s bottom, it might be from the pump or a clamp. Correctly checking the hoses is the first step in tackling leak problems.
| Check | What to Look For | Action |
|---|---|---|
| Inlet hoses | Cracks, brittleness, loose 3/4-inch fittings | Replace rubber every 5 years; hand-tighten then 1/4–1/2 turn with pliers |
| Drain hose | Corrugation damage, poor clamp, incorrect height | Ensure 18–30 inch height for standpipe; secure with stainless clamp |
| Clamps | Corrosion, loose bite, worn OEM parts | Swap for stainless-steel worm-drive clamps for long-term seal |
| Physical test | Soft spots, bulges, mineral buildup at ends | Squeeze and flex hoses; replace if any weakness found |
The drain pump moves water from the tub to the drain hose during the drain and spin cycles. It prevents clothes from staying in soapy water. It also stops water from gathering under the machine. If the pump has issues, it might be why people look for washing machine leak repair.
The pump is an electric device attached to the motor or placed on the washer’s base. It uses an impeller or diaphragm to push water out when the motor runs. Seals and gaskets are there to prevent leaks. But small items or debris can block the impeller. Impacts can also crack the housing or damage the seals.
If you see water under the washer or drip marks, the pump might be failing. The washer not draining well is another sign. Hearing strange sounds like grinding or rattling during the drain cycle means there might be wear inside. Cracks or dampness around the pump area can indicate leaks.
First, make sure to turn off the power and water supply. This is for safety. Then, open the front or rear panel to see the pump. You might need to check your owner’s manual to find it. Look for things like coins or lint blocking the inlet or impeller and clear them out.
To check if the pump is working, use a multimeter to test electrical continuity at the motor. Match your findings with the service manual’s specs. If the pump fails the test or the motor isn’t right, you should replace it with the suggested part from the maker.
| Check | What to look for | Quick action |
|---|---|---|
| Visual inspection | Cracks, wet seals, pooled water under machine | Dry area, tighten clamps, note leak location |
| Obstructions | Coins, lint, small garments in impeller or inlet | Remove debris, spin drum by hand to test free movement |
| Electrical test | No continuity or out-of-range ohms | Replace pump with OEM part |
| Operational test | Weird noises during drain cycle | Clear debris, retest using diagnostic cycle |
Poor installation starts with minor drips and then escalates. An uneven washer can cause vibrations. It shifts hoses and might rub against sharp objects. This all makes leaks more common and can lead to water spilling during use.
Place a spirit level on the washer to ensure it’s flat. Washers from big brands like LG and Samsung have feet you can adjust. Twist the feet until the washer is level, then lock them in place. For front-load models, level them well to stop leaks around the door.
Keep the drain hose at the right height to prevent issues. Avoid pushing the hose too far into the standpipe. If water gets trapped, it might spill. Check your home drain to avoid backflows that can cause leaks.
Look at the manual for the right specs and hose types. Big brands’ manuals guide you to keep warranties safe. They prevent leaks and explain when to call a technician.
Small leaks often start at the point where a hose connects to a machine. It’s wise to check the clamps and connectors if you find your washing machine leaking. Promptly inspecting these can help fix a leak fast and prevent a small drip from becoming a big problem.
Worm-drive clamps work by tightening a screw, which brings a band snug around the hose. These clamps are found on both inlet and drain hoses. Spring clamps are easy to snap on for a quick fix and are often used on original equipment. Oetiker-style crimp clamps create a strong seal, often seen on corrugated drain hoses.
Rust on a clamp or stripped screw heads are obvious signs of trouble. Beware of loose bands that can’t compress the hose anymore. Also, corrosion where metal meets plastic might slow leaks leading to damage.
Check plastic connectors for any cracks or changes in shape. These issues can prevent a good seal, causing leaks during heavy use.
Always turn off the water and power before starting. Drain any left water into a bucket before you remove the clamps. Choosing stainless-steel worm-drive clamps as replacements can extend their lifespan. Make sure to position the clamp on the hose correctly and tighten it just right to avoid damage.
When dealing with crimp-style clamps, it’s crucial to use the right tool. If you can’t service the clamp, you might need to replace the hose section. Taking care in this step can save you from future repair headaches.
| Clamp Type | Best For | Pros | Cons |
|---|---|---|---|
| Worm-drive (screw) | Inlet and drain hoses on most residential washers | Adjustable, strong seal, available in stainless steel | Can strip screw head; may corrode if low quality |
| Spring clamp | Quick service OEM connections | Fast to install and remove, no tools for basic operation | Less adjustable, can lose tension over time |
| Oetiker-style crimp | Corrugated drain hoses and permanent joins | Very secure, tamper-resistant, low leak risk | Requires crimp tool or replacement of clamp/hose |
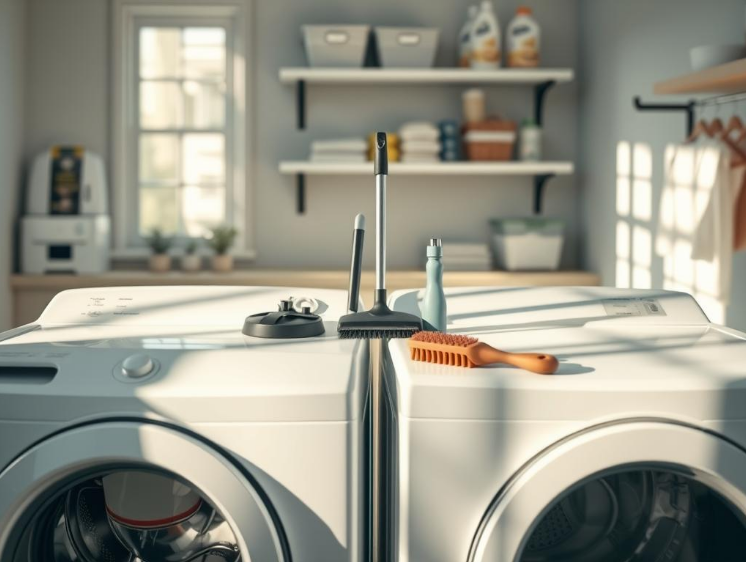
Small, regular actions keep your washer in good shape and prevent expensive water damage. Doing a quick check every month and following a few cleaning tips can stop leaks early. This way, you solve problems before they get big.
Regular inspection tips
Every month, examine the hoses for any cracks, bulges, or signs of mineral deposits. After using a front-load washer, wipe the door seals and leave the door slightly open. This helps dry the gasket. Look around and under the machine for wet spots that could mean there’s a leak you can’t see.
Cleaning the washer’s filter
Find and clean the pump filter or trap on your washer every three to six months. Before opening the filter cover, put down a towel and a shallow pan to catch any water. A blocked filter can slow down drainage and put extra pressure on the pump, making it harder to fix leaks if you don’t handle it.
Maintaining hoses and pumps
It’s best to replace rubber hoses every five years, or earlier if they look worn out. You might want to use braided stainless-steel hoses since they last longer and are less likely to burst. Do a maintenance wash with hot water and cleaner or white vinegar every month. This gets rid of leftovers that could damage seals and pumps.
Make sure the area behind your washer is clean and doesn’t have dust or lint. Debris can cause rust and block the air flow in pumps. Following these easy tips can keep your washer from leaking and make its parts last longer.
If you can’t fix leaks by checking hoses, clamps, and the pump, it’s time for a pro. Trying small repairs like tightening connections and replacing clamps might help. But, if leaks persist or water comes from inside, call for professional help.

If water keeps dripping after you’ve tried to fix it, there might be bigger issues. Leaks from inside or a cracked part mean you’ll need special parts most folks don’t have.
Electrical issues, burning smells, or weird noises mean it might be a motor problem. If your washer is still under warranty, call the brand before you try fixing it yourself.
A technician will start by figuring out what’s wrong based on your washer’s model. They’ll check various parts with the right tools.
They will inspect your washer and then give you a cost estimate. They might fix minor issues right then. For bigger problems, they’ll need to order parts and come back. Good technicians warranty their parts and tell you if repairs are urgent.
Diagnosis fees in the U.S. usually range from $75 to $150. The cost goes up with parts and labor. Hoses might cost $15–$50, pumps $50–$200, and valves $40–$120.
Always get a few quotes and check the repair person’s reputation. A good estimate will help you decide if fixing the leak is worth it.
When you notice water leaking from your washing machine, act quickly. This will help prevent floor damage and avoid bigger issues. Use these immediate steps to manage the mess while you plan for a permanent fix.
Put absorbent towels or pads under the leak. This will soak up water and protect your floors. Please use a shallow bucket to catch drips near the machine’s base, and empty it regularly to avoid overflow.
Lift the washer only enough to access the leak’s source. Be careful not to tip the machine too much. Doing so can stress and damage hoses and clamps, making the leak worse.
If the carpet is wet, you should lift the flooring or remove the trim to dry the area. Speedy drying helps prevent mold and saves on costly repairs.
Shut the washer’s inlet valves if you see a steady stream or a big puddle. In cases of severe leaks, turn off the home’s main water supply. This should be done until repair can be made.
For leaks that come and go, keep the valves closed when not using the washer. Only open them when you need to run a cycle. This can help prevent leaks as you wait for a permanent solution.
Adding an emergency shutoff or quick-connect valve to your inlet line is a good idea. It helps isolate leaks quickly in the future.
Small pinhole leaks in rubber hoses might be fixed for a short time with heavy rubber bands or self-fusing silicone tape. Wrap it tight and test the machine with short cycles, watching for new leaks.
Think of this as a temporary solution. Changes in pressure during spins may cause such repairs to fail. So, plan to replace the hose soon to fully fix the leak.
Keep an eye on the patched area during the next few laundry sessions. Schedule a permanent hose replacement if you notice more leaking.
| Quick Fix | Best Use | Limitations |
|---|---|---|
| Absorbent towels and buckets | Small drips and floor protection | Requires frequent emptying and drying |
| Shutoff inlet valves or main water | Severe or steady leaks | Interrupts washer use until repaired |
| Rubber bands or silicone tape | Temporary stop for pinhole leaks | Not reliable long-term; can fail under pressure |
| Emergency quick-connect valve | Fast isolation for future leaks | Requires installation by homeowner or plumber |
Picking the right detergent can lower the chance of your washing machine leaking. Suds, buildup, and using the wrong type can harm seals and clog pumps. Making a few smart changes can stop constant messes and cut down on repair needs.
Too many suds can spill over the seals and door boots of front-load washers, leading to leaks. Using too much non-HE detergent or using it too often can cause residue to form on gaskets and inside hoses. This residue increases wear and results in slow leaks. Machines designed for high efficiency work best with low-sudsing detergents. This helps the pump and drainage system to function correctly.
Choose detergents labeled HE for both front-load and high-efficiency top-load machines. Options like Tide HE, Gain HE, and Seventh Generation HE are good choices. Stick to the recommended amount for small or lightly dirty loads. If you live in an area with hard water, choose detergents made for that kind of water. This can prevent residue that makes leaks more likely.
Using too much detergent leads to suds that last too long. This makes the machine add extra rinse cycles and puts strain on the pump. The added stress can cause leaks. Detergent that builds up in hoses, seals, and filters can make leaks more likely. It can also shorten the life of these parts.
To keep residue from building up, run deep-clean cycles now and then. Or, use a cleaner made for HE machines. This can help your washer stay leak-free and save money on fixes in the long run.
| Issue | Cause | Practical Fix |
|---|---|---|
| Overflowing suds | Too much detergent or non-HE product in an HE washer | Switch to HE detergent; measure dose per load; run an extra rinse |
| Seal degradation | Residue buildup from improper detergent | Use cleaners for gaskets; reduce detergent amount; inspect seals |
| Clogged pump/filter | Soap scum and lint trapped in pump area | Clean pump filter regularly; schedule deep-clean cycles |
| Frequent minor leaks | Long-term buildup and strained pump | Adopt low-sudsing detergents; maintain hoses; follow dosing |
Checking the water inlet can stop a small drip from turning into a big issue. When you see water around your washing machine, look at the inlet first. Doing this early can save you time and keep you from having to fix leaks later.
Ignoring problems with the inlet can lead to damage. Water from the washing machine can ruin floors and walls. Leaks often begin at the shutoff valve or hose connection. Things like rust, mineral deposits, or damaged rubber gaskets are common causes at the inlet.
Bad inlet valves might let water drip inside the machine even when it’s off. Connections that aren’t tight at the shutoff valve can leak slowly. This is easy to miss. Rusty supply lines can also break at the connection, causing leaks that don’t stop.
If your home’s water pressure is too high, it can hurt hoses and fittings. Pressure above 80 psi can make hoses break. Also, stuff like sediment in your water can block inlet screens. This stops them from sealing properly, leading to constant dripping.
First, look closely at hoses, valves, and connections. Search for signs of rust, mineral build-up, or wet spots. Small wear signs can point to bigger issues down the line.
Shut off the water, then take the hose off to check the valve screen for debris. Use a brush to clean the screen. Then, rinse off any sediment. Check the hose’s threads for damage and look for any cracks at the washer’s inlet.
Use braided stainless-steel hoses instead of old ones for more strength. Adding new rubber washers at hose ends can stop leaks. Tighten the connections properly to avoid damaging them.
Put in a water-pressure regulator if your home’s pressure is too high. If there’s an internal leak in the inlet valve, get a new one made for your washer’s brand. You can find parts for brands like Whirlpool or Samsung. Or, call a pro for help.
| Issue | Quick Check | Fast Fix |
|---|---|---|
| Drip at shutoff valve | Feel for dampness after a wash cycle | Tighten connection and replace rubber washer |
| Clogged inlet screen | Disconnect hose and inspect screen | Clean screen with a brush; reattach hose |
| Corroded supply line | Look for rust or bulges near fittings | Replace with stainless-steel braided hose |
| High water pressure | Measure pressure with a gauge | Install pressure regulator or reducer |
| Internal inlet valve leak | Washer fills slowly or constant drip | Replace valve or call a technician for washing machine leak repair |
When you notice your washer leaking, start recording details right away. Write down the date, time, and cycle it was on—like fill, wash, or spin. Note any water spills, error messages, or if you’ve recently changed something like the hose or detergent. Keeping a detailed record helps spot trends and simplifies fixing leaks.
Take pictures and videos of leaks, damp floors, hoses, and the pump area. These visuals can reveal if leaks happen randomly and help experts quickly see if the issue is with the inlet, hose, pump, or door seal. A detailed log can speed up the diagnosis, shorten repair visits, and might even reduce repair costs.
When you call a repair service, have your washer’s brand, model, and serial number ready. This info is usually on the door or back. Tell them about any parts you’ve replaced or maintenance done. Share your log, any error codes, and the photos you’ve taken. Let them know if the washer is in a tight spot or if it’s still under warranty.
Always provide clear contact details and when you’re available for a visit. Ask for estimates and if parts have warranties. An organized file on your washer’s issues makes troubleshooting, getting repair quotes, and solving problems quicker and easier.