Our Location
1250 Beacon Street
Brookline, MA 02446
Experiencing a washer filling and draining itself? Learn how to troubleshoot the check valve and pressure switch to fix the issue.
A faulty valve or sensor can cause your washer to fill and drain by itself. This can waste hundreds of gallons of water yearly and mess up your laundry.
If your washer fills and drains without you asking, you’re not the only one. Brands like Whirlpool and Samsung have machines that might start acting up. That’s because of their automatic water cycle, which uses special valves and sensors.
For those confused about why this happens, this article is for you. It’ll explain the role of the check valve and pressure switch, among others. We’ll show you how to figure out what’s wrong, try fixing it yourself, and when to call the pros.
Keep reading to learn how to spot common issues and fix them. Plus, find out about maintenance, how much repairs might cost, and how to stay safe while doing this.
Modern washers combine mechanical components and smart technology to control water cycles. This knowledge is key to quickly finding and fixing problems.
The cycle begins with the machine sensing the load. Brands like Samsung and Whirlpool use sensors to determine the right amount of water and spin speed.
Then, hot and cold water flow in through the inlet valves. The machine fills up, pauses, and a sensor checks if the water is at the right level.
Detergent is added, and the machine starts moving the clothes for cleaning. After washing, the water is pumped out.
The next step is spinning to get rid of excess water. Finally, one last drain ensures the tub is empty. The machine’s timers and control board make sure everything happens in the right order.
Water inlet valves, which are controlled electronically, regulate the hot and cold water. A common problem is when they malfunction, leading to filling issues.
A pressure switch or sensor is attached to the machine. It measures how much water is in the tub and tells the machine when to stop filling.
To prevent water from going the wrong way, a check valve or anti-siphon device is used. It ensures the water level stays constant during the wash.
The drain pump and hoses play a role in removing the water. The control board or a timer manages when this happens. For extra safety, front-loaders have a door lock that must be secure before spinning begins.
| Component | Role in Cycle | Common Fault |
|---|---|---|
| Water inlet valves | Admit hot and cold water during fill | Sticks open or fails to open, causing overfill or no fill |
| Pressure switch / sensor | Senses water level and signals control board | Clogged hose or faulty sensor yields wrong level detection |
| Check valve / anti-siphon | Prevents drain water from returning to tub | Worn or stuck part allows backflow, affecting fill level |
| Drain pump & hoses | Evacuate water during drain and spin | Blockages or pump failure cause standing water |
| Control board / timer | Coordinates fill, wash, drain, and spin stages | Faulty relays or software issues disrupt cycle order |
| Door/lid lock | Ensures safety before agitation and spin | Failure prevents cycle progression or interrupts spin |
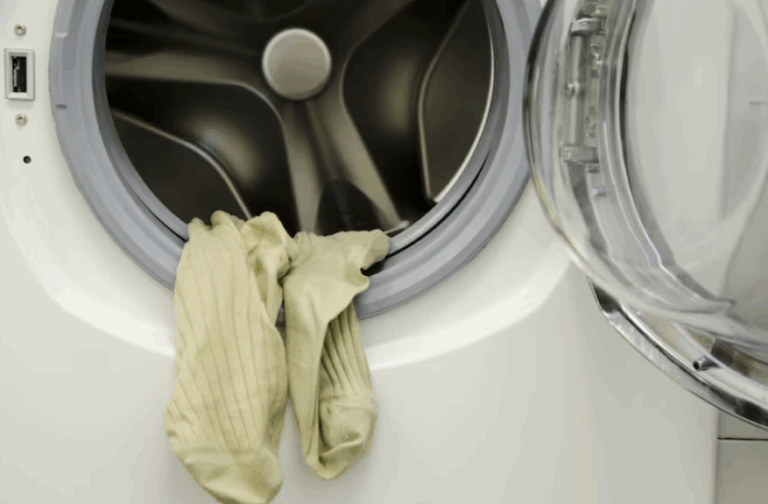
Seeing your washer fill and drain on its own is a red flag. It might do this as a slow drip or keep filling past the end of a cycle. These signs can indicate a serious issue.
A slow drip often means a leaky inlet valve. If the washer keeps filling, there might be a stuck valve or an issue with the electronics. An easy sign of trouble is when the water level inside the drum is too high. Listen for strange sounds like clicks or hums from the water inlet.
If your washer starts filling without you picking a cycle, pay attention. Also, if it fills then stops repeatedly after the cycle, that’s not normal. Any odd noises or water leaking when the machine is off are key signs.
A slow leak could be from wear or debris. But non-stop filling usually means a valve or electronics issue. That’s bad news.
Does your washer seem to drain all the time? Or does it switch between draining and filling too much? These are signs of a problem. If clothes are still wet after spinning or water vanishes mid-cycle, the drain might be blocked.
Slow draining water could mean a bad valve or a squished hose. If your washer won’t fill up, check the pressure hose for clogs. Sometimes, washers give codes like F7, IE, or LD for drain issues.
A working check valve ensures water flows correctly in your washer. It’s placed in the drain hose or pump area to prevent dirty water from going back into the tub. Many new washers have this built in, helping stop water from flowing the wrong way.
A check valve is a special one-way valve. It can be made of rubber or plastic. Depending on the washer, it sits inside the pump or near it. It opens for water to exit when the pump works, and shuts when the pump stops. This keeps the machine draining correctly and stops water from being pulled back in.
If the valve breaks or doesn’t close, water can move backwards into your machine. Your washer might fill up by itself and drain when it’s not supposed to. Things like debris or damaged seals often cause this problem.
To check if the valve is good, unhook the drain hose after washing. If water goes back into the tub, the valve might be the problem. Look at the pump’s entrance and exit for any valve or blockage. A wrongly installed valve or one that’s too low can also look like a broken valve problem.
The pressure switch is crucial in controlling water in many washers. It detects air pressure through a hose as the tub fills. It then signals the control board to stop filling. This part ensures an automatic washer maintains correct water levels, preventing over or under filling.
A mechanical pressure switch is linked to the tub via an air hose. As water rises, it compresses air in the hose. This pressure change prompts the switch to either stop or start the water flow.
Old washers use this mechanism. New ones might have electronic sensors or software for regulation. The washer’s auto-fill relies on these precise pressure signals. If the hose or switch wears out, it sends incorrect information to the board. A good pressure switch ensures balanced water use and efficient wash cycles.
If the pressure switch or hose has issues, a washer might overfill or not stop draining. You may notice the machine keeps trying to fill. Other symptoms include early draining due to false full signals from the switch.
Intermittent problems cause unpredictable washes. Look out for varying water levels, sudden stops, or continuous fill-and-drain actions. These could mean a faulty switch. Similar symptoms may result from sensor or board failures, so testing is crucial.
To diagnose, start with simple tests. Turn off power and squeeze the pressure hose to check for a click from the switch. Using a multimeter to test continuity in the switch contacts under pressure can confirm if it’s working. Always refer to the manual for the correct pressure settings and testing procedures.
| Symptom | Likely Cause | Quick Check |
|---|---|---|
| Continuous filling | Clogged or stuck pressure switch, blocked hose | Power off, squeeze hose to listen for switch click |
| Early draining | Switch falsely senses full; hose leak or pinch | Inspect hose for kinks and secure connections |
| Erratic water levels | Intermittent switch fault or control board issue | Run multiple cycles and note pattern; use multimeter |
| No fill despite command | Open switch contacts or failed valve | Check continuity on switch and voltage at fill valve |
| Normal operation after tapping | Loose internal contact in switch | Replace switch to restore reliable self-regulating washer behavior |
Begin fixing your washer by ensuring safety and having a plan. First, disconnect the power and turn off the water. Record any weird symptoms, error codes, and cycle issues. This will help you troubleshoot methodically.
1. Make sure the power and water are off. This is key to avoid electrical shocks and water spills.
2. Write down anything unusual, like the washer filling or draining on its own. This makes it easier to figure out the problem.
3. Check the water hoses and valves for leaks or drips. If a valve is stuck, the washer might fill up by mistake.
4. If your washer has a diagnostic mode, run it. Check your manual to learn how. This can help identify issues with valves, pumps, and sensors.
5. Look at the drain hose and its height. It should be between 36 and 96 inches up, as per the manufacturer’s guidance. Avoid kinks or placing it too low, which can cause siphoning.
6. To test for siphoning, watch the tub after draining. If water comes back in, there might be a problem with the drain setup or the check valve.
7. Check the pressure hose for any blockage or damage. Cracks or water inside can give incorrect readings.
8. During a drain cycle, listen to the drain pump. It should run smoothly and empty the water fast.
9. Use a multimeter to check the electrical parts like the pressure switch and inlet valve. This is where many issues are found.
10. If anything seems wrong, replace parts like valves or switches. Then, test the washer again to make sure it works right.
Follow these steps carefully to avoid finding the wrong problem. Taking good notes and having the right tools will simplify fixing issues like the washer filling or draining by itself. This careful process helps avoid unnecessary repairs and makes fixing your washer more successful.
Keeping a washer in good shape prevents costly repairs. Follow simple habits to keep it running smoothly. These habits protect sensors and keep the self-draining system working well.
Every month, run a hot water cleaning cycle. Use white vinegar or a cleaner approved by the manufacturer. This reduces soap scum and odor, keeping your machine fresh.
After using a front-load machine, wipe the tub and door gasket. This action stops mold and ensures the drum works efficiently.
Remove and clean the pump filter or trap regularly. This prevents items like lint and coins from causing blockages.
Check the pressure hose and elbow for clogs. Blowing air through the hose can remove any residue that affects the pressure switch.
Clean inlet screens where the fill hoses attach. Removing debris helps water valves work correctly, ensuring proper water flow.
Inspect drain hoses for any damage or blockages. Proper hose routing is crucial for the self-draining system’s effectiveness.
Preventative measures to avoid future problems
Adjust the drain height and air gap according to the manufacturer’s specs. Proper setup prevents siphoning and protects the washing machine.
For high-efficiency machines, use HE detergent. Measure it carefully to avoid excess suds, which can confuse sensors.
Keep the door or lid open after washing. This reduces mold and extends the life of seals and gaskets.
Replace rubber hoses with stainless steel braided ones every five to seven years. They’re less likely to burst, reducing water damage risk.
Get your older machine checked by a professional yearly. This ensures it remains in top shape and parts stay compatible.
If your washer keeps acting up after you’ve tried simple fixes, it’s probably time to call in an expert. Fixing a hose or changing a valve is something many people can do. But if you’re seeing complex wiring problems, constant issues with the control board, or burnt parts, you need a professional.
If electrical problems keep happening even after you replace parts, it’s time to get expert help. Front-load washers with damaged bearings or seals require special tools. Also, if fixing it costs as much as a new machine, get a professional’s opinion to save both time and money.
Don’t tackle gas leaks, electrical risks, or major water damage yourself. Also, if your machine won’t stop filling or draining, you need a pro. Always use authorized service for warranty repairs to keep your coverage.
Look for technicians with certifications from big appliance brands or reputable organizations. Check their reviews on Angi, Yelp, and Google. This will help you understand the quality of their work.
Always ask about the cost upfront and the warranty on parts and labor. Make sure they’re familiar with your appliance type. Genuine parts are essential for keeping your washer running right.
A detailed quote helps you feel confident in your choice. It should explain the problem clearly. Picking a technician who guarantees their work means you won’t have to worry about repeated issues.
Start with basic repairs before you make a call to a repair person. Many owners fix minor issues themselves with a little help and the correct tools. Remember, leave mains power and complicated electronics to the experts.
First, inspect the check valve. If it’s clogged, clean and put it back. If it’s worn out, you should replace it.
Next, look at the pressure hose. A hose that’s blocked or twisted can mess up the pressure switch. If needed, replace the hose or the entire pressure switch assembly.
If your auto-fill washer keeps filling up, check the inlet valves. Leaky valves need to be replaced. Follow the service manual for testing.
When your washer drains poorly, check for clogs in the pump, trap, or hoses. Noise or weak flow means you might need a new impeller or motor.
To prevent siphoning, adjust your plumbing. You might need to lift the standpipe, add an anti-siphon loop, or put in an air gap.
Only replace the control board if you’re sure there are no mechanical or wiring issues. Electronics rarely fail, but they can confuse the diagnosis.
Always unplug the washer and stop the water before opening it up. Use a non-contact tester to make sure there’s no power.
Wear safety gear to protect yourself from sharp objects and messes. Have towels and a pan ready for any spills when you disconnect things.
Mark wires and take pictures before taking anything apart. This ensures you can put it back together correctly. Stick to local electric rules for any wiring work.
If you need to tackle wiring or detailed control repairs, call a pro. It’s safer and avoids costly errors.
| Issue | Likely Cause | DIY Step | When to Call a Pro |
|---|---|---|---|
| Fills on its own | Faulty inlet valve or leaking valve seat | Inspect valve, test continuity, replace if leaking | Electrical valve controls fail or soldered PCB faults |
| Continuous draining | Stuck drain or pump, siphoning from low standpipe | Clear pump trap, raise standpipe, add anti-siphon loop | Pump motor noisy, bearings failed, complex plumbing |
| Erratic fill level | Blocked pressure hose or bad pressure switch | Replace hose, test or swap pressure switch | Hard-to-access pressure sensor or board-related faults |
| Poor self-draining | Clogged hoses, worn impeller, damaged trap | Clean hoses, replace impeller or pump as needed | Corroded plumbing or failed tub seal requiring teardown |
Fixing a washer can be a gamble. Minor repairs might be affordable. But major parts or labor can really add up. Here’s a quick guide on what you might expect to pay and why.

Expect to pay $60 to $120 for a service call or diagnosis. Small parts, like check valves, are cheap – $10 to $40. But adding labor can make the cost jump.
Changing a pressure switch or sensor might cost $100 to $300, labor included. Inlet valves can cost up to $300 for a full fix.
Drain pump repairs can range from $150 to $400. Control boards are the most expensive, costing between $300 and $800 or even more. This depends on the brand and part availability.
Where you live affects labor costs. City rates are usually higher than in rural areas. Repair costs also go up for machines that are hard to get to, like stacked or front-loading washers.
The brand makes a difference. Parts for high-end brands like Samsung or LG are pricier. Choosing original parts over aftermarket ones might cost more but can make your washer last longer.
Warranties and service plans can lower what you pay out of pocket. The distance a technician travels and any unexpected repairs can also impact your bill.
| Repair Item | Typical Parts Cost | Estimated Total Repair |
|---|---|---|
| Diagnostic / Service Call | $60–$120 | $60–$120 |
| Check Valve Replacement | $10–$40 | $50–$190 |
| Pressure Switch / Sensor | $20–$150 | $100–$300 |
| Inlet Valve(s) | $30–$100 | $120–$300 |
| Drain Pump | $40–$200 | $150–$400 |
| Control Board | $150–$500+ | $300–$800+ |
Planning ahead for repair costs can prevent any shocks. Knowing the usual costs and what influences them helps you choose between fixing or replacing your machine. Always keep your receipts and ask for estimates to weigh your options carefully.
Short answers to common worries help you act quickly when your washing machine acts up. Below are clear explanations and practical checks for issues like a self-starting washer or poor drainage.
A washer that fills and drains on its own can be due to several issues. A stuck inlet valve or a broken solenoid lets water flow even with the washer off. Water can enter the drum because of a siphon effect from a high drain or plumbing mix-ups.
A faulty pressure switch or a cracked hose might send wrong signals of low water to the control board. This makes the washer fill up. Problems with the electronic control board can also start cycles by themselves.
Quick checks: turn off the water supply to the washer. If the filling stops, check the inlet valve for issues. Observe where the water is coming from—either supply hoses or the drain standpipe. This helps figure out if it’s siphoning or valve leaks.
Putting too much in your washer usually doesn’t cause it to fill on its own. Yet, heavy loads do change how it uses water and spins. Too much weight can make the drum unsteady and slow down drainage.
If your washing machine keeps draining and filling, it might be trying to fix a heavy load. This can look as if the washer is filling up by itself. Overloading also puts extra stress on pumps, bearings, and valves, making them more likely to fail.
Stick to the loading instructions from brands like Whirlpool, Samsung, and LG. Properly loading your washer prevents strain and lowers the chance of overloading causing more problems.
| Problem | Likely Cause | Quick Test |
|---|---|---|
| Washer fills when off | Stuck inlet valve or faulty solenoid | Turn off water supply; if filling stops, replace inlet valve |
| Water appears from drain pipe | Siphoning or backflow from plumbing | Observe drain standpipe while filling cycle runs |
| Repeated drain/fill cycles | Faulty pressure switch or overloaded drum | Reduce load; inspect pressure hose for leaks |
| Pump runs but poor draining | Clogged pump or worn check valve | Clear pump filter; test pump operation during drain |
| Control panel starts cycle randomly | Electronic control board fault | Unplug for 1 minute; if problem returns, consider board diagnostics |
When your washer fills and drains on its own, the issues could be with several parts. These can include the check valve, pressure switch, inlet valve, or problems with how it drains. To figure out what’s wrong, watch what happens, try some easy tests, and maybe use a multimeter. Knowing these parts helps you decide if you can fix it yourself or need a pro.
Keeping your washer in good shape can stop these issues before they start. Make sure to clean the pump filters, check the pressure hoses, and set up the drain right. This will help your washer run right without needing to fix it. If something does go wrong, some people can fix minor issues themselves. Yet, for big problems with the wiring or mechanics, it’s better to call in experts from companies like Whirlpool, GE, or Samsung.
Think about the costs of parts and the help from a pro versus how old your washer is and if it’s under warranty. Cleaning the tub every month, looking at the hoses now and then, and acting fast if it fills or drains weirdly can prevent water damage and save you money. Being careful with your washer and knowing what to do when something goes wrong can often fix it. This way, it will last longer and work well.