Our Location
1250 Beacon Street
Brookline, MA 02446
Discover the essentials of cleaning split AC at home with our step-by-step guide to disassembling and sanitizing your unit safely and effectively.
A typical indoor split unit can lose up to 15% efficiency in one season. This happens if filters and coils are clogged.
This short guide explains how to clean your split AC at home. It covers basic disassembly of indoor and outdoor parts. It also talks about safely sanitizing evaporator and condenser coils. Plus, how to clean or replace filters and clear drains.
Before you start, always turn off power at the circuit breaker. Do this for both the indoor and outdoor units. Unplug or isolate the outdoor unit if needed to avoid shocks or motor damage.
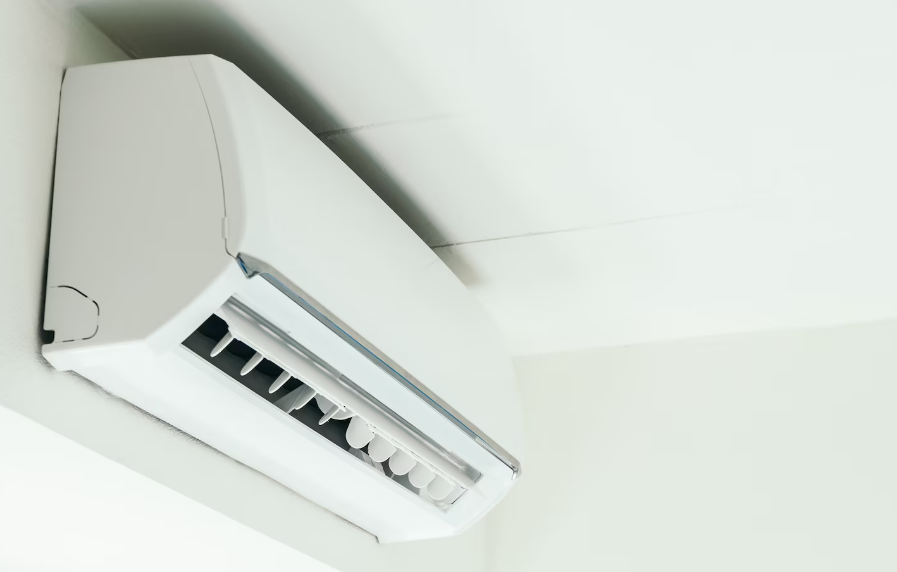
You’ll be dealing with parts like the indoor evaporator unit. This includes the front panel, air filters, evaporator coil, fan, and drain pan. For the outdoor condenser, you’ll touch the compressor, condenser coil, fan, and fins. Plus, the refrigerant lines that connect them. We’ll focus on tasks you can do safely. You’ll use simple tools like a vacuum with a brush attachment, soft brush, and mild detergent. Also, a no-rinse evaporator spray, fin comb, garden hose on light spray, and basic hand tools.
Always follow the manufacturer’s guidance in your owner’s manual. Stop if you see exposed refrigerant lines or complex wiring. Also, if you find bent fins that need replacing, or persistent mold and odors. In these situations, call a licensed HVAC technician.
Cleaning your split AC does more than just make a room smell better. It gets rid of dust, pollen, and mold from filters and coils. This makes the air healthier to breathe and cuts down on bad smells. By taking care of it regularly, you can avoid big problems.
Looking after your AC regularly helps prevent it from suddenly breaking down. It means less dirt and fewer allergens get trapped. So, people with allergies find it easier to breathe. Plus, you won’t have to call for repairs as often, making your home more comfortable.
If your AC is dirty, it has to work harder. But if you keep it clean, it works like it’s supposed to, and you save energy. The U.S. Department of Energy says taking care of your AC can help cut down your bills.
Regular cleaning and fixing small issues mean less wear and tear on important parts. If you clean your AC yourself twice a year and get a pro to check it once, it will last longer. This approach helps avoid expensive replacements.
Before you start cleaning your AC, collect the necessary tools. Making a short checklist will save you time. Choose items that are suitable for the task to protect the AC and yourself.
Begin with soft cloths and microfiber rags to clean surfaces gently. Use a gentle detergent or soapy water in a spray for dirt. For the coils, choose a no-rinse cleaner that’s safe for home use.
To fight mold, have an antifungal or antibacterial spray ready. Clean the condensate pan and coils with a garden hose or a flush kit. A cleaning bag or a large trash bag can catch the water while you wash the indoor unit.
Wear safety gloves to safeguard your hands from sharp parts and chemicals. Safety goggles are essential to keep your eyes safe. A dust mask or N95 respirator is needed if there’s a lot of dust or mold. Always wear closed-toe shoes to protect your feet, especially when using ladders.
A vacuum with a brush attachment can quickly remove dust. Use a soft-bristle brush for delicate areas. A fin comb can straighten bent fins, improving airflow.
For tough dust, think about using a canister air blower. A screwdriver, a wrench set for removing grills, and a wire for clogs are useful. A garden sprayer is handy for applying cleaning solutions outside. These tools enhance your cleaning efficiency.
Stay away from pressure washers as they can damage the AC. Avoid strong acids or pure bleach on coils to prevent damage. A DIY AC cleaning kit might be a good, all-in-one solution.
You can find most cleaning items at stores like Home Depot or Lowe’s, or online. Search for “aircon cleaning bag” or AC cleaning supply combos. A basic kit usually has what you need for home AC maintenance.
Before you begin, take time to plan a safe DIY AC cleaning. Turn off all power and make room around both indoor and outdoor units. Have your tools and cleaners close by to work carefully and without hurry.
Always switch off the AC’s power at the breaker. Or, use the outdoor disconnect before you touch the unit. Make sure it’s completely off by checking there’s no sound or airflow. Don’t spray water near electrical parts and never try to fix refrigerant lines or the compressor yourself. A professional HVAC technician should do those jobs.
Wear gloves, eye protection, and a dust mask when handling filters or using sprays. Some chemical cleaners and antifungal sprays can harm your skin and lungs. Always read the labels and use products safely, making sure the area is well-ventilated.
To prevent water damage from AC cleaning, catch drips using a drip bag or large trash bag. Open the drip tray’s drain plug and direct water into the bag. Let the drain lines air dry for at least an hour before turning the power back on.
Be gentle with fins and coils since bent fins can lower the unit’s performance. A fin comb might be needed to fix any bends. Avoid using a pressure washer on coils. If you come across damaged wiring, leaks, serious mold, or confusing instructions, stop. Call a pro. Following these tips for cleaning your split AC at home keeps you and your system safe.
Before you start, make sure everything is safe. Turn off the power to both the indoor and outdoor AC units. Lay something heavy, like a trash bag, under the indoor unit to catch any drips. And don’t forget to check your owner’s manual. It will tell you where all the screws and latches are.
It’s smart to keep all the small parts in order. Snap pictures with your phone as you take things apart. Doing this makes it much easier to put everything back together the right way. You won’t get mixed up or leave anything out.
Find the latches or screws on the front edge of the indoor unit. Open them carefully. Many panels swing up and hook onto clips. Hold the panel while you lift it to keep it from falling.
If your AC has side tabs, gently push them to pop the clips. Don’t force them. If you’re having trouble, the manual might show extra screws you missed. Being careful here helps avoid breaking anything.
Once the front panel is off, getting to the filters is easy. Press the tabs or lift the edges, and pull the filters out. Take the filters outside to shake off the dust before you wash them. This keeps the inside of your house clean.
Some AC units have extra filters, like ones made of activated carbon. These might need to be handled or replaced differently, so check the instructions. Keep track of where each filter goes. This makes it easier to put them back right.
Look for the drain pan under the coil. Remove the plug so water drains into the bag you placed earlier. If the pan comes out, carefully lift it and empty it into the bag.
If the pan doesn’t come out, clean it where it is with a cloth and spray cleaner. Be careful not to touch the coil fins. For tough spots, use a soft brush or an old toothbrush.
| Step | Action | Tip |
|---|---|---|
| Power Off | Shut breaker for indoor and outdoor units | Prevents shocks and motor damage |
| Prepare Area | Place cleaning bag under unit and gather tools | Protects flooring from runoff |
| Front Panel | Undo latches or screws and hinge panel upward | Support panel to avoid cracking clips |
| Filters | Slide out rectangular or carbon filters | Shake dust outside before washing |
| Drain Pan | Remove plug or lift pan to empty and clean | Use cloth for fixed pans; avoid pouring near electronics |
| Delicate Parts | Avoid touching coil fins or electronic modules | Use soft brush for stubborn grime |
| Document | Photograph parts and store screws by location | Simplifies reassembly after cleaning |
Clean filters help a split AC run well and keep the air clean inside. First, check your unit’s manual to know the filter type. This step tells you if you should wash or replace the filter.
Most split systems have washable mesh filters. They’re common and simple to clean. Some models have pleated disposable filters for finer dust, but you can’t wash these.
High-end units might have HEPA or electrostatic filters and ones for odors or activated carbon. Always follow the maker’s advice to avoid damaging them.
Begin by shaking off dust outside to lessen the mess indoors. Then, use a gentle brush or vacuum to clear off the debris.
Wash mesh filters with cool water. Lightly dirty filters just need this step. If they’re very dirty, soak them in mild soap for 10–15 minutes, then scrub softly.
After washing, let the filters dry completely before putting them back. Avoid using heat to dry them since moisture can cause mold and lower the AC’s efficiency.
For disposable pleated filters, don’t wash them. Replace with the right size. Ensure they’re put back correctly to keep air flowing as it should.
Wash reusable filters every 1-2 months if you’re using the AC a lot. The U.S. Department of Energy recommends cleaning at least every other month during peak times.
Change disposable filters every 1-3 months, depending on your home and air quality. Charcoal or deodorizing filters should be replaced as the manufacturer suggests, typically twice a year.
Knowing when to replace or clean filters helps keep your AC working great. Remember these tips for routine maintenance and cleaning your split AC filters at home.
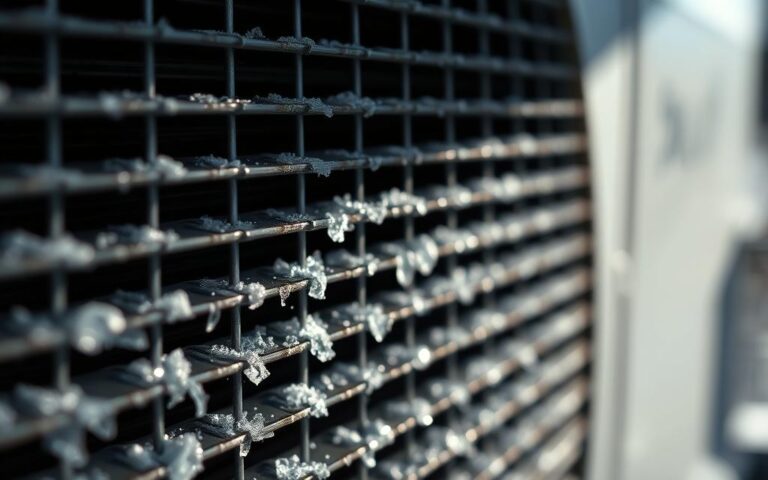
Clean coils help a split AC stay cool and smell fresh. Dust and mold on the coils can block air and lower the AC’s power. Cleaning them often makes the system work better and stops bad smells.
Evaporator and condenser coils help heat move between the air and refrigerant. If coils are dirty, the AC works harder and uses more power. Cleaning them stops cooling problems, protects the compressor, and keeps the air clean.
A no-rinse spray is quick for light dirt. Spray it on and wait 10–20 minutes. The foam breaks down the dirt and it drains away.
To fight mold or germs, use a special spray for HVACs. Wait about five minutes, then let it dry. Soap and water are fine for a small bit of dirt. Use a soft hose to rinse off outdoor fins.
Don’t get electrical parts wet. Protect wires when spraying. A soft brush can help with tough spots. Let everything dry before putting it back together. Always use gentle spray on outdoor coils to keep them straight.
You can clean your AC with some sprays and careful rinsing for normal upkeep. This is good for people okay with following instructions and safe around wires.
If the coils are very dirty, have a lot of mold, are damaged, or if you’re not comfortable doing it yourself, call a pro. A pro can deeply clean everything, check the refrigerant, and make sure your AC stays in good shape.
A blocked condensate line can quickly cause a lot of problems. This guide will teach you how to find clogs and choose the right tools. You’ll also learn easy steps to clear your AC drains safely. Use these tips to prevent leaks or mold by keeping your system draining right.
If water is dripping from the indoor unit or pooling underneath, there’s likely a clog. You might also smell something musty or moldy near the unit if the condensate can’t flow.
Poor condensate removal might make your cooling less effective or cause coils to freeze. Deal with it fast to dodge water damage and air quality issues.
You can use a flush kit or a pressurized nozzle to push water through the pipe. A long, flexible wire or a straightened coat hanger can also break up clogs. But be gentle with it.
A wet-dry vacuum can pull blockages out from the drain access. Use small funnels or syringes to pour water or diluted vinegar into the line. This can help loosen up any buildup.
First, find the drain line access. You might need to disconnect the hose between the indoor and outdoor units. Use a pressurized flush kit to push water or cleaner through; try to flush both ways if possible.
After flushing, let the line dry for about an hour before reconnecting. Always handle the wire carefully to avoid pipe damage.
Flush your drain lines with each season or when cleaning your AC’s filters. A bit of diluted vinegar can cut down on algae and mold. But, make sure to follow what the manufacturer says.
Keep the area around your indoor unit and outdoor outlet clear for good flow. Clear out any debris from the drain pan when taking things apart. Clean filters regularly to help avoid future clogs.
If you keep getting clogs despite regular care, it’s time to call in an HVAC pro. They can check out the drain pan or any hard-to-reach spots. Cleaning your AC’s drain lines as part of routine maintenance prevents many issues. It also saves you time in the long run.
| Issue | Quick Fix | When to Call a Technician |
|---|---|---|
| Water pooling beneath unit | Use flush kit or wet-dry vacuum to remove blockage | Repeated leaks after flushing or visible damage to drain pan |
| Musty odors | Pour diluted vinegar into access point and flush | Persistent mold smell despite cleaning |
| Reduced cooling / frozen coils | Clear condensate line and check airflow; clean filters | System cycles frequently or freezes again after clearing |
| Slow draining | Schedule seasonal flush drain line AC and clean filters | Blockage inside inaccessible sections of pipe |
After cleaning your AC, take things slow. A calm approach ensures you don’t miss any steps. Keep your tools ready and check the owner’s manual for help with clips, screws, and diagrams.
Make sure all filters are dry before putting them back. Place each filter correctly, then carefully put the front panel back.
Fasten latches or screws as the manual says. If you removed any drain plugs for cleaning, put them back. Make sure everything is connected right to avoid leaks.
Look inside for any left tools or cloths. Tighten screws and make sure all covers are in place.
Check for dampness in electrical areas. Let it dry more if you need to. Turn the power back on when it’s dry.
Start the AC and listen for odd sounds. Check if it cools well and doesn’t leak. Also, watch out for any error messages.
Use photos from when you took the AC apart. This helps you put everything back right. Don’t force anything—if it’s not fitting, double-check it.
Create a maintenance log. Note down when you cleaned it and what you noticed, like smells or dust. Keep the manual and warranty info close. Some cleaning actions could void the warranty.
If you have trouble after putting your AC back together, turn it off and recheck everything. If problems continue, it’s time to call a pro.
| Step | Action | Why It Matters |
|---|---|---|
| 1 | Confirm dry filters and reinstall | Prevents mold growth and ensures airflow efficiency |
| 2 | Align and secure front panel | Maintains proper sealing and reduces vibration noise |
| 3 | Reconnect drain and replace plugs | Avoids water damage and clogged drain issues |
| 4 | Check for tools, tighten fasteners | Prevents rattle and mechanical failure |
| 5 | Restore power and test unit | Verifies AC cleaning steps restart and proper operation |
| 6 | Log maintenance details | Helps track performance and future how to clean split AC unit reassembly needs |
| 7 | Follow best practices for reassembly | Ensures long-term reliability and respects warranties |
Maintain your split AC with regular care to avoid sudden breakdowns. Follow an easy upkeep plan at home. This plan should consider both busy times and off-seasons. Keeping track of maintenance and repairs simplifies accessing warranty info and history.
Start by setting up a yearly cleaning schedule for your split AC. Clean washable filters each 1–2 months during high usage periods. Also, make sure to deep clean the evaporator coils and drain lines before cooling season begins.
Have a pro check your AC once a year for refrigerant and electrical systems, and for deep cleaning of coils or condensers. Write down each maintenance date. This makes future service calls much smoother.
The start of spring is crucial for maintenance tasks. Clean filters, coils, and drain lines thoroughly. Remember to clean the outdoor part of your AC and keep the area around it clear.
In summer, check and clean filters every month or two, especially if you notice less airflow or strange smells. When it’s colder, cover the outdoor unit if advised. Warmer areas should have the unit checked occasionally through fall and winter.
Be alert for water leaks, odd loud noises, burning smells, reduced cooling, or if the system won’t stop running. Oil spots or visible leaks from refrigerant are serious and need quick action.
If you see mold or lots of growth inside the AC or its drains, call an expert. These issues mean you should turn off your AC and get help right away.
Keep detailed notes of all filter replacements, cleanings, and professional check-ups. This makes keeping up with regular maintenance easier. It also helps with troubleshooting, making it quicker to figure out problems.
Cleaning your split AC at home helps save money and maintain good air quality. Common mistakes can cause leaks, mold, or damage. Learn simple tips to avoid these issues and clean your AC safely.
Often, people clean filters and coils but forget the condensate drain. Neglecting this step can lead to clogs, leaks, and mold. Make sure to check the drain line, empty the pan, and flush it if needed.
Using harsh chemicals
Steer clear of using strong cleaners like pressure washers or bleach on your AC. These can harm the coils and fins, and may also void warranties. Opt for gentle coil cleaners or mild soap for cleaning. Manufacturers’ recommended antifungal sprays are best for tough build-up.
Neglecting safety precautions
Always turn off the power before you start working on your AC. Spraying water on live parts can cause electric shock or damage. Don’t mess with the refrigerant or try to adjust bent fins without the right tools. For refrigerants and difficult fixes, call a pro.
Skipping steps like drying filters before reinstalling, not securing drain plugs, or using high-pressure water on outdoor units are also common errors. Always follow the manual, choose the correct cleaners and tools, and seek professional help for complex tasks.
To protect your AC and your home, remember these cleaning mistakes to avoid. Routine checks and proper cleaning methods can prevent big issues and help your system last longer.
Doing routine filter cleaning and coil wiping can fix many common issues. But, some problems need an expert’s look. If you find leaks, hear loud noises, face repeated shutdowns, or can’t get rid of mold and odors, call a technician. Knowing when to get professional AC help saves you from bigger, costly repairs.
Watch out for signs like hissing leaks, failing compressors, or tripped breakers. Expert technicians spot issues like bad capacitors and worn out motors that you might miss. If cleaning your split AC doesn’t fix smells or performance, it’s time for professional help—don’t wait too long.
DIY cleaning costs less than calling a pro. In the U.S., professional services vary in price. Expect to pay $75 to $250 for an annual tune-up. But, fixing big issues like a leak or replacing parts can cost a lot more. A pro can save you time and avoid DIY mistakes. Remember, keeping up with yearly services can keep your warranty valid.
Professionals use special tools and have the training to safely work with complicated systems. Their services go deeper than basic cleaning, including washing condensers, straightening fins, checking electrical systems, and testing performance. Regular DIY care plus annual professional checks keep your system running well and lasting longer.