Our Location
1250 Beacon Street
Brookline, MA 02446
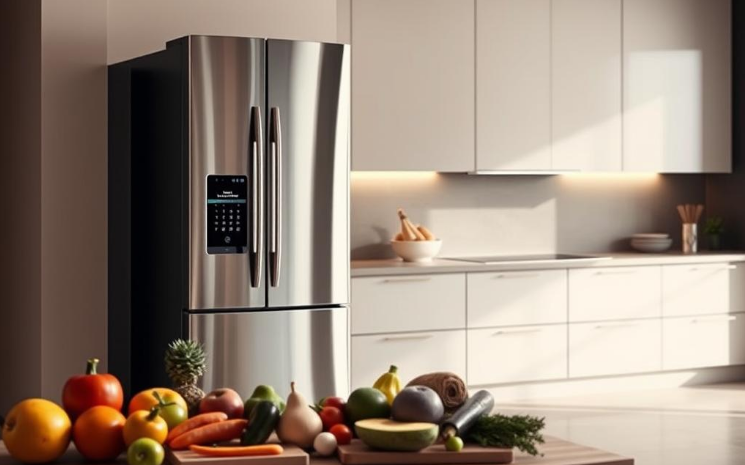
Create a homemade HEPA pre-filter with our step-by-step guide. Ensure clean air with DIY tips and important safety considerations for your home.
Wildfire smoke can make indoor air 700% dirtier in affected areas. This shows that clean air inside is not always sure. A homemade HEPA pre-filter is useful for people living in the USA. It cuts down airborne particles and saves your main filter’s life.
Here, we will show you how to make a safe DIY HEPA filter. We use methods like the Corsi-Rosenthal cube and box-fan designs. You’ll get easy steps, what materials to use, and important safety tips. This helps you make your air cleaner without having to guess how.
Important points are to pick MERV-13 or HEPA materials, not overwork HVAC systems, and use certified box fans from 2012 or newer. Also, consider activated carbon for smells or gases. Follow these instructions for a cheap, effective HEPA pre-filter. It’s great for smoke season, allergy times, or just cleaner air at home.
HEPA filters catch over 99.97% of tiny particles, as small as 0.3 microns. This is a widely recognized standard. A pre-filter first grabs the big stuff like dust and hair. This protects the delicate HEPA filter, making it last longer.
Knowing how HEPA filters work is useful for DIY air cleaners. True HEPA beats MERV 13 filters at capturing the tiniest particles. MERV 13 can catch many particles from about 0.3 to 1 micron. It’s common in DIY fan filters, but HEPA offers more protection against fine dust.
Using a pre-filter has several advantages. It catches big particles such as pet hair and lint. This means you don’t have to replace the HEPA filter as often. It saves money in the long run. The airflow stays strong, making fans work better and quieter.
A HEPA pre-filter works well with activated carbon for a fuller clean. This two-layer setup targets both particles and smells or chemicals. It’s great for DIY systems that aim for more than just trapping dust.
Pre-filters are key in portable and DIY air purifiers. Projects like box-fan filters and Corsi-Rosenthal cubes use them to extend the life of filters. Some even install pre-filters in their HVAC systems, with advice from experts. This is to avoid affecting airflow or warranties. In big emergencies, some create sealed rooms with HEPA and carbon filters for extra safety.
Pre-filters are great for dealing with wildfire smoke, easing allergies, and adding extra cleaning to rooms. If you’re making your own air cleaner, starting with a pre-filter is smart. It’s affordable and keeps your device running smoothly for a long time.
Start by collecting materials that ensure your homemade pre-filter is effective and safe. Choose strong filter media and sturdy hardware. This way, your DIY HVAC filter will work great and last long.
For most box-fan projects, use MERV-13 furnace panels measuring 20″x20″x1–2″. Make sure the arrows on the filters face inward, pointing towards the fan. This setup helps when they’re used as intake filters.
For even more protection, include a True HEPA filter. Look for labels like HEPA, H13, or H14 that promise 99.97% efficiency at 0.3µm. Add activated carbon panels or canisters made from coconut shell for dealing with odors and harmful chemicals. Pick carbon that’s mixed with TEDA for chemical absorption.
Put a washable mesh or foam pre-filter in front of fine media to catch big particles. Use cardboard for simple shrouds and backs in box models. For a stronger unit, go with thin plywood or a solid 20″x20″ board for backing.
Having the right tools is key for a precise and safe build. Choose a 20″ box fan from a reliable brand, made after 2012. It should have a safety fuse and be UL/CSA/ETL certified. You’ll also need duct tape, a marker, utility knife, scissors, and a measuring tape.
Think about getting zip ties or clamps for extra security. If you want to check the pressure, grab a small gauge or manometer. A budget-friendly particulate sensor can quickly test your filter system’s performance.
Always wear the right safety gear. Use an N95 mask or better to cut filter media or handle dirty filters. Wear safety gloves to protect your hands from cuts when using cardboard and working on the fan frames.
Don’t forget eye protection, especially when cutting hard boards or using adhesives. Remember basic electrical safety too: unplug the fan when assembling and ensure nothing blocks the intake or stresses the wiring.
| Item | Why It Matters | Recommended Spec |
|---|---|---|
| MERV-13 Furnace Filter | Primary fine particle capture for DIY box-fan setups | 20″x20″x1–2″, arrows point inward, FPR 10 or MPR1500–1900 |
| True HEPA Panel | High-efficiency stage for multi-stage systems | HEPA/H13/H14, 99.97% @0.3µm |
| Activated Carbon | Adsorbs odors and VOCs | Coconut shell carbon, TEDA-impregnated for chemicals |
| Pre-filter Mesh or Foam | Captures large debris, extends main media life | Washable foam or fine mesh |
| Box Fan | Drives airflow through the filter stack | 20″ fan, 2012+ model, UL/CSA/ETL certified |
| Backing/Shroud Materials | Supports filters and seals airflow paths | Cardboard, thin plywood, or rigid 20″x20″ board |
| Fasteners & Tape | Secures assembly under airflow | Duct tape, zip ties, clamps |
| Cutting & Measuring Tools | Ensures accurate, clean cuts | Utility knife, scissors, measuring tape, marker |
| Testing Tools | Verifies performance and pressure | Manometer/pressure gauge, particulate sensor |
| Personal Protective Equipment | Protects during construction and handling | N95+ respirator, nitrile/work gloves, eye protection |
This tutorial will show you how to make a HEPA pre-filter. It’s for making a homemade air cleaner or a DIY air purifier. First, read each step carefully. Then, gather all your materials, check your fan, and plan how everything will fit together.
Start by choosing a clean, flat area with enough space. Make sure there is no flammable stuff around, and keep your tools handy. Good lighting is important to see any issues in the filter or dust.
Next, test the box fan to see which way the air goes. Draw an arrow on it from the back (intake) to the front (output). Use a fan and filters that are 20″x20″ for most setups.
Choose a fan built after 2012 that’s safe and has different speed settings. Before you start, check the fan’s cord and casing for any damage.
Measure any custom pieces you need carefully. For supports, cut cardboard triangles that are 21 inches with 60-degree angles. Always use a straight edge and a sharp knife for neat cuts.
Only cut HEPA or MERV filters if the maker says it’s okay. Cutting them wrong can make them less effective. The right 20″x20″ filters won’t have this issue.
If you need to size activated carbon panels or pre-filters, use scissors. Cut carefully to prevent fraying, and wear gloves to keep your hands safe.
For a single box-fan setup: make sure the filter’s arrow goes the same way as the fan. Attach the filter to the fan with duct tape. Put a cardboard piece around the front to keep air from escaping.
For the Corsi-Rosenthal cube: place four MERV-13 filters standing up with arrows pointing to the center. Tape them together at the edges. Put a cardboard base underneath, the fan on top facing up, and tape it all securely.
For using two box fans: tape two filters together on one side. Put cardboard triangles on the top and bottom. Make sure arrows on the filters point inward, then tape it to the back of the fan, keeping public health advice in mind.
Finally, tape up all connections well. Wrap a shroud around where air comes out to prevent it from leaking. Initially, use the fan on a low setting to test. Then, gradually increase speed, keeping an eye on the fan and the seals.
Making small tweaks can greatly improve your DIY air purifier. We’ll cover the right size, where to place it, and how to keep it working well. This way, you get the most from your homemade HEPA pre-filter and air cleaner.
Choosing the right size
Ensure the filter’s size matches the fan’s size. A 20″x20″ filter works best with a matching box fan. This combo is great for most DIY projects. For bigger spaces, consider several units or a larger Corsi-Rosenthal cube.
A standard Corsi-Rosenthal cube can handle 900 CFM using a 20″ fan. This is suggested by This Old House. It’s best to aim for three full air changes every hour. Bigger spaces might need more DIY purifiers placed throughout.
Proper installation techniques
Put the unit in the center of a room, away from walls or curtains. Never block the fan’s front or back. Keep windows and doors shut unless you need more ventilation or to cool down.
Use cardboard and duct tape to make a shroud. This stops clean air from being pulled back into the fan. Always check the filter’s arrows and face them in the right direction. For central air systems, talk to a professional before adding high-MERV filters. This avoids damage and airflow problems.
Maintenance and cleaning tips
Change the filter when it looks dirty, usually every six months. If there’s smoke, dust from construction, or wildfire smoke, change it sooner.
Every month, check the unit’s seals, tape, and fan. Look out for damaged cords or overheating signs. Add a cheap pre-filter to catch big particles and help your main filter last longer. A PM2.5 sensor can also help you know when to speed up the fan or change the filter based on air quality.
Never try to wash disposable filters. Always replace them to maintain efficiency and safety. By following these simple steps, your DIY air cleaner will work better and last longer.
Creating a DIY air cleaner is both rewarding and economical. Before starting your DIY HEPA filter project, it’s important to know the safety steps. Small precautions can make your DIY air purifier safe and effective for a long time.
Wear an N95 mask and disposable gloves when handling dirty materials. Glasses and cut-resistant gloves are needed for cutting. Always unplug the fan before adding a filter. Ensure it remains off when attaching or adjusting parts.
Avoiding common hazards
Opt for box fans with safety certifications like UL, ETL, or CSA, especially those made after 2012. Older models might not have necessary safety features and could be a fire risk. Don’t cover the fan’s intake or exhaust areas; it could overheat.
Never leave a homemade air cleaner on without supervision, especially near kids or those who can’t turn it off. The BCCDC recommends being careful under these conditions. Don’t put the unit near things that burn easily like curtains or furniture, and keep it away from flames or heaters.
Consult a professional HVAC technician before using high-MERV or HEPA filters in your system. Such filters can hinder airflow, strain the system, and cause issues like freezing in air conditioners.
Proper disposal of filter materials
Put used filters in sturdy plastic bags before throwing them away. This keeps dust and particles contained. Follow your area’s rules for throwing away contaminated items. If filters touched dangerous substances, get guidance from local waste officials.
When dealing with used activated carbon canisters, wear gloves and replace carbon as recommended. HEPA media usually lasts longer than carbon. Keep new filters in a dry, sealed place until needed for your DIY air purifier project.
Before you use a homemade HEPA pre-filter in your living space, do some checks. Start with looking at it closely, then measure its performance. Keep clear notes to see any changes over time. This helps keep your DIY air filter safe.

Visual inspection techniques
Use a bright light to check the fan, filter edges, and shroud for small gaps. These gaps can make any DIY air purifier less effective.
After running it for a few hours, check if dust collects evenly on the pleats. If it doesn’t, this could mean the filter is not properly in place or there’s a seal problem.
Turn the fan on high for a bit, then check if it gets too hot or makes strange sounds. Overheating or unusual vibrations can mean it’s not mounted right or the filter is blocking too much air.
Using airflow and particle count measurements
Measure PM2.5 with an affordable sensor. Compare the air quality with the unit off and then on. This shows how well it’s cleaning the air in your room.
Check how the air moves through the filter with tools like an anemometer. Measuring CFM shows how effective your DIY air purifier is at cleaning the air in a space.
In setups meant to keep a room extra clean, use a pressure gauge to check for positive pressure. You want at least 0.1″ of water gauge pressure to keep unwanted air out.
Recognizing signs of ineffectiveness
If PM2.5 levels don’t drop or if smoke and smells linger, there might be leaks, clogged filters, or not enough air moving through. These issues can make your DIY air filter less useful quickly.
Loud noise, a motor that gets too hot, or less air moving through suggest clogs or fans working too hard. Check the filter and fan if you notice these signs.
If the filter gets dirty quickly or you have to replace it a lot, your air might be very polluted. Adding a simple pre-filter or more units can help it last longer and work better.
| Test | Tool | What to look for | Action if failed |
|---|---|---|---|
| Seal inspection | Bright flashlight | Gaps at seams or tape | Re-seal with foil tape or gasket material |
| Dust loading | Visual check after runtime | Uneven pleat loading | Re-orient filter or reinforce seal |
| PM2.5 reduction | Low-cost particle sensor | Drop in PM2.5 when unit on | Fix bypass or increase filter surface area |
| Airflow/CFM | Anemometer or manometer | Expected CFM for room size | Use higher-CFM fan or reduce resistance |
| Fan health | Touch and listen | Overheating or unusual noise | Inspect bearings, replace fan if needed |
| Odor persistence | Smell test | Ongoing chemical odors or VOCs | Add activated carbon stage |
Below you’ll find answers to common questions about DIY HEPA pre-filters and air cleaners. We cover practical steps and safe options. Brands like 3M and Honeywell are mentioned for your guidance.
How often should I change my pre-filter?
Check your pre-filter monthly. You should replace the main filters, like HEPA or MERV-13, roughly every six months with regular use. The pre-filter needs a change every one to three months, depending on dust, pet fur, or smoke from wildfires. Swap it out right away if it’s dirty, damaged, or smells bad.
Can I use different materials?
Yes, but only use materials that have proper specifications. For particles, go for certified HEPA or MERV-13 media. Activated carbon works well to cut down on gases and odors. But steer clear of makeshift materials that lose fibers, such as loose fiberglass fabric or uncertified furnace filters.
Do not put very dense, high-MERV media in HVAC systems without an expert’s advice. Such media can block airflow and overwork fans or motors.
What to do if my pre-filter doesn’t fit?
If possible, buy a filter that’s the right size; a 20″x20″ often fits box fans. Only trim filters where it’s safe to do so. Ensure cut edges have a sturdy backing, like thin plywood, to keep pleats safe. Use cardboard and strong tape to close any gaps and prevent air leaks.
Think about using several smaller certified filters in a cube shape, like a Corsi-Rosenthal box. This setup can suit a fan’s size and keep air moving well, without forcing a single, poorly fitting filter to work.
| Question | Quick Guidance | When to Act |
|---|---|---|
| Change frequency | Inspect monthly; pre-filter 1–3 months; HEPA/MERV-13 ~6 months | Visible dirt, tears, odors, or heavy smoke events |
| Material choices | Use certified HEPA or MERV media; activated carbon for gases | Avoid non-certified fabrics that may shed or underperform |
| Fit and installation | Buy correct size; trim with rigid backing; seal with shroud | If gaps exist or the fan intake is not fully covered |
| Alternative builds | Corsi-Rosenthal cube or multiple filters taped together | When a single filter won’t match the fan footprint |
| HVAC caution | Consult an HVAC pro before using high-MERV media in ducted systems | When upgrading whole-house filters or using dense media |
Choosing a DIY or commercial air purifier depends on your budget, needs, and environmental values. This overview considers cost, performance, and waste factors. It helps you decide the best option for your home or small office.
Starting a DIY setup like a Corsi-Rosenthal cube costs about $100 to $150. You need a 20″ box fan, four MERV-13 filters, cardboard, and tape. This homemade option is cheaper at the start compared to many store-bought purifiers.
Store-bought HEPA units begin at a few hundred dollars. Higher-end models have features like smart sensors and better filtration steps. Over time, you’ll spend more on replacing filters compared to the basic MERV pre-filters of DIY solutions.
Studies show that well-made DIY purifiers remove particles as well as some HEPA units. These homemade systems can also be as energy-efficient as their commercial counterparts if operated similarly.
However, commercial purifiers usually perform better in terms of design, odor control, and certified ratings. For places needing high-level filtering, like hospitals, certified HEPA units are best.
Both DIY and store-bought filters result in waste when you change filters. But, a homemade HEPA filter with a cleanable pre-filter reduces trash and makes the HEPA last longer.
When adding odor control, go for eco-friendly carbon media. And try to recycle the cardboard or plastic parts. Always bag filters properly when throwing them out to avoid any risk.
| Factor | Typical DIY Setup | Typical Store-Bought Unit |
|---|---|---|
| Initial Cost | $100–$150 for Corsi-Rosenthal style assembly | $150–$500+ depending on features and brand |
| Filter Replacement Cost | Lower for basic MERV pre-filters; HEPA media costs vary | Higher for true HEPA and activated carbon cartridges |
| Performance (PM2.5 removal) | Comparable when built correctly and sealed well | Often better sealed, standardized CADR, added odor removal |
| Energy Use | Similar to portable units at same fan speed | Optimized motors, auto modes may save energy over time |
| Safety and Design | Exposed fans and edges require careful construction | Enclosed housings, child-safe features, certifications |
| Environmental Footprint | Waste from disposable filters; reusable pre-filters reduce impact | Disposable cartridges common; some models offer recyclable parts |
| Best Use | Cost-conscious homes seeking effective homemade air filtration | Sensitive environments, continuous monitoring, high-threat needs |
Here are trusted sources and how-to’s for DIY air purifiers and better home filtration. These resources include DIY projects, safety tips, and info on filter types like MERV and HEPA.
This Old House shares an easy video on making a Corsi-Rosenthal cube. It goes over the materials, how to put it together, and using a fan with a MERV-13 filter. The BC Centre for Disease Control offers advice on dealing with smoke from wildfires. They give tips on choosing filters, using fans safely, and making a cover for your setup. If you’re looking for wider advice on air inside, check out EPA and FEMA’s advice on sealing rooms and the basics of filtration.
If you want to really understand filters, look at Indoor Air Quality: A Comprehensive Reference Book. ASHRAE guides and HVAC manuals give expert advice on filters, airflow, and making sure your system works together. Home care books also have good chapters on keeping air clean, when to replace things, and how to seal a room.
Online forums and DIY spaces share projects, help fix problems, and break down costs. On Reddit, groups like r/DIY and r/AirPurifiers show what others have made and compare how well they work. Sites like This Old House community and HVACTalk bring together home improvers and experts to talk about what works and safety tips. Local DIY groups often share plans for making your own filters or purifiers.
Look for affordable PM2.5 sensors and guides from sellers to check how well your DIY purifier works. You can also find datasheets for filters to make sure you’re using them right and know when to replace them. For serious concerns like chemical threats, it’s best to ask experts and possibly use commercial or hospital-grade systems.