Our Location
1250 Beacon Street
Brookline, MA 02446
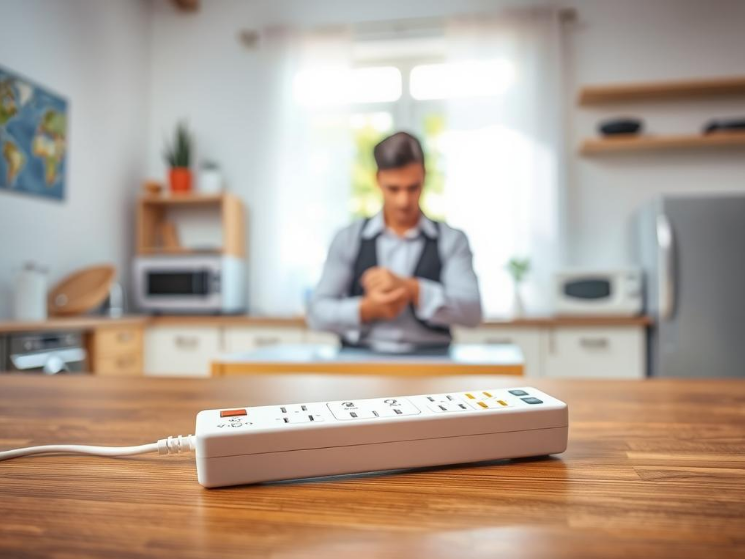
Discover essential tips on how to use multimeter safely for your appliance testing and maintenance. Ensure accurate results with safety in mind.
One in four home appliance repairs begins with a multimeter check. Yet, many shocks and short circuits happen because of wrong testing.
A multimeter is essential for fixing appliances. It can find issues like a bad dryer fuse, fridge motor failure, or oven power trouble. Knowing how to handle it safely protects you and your appliances.
Always make sure there’s no live current before testing. There are exceptions for needed live tests. Checking multimeter leads, choosing the right setting, and discharging capacitors can lower shock and damage risks.
This guide offers clear steps and tips on using a multimeter, shared by repair experts and trusted DIY guides. If you’re not sure how to fix or check a part, it’s better to call a professional repair service.
Accuracy and safety go hand in hand. Using a multimeter the right way, with correct settings and following maker’s advice, ensures the best and safest troubleshooting.
Before using it on a wire or an appliance, you should get to know your tool. This guide will explain what a multimeter is, show the main types, and cover the important parts. This is crucial for using it correctly and safely.
A multimeter, also known as a volt-ohm meter, measures various things. It checks AC/DC voltage, resistance, and current. It also tests continuity by making sure electricity flows well through a component.
These devices usually have a display, a selector, and two probes. The red probe is positive, and the black probe is common.
There are digital and analog multimeters. Digital ones are easier to read and often turn off by themselves. They are great for most home use.
Analog meters are good for watching live changes. They may be cheaper but can be more delicate and slower to use. For household tasks, a digital multimeter is often the best choice.
The display shows measurements in numbers or uses a needle. The selector lets you choose different functions. Make sure the functions are clearly marked.
Jacks are for connecting the probes. Black goes to COM, and red goes to the positive jack. Good test leads have very low resistance when connected.
Use good habits for accurate results. Start with a high range and adjust, check the probes, and ensure you’re using the correct settings. Following these steps will make you better at using a multimeter.
When you use a multimeter on appliances, safety is key. Stick to clear safety steps to lower shock risk and protect your gear. Having good habits and a checklist is smart.
Always turn the appliance off and unplug it first. If needed, turn off the circuit breaker. Removing power lowers risks a lot. Save testing with power for when it’s really needed.
To avoid shocks, discharge capacitors before touching things inside. Use a grounding strap for big capacitors, like in microwaves. These are key steps for staying safe.
Make sure your meter fits the job, especially for voltage. In the U.S., appliances usually need 120V or 240V. Use AC for home power and DC for batteries. Start high and go lower to get better readings.
Put probes in the right spots for the kind of test you’re doing. Wrong settings can break your meter. Following these tips prevents damage.
Look over your multimeter for any cracks or damage. Make sure the probes are in good shape too. Replace any damaged parts before you start.
Test the probes to see if the meter shows near 0 Ω. Wearing rubber shoes and gloves helps with safety. These steps help make sure your tests are safe.
Following these tips and the safety steps mentioned will protect you and your appliances. Simple checks and correct settings lead to safer, better results.
Before starting your test, plan ahead. Make sure the area is clean and you have safety glasses. Check that your Fluke or Klein multimeter can handle the job. Following these steps will make testing faster and safer.
Start by putting the black lead in the COM port and the red lead in the VΩmA or the voltage jack. Choose V~ for AC or V⎓ for DC. If it’s a manual-range meter, begin at a high setting. Then adjust to get a clearer reading.
Always check the meter’s safety category and voltage limit before testing. It’s crucial to follow these guidelines. This helps you use your multimeter safely and correctly.
For anything plugged into a wall, use the AC setting. Connect the black probe to the ground and the red to the live slot. Most U.S. homes have around 120V, or 240V for certain types of lines.
For batteries and DC sources, use the DC setting. The black probe goes on the negative, and the red on the positive. Always check the adapter’s details before using the meter.
A reading tha matches what you expect, like ~120V from outlets, means everything is likely fine. If DC readings are negative, just switch the probes. Not getting a reading could indicate a bigger problem, like a blown fuse or tripped breaker.
Always keep your fingers safe and don’t let the probes touch each other when testing. Pull out the probes starting with red, then black, when done. If testing feels risky, better to call a professional electrician.
Learning to measure resistance tells us if a part is working right, is broken, or in the range it should be. Knowing how to use a multimeter starts with setting it up calmly and methodically. Always check your setup before using the probes on components. This ensures our readings are spot on and our equipment stays safe.
First, make sure the appliance is off and unplugged. If you can, remove or isolate the component to avoid incorrect results. Then, put the black lead into the COM slot and the red one into the VΩ jack.
Turn the dial to the correct ohms setting. If you have an auto-ranging meter, it picks the setting for you. Doing these steps correctly is vital for getting reliable readings.
Press the probes against the component’s two terminals. It doesn’t matter which way for resistance tests. Look at the display for a number to show up.
If the screen shows “1”, “OL”, or dashes, just increase the range until numbers appear. An OL across all ranges means the part could be broken. A very low reading means you should adjust the range for a more accurate number.
Use known resistance values for common parts to understand your results. For example, water valves should read 2,000–4,000 Ω; and heaters, 20–40 Ω. If the numbers are way off, it could mean a part is not working right.
To measure resistance accurately, make sure there’s no power going to the component. Testing with power on can ruin the meter and mess up the readings. Always power off and, if possible, take the component out or disconnect the wires first.
Following these steps for using a multimeter the right way lowers risks and makes for better testing. Remember these tips every time you check resistance.
Working with current needs caution and clear steps. Use multimeter usage tips and safety measures for less risk. Have a plan, pick the right meter settings, and ensure a calm work area when testing appliance currents.
First, move the red lead to the mA jack for small currents or 10A for big loads. Choose DC or AC current based on your need. Always start on the highest range to avoid meter overload.
Never connect probes across a voltage source for current; it shorts the circuit. Doing so might blow a fuse or even cause injury.
To measure current, open the circuit and place the meter in series with the load. Connecting the meter in parallel, like for voltage, can harm the meter and trip fuses. Imagine the meter as part of the line carrying all the current.
If a fuse blows, make sure the red lead is in the current jack and you picked the right range. With unstable readings, check the probe connections are tight. A higher range might help if values jump. For live measurements, a clamp meter avoids direct line connection.
| Problem | Likely Cause | Quick Fix |
|---|---|---|
| Blown fuse | Leads in wrong jack or meter across voltage source | Move red lead to correct jack, inspect fuse, restart on highest range |
| Fluctuating readings | Poor connection or incorrect range | Re-seat probes, select higher range, stabilize test setup |
| Zero or very low current shown | Meter not in series or circuit open | Insert meter in series, confirm circuit is complete |
| Meter overheating | Exceeded meter’s current rating | Stop test immediately, use clamp meter or higher-rated meter |
Always follow basic multimeter tips and check leads and ranges before testing. This practice creates safe habits. It solves many issues for new users on safe multimeter use.
Ohm’s Law connects voltage, current, and resistance in a simple formula: V = I × R. This formula helps technicians understand how circuits work. They can also use it to find a missing value after measuring two other variables.

Voltage pushes electrons along. Current is the movement of these electrons. And resistance slows them down.
To check parts, use the formula V = I × R. Measure the voltage and resistance to calculate the current. This confirms if everything is working as expected. Always follow the best practices for using your multimeter.
If a heater’s resistance is higher than its specification, the current and heat it produces will decrease. Ohm’s Law can help you calculate the change in current.
A resistance close to zero suggests a short circuit. This can cause too much current to flow, which might trip breakers or damage motors. It’s important to compare your measurements with what’s expected for motors, heaters, and control circuits.
Ohm’s Law can turn your meter readings into useful information. It helps you know if a part is working correctly, has an open circuit, or is shorted. For instance, a heater that should be 20–40 Ω can be quickly checked.
Estimating current before test setups can make your tests safer. Always plan your tests carefully, using both your multimeter and your calculations to ensure accurate and safe results.
| Test Scenario | What to Measure | Use of Ohm’s Law | Practical Tip |
|---|---|---|---|
| Heater element | Resistance (Ω) and supply voltage (V) | Compute I = V/R to estimate operating current | Check against spec; follow multimeter best practices for resistance tests |
| Motor winding | Resistance and expected current draw | Use V = I×R to infer if winding has short or open turns | Measure with power off; consult motor nameplate for expected values |
| Control board trace | Voltage at test points and component resistance | Confirm that voltages and currents fit design limits | Use using multimeter correctly to avoid board damage |
| Short-circuit check | Very low resistance across supply | Estimate potential current to judge breaker trip risk | Predict current before series insertion; follow multimeter usage instructions |
This section introduces three key functions of multimeters. These functions are commonly used on various appliances. Clear instructions make testing with a multimeter quicker. By following these basic tips, you can avoid mistakes and keep safe.
Continuity testing checks if a circuit path is complete. Always turn off the power before you start testing. To test, set the dial to continuity, connect the probes to the Ω and COM jacks, and touch the probes to the two points you’re testing. A beep or very low resistance means the path is complete. This function helps you find breaks or shorts in wires, fuses, switches, and connectors.
For reliable continuity checks, make sure the power is off, clean the probe tips, and test components known to be good. This ensures your meter is working correctly. Dirty contacts or unexpected paths in a circuit can cause minor issues.
Diode testing uses a little voltage to measure the forward voltage drop across a diode. It’s best to disconnect the diode from its circuit first. To test, put the red probe on the anode and the black one on the cathode. A normal silicon diode will show a drop of about 0.6–0.7 volts in forward bias. If it reads OL or shows an open circuit, it means the diode is blocking the current one way.
To get accurate diode test results, isolate the diode from other components, test both directions, and compare your results with the expected specifications. Checking diodes can reveal issues in appliances like those with rectifiers or control boards.
Capacitance measurement checks how well a capacitor can store a charge. Always discharge the capacitor completely and remove it from its circuit before testing. Set your meter to measure capacitance and touch the probes to the capacitor’s terminals. Compare the meter’s reading to the capacitor’s rated value. A big difference or no reading usually means the capacitor is faulty.
When handling large capacitors, follow these safety tips: discharge them through a resistor, never directly short them with a screwdriver unless it’s insulated and you’re trained in the technique, and always check they’re fully discharged with a DC voltage setting. It’s better to replace capacitors that are swollen or leaking rather than trying to fix them.
| Function | What it checks | Basic steps | Common use on appliances |
|---|---|---|---|
| Continuity | Continuous electrical path | Power off → continuity mode → probes on points → listen for beep | Wires, fuses, switches, connectors |
| Diode Test | Forward voltage drop | Remove diode → diode mode → red on anode, black on cathode → read voltage | Rectifiers, control boards, power supplies |
| Capacitance | Stored charge capacity | Discharge capacitor → capacitance mode → probes on terminals → compare rating | Motor run caps, filter caps, start capacitors |
Maintaining a multimeter requires steady habits. It’s crucial to follow best practices to protect your tools and ensure accurate readings. Small steps can prevent mistakes and cut down on repair times for appliances like washers, ovens, and refrigerators.
Accuracy starts with regular calibration and maintenance. Compare your meter with a known reference or a calibrated Fluke unit when you can. Quickly replace worn probes, frayed leads, and old batteries to prevent incorrect readings.
Plan checks every six to twelve months if it’s a hobby, and more often for work. For high precision, send meters to a certified lab. Always inspect probe tips, banana plugs, and input jacks before starting a job.
Keep a simple log noting the date, meter model, setting, range, and conditions of each test. Check the expected values in appliance manuals against what you measure. This can help identify issues. Taking photos of wiring before taking it apart helps with quicker, safer reassembly.
Keep your meter in its case, in a cool, dry spot. Coil the leads loosely to avoid damage and remove batteries if you’re not using it for awhile. Keep everything away from corrosive stuff and high heat.
Use good alligator clips for easier testing and mark common settings for quicker work. Always replace fuses with the right type and rating. Following these tips can reduce mistakes and keep you safe while fixing appliances.
Stick to simple safety rules: check your equipment, log your results, and store your tools right. This will help your tools last longer and keep your measurements reliable.
Small issues with a multimeter can usually be fixed easily. This guide covers common problems, checking for wrong readings, and when it’s time to get a pro involved. Remember to always think about how to safely troubleshoot, use, and handle your multimeter.
If your meter shows OL but you expected a different read, start by checking its range setting. Make sure the component isn’t still part of the circuit. To correctly measure a resistor, remove it from the circuit or pick a higher range setting.
Did your meter’s fuse blow while testing for current? Make sure you put the probes in the right places and followed correct steps for measuring current. Always use a fuse that matches your meter’s specifications. Also, it’s smart to have a spare fuse and extra probes ready to go.
Are the readings jumping around or not stable? Try cleaning the probe tips and pressing them harder for a better connection. If the meter still acts up, check the battery. Swapping the leads can help you see if there’s an issue with the wires.
Begin by touching the probes together; a working meter will show almost 0 Ω in resistance mode. Try measuring a brand-new AA battery or a known resistor to double-check the numbers you get. When in doubt, use another meter from a reliable make, like Fluke, to compare readings.
Remember, powered circuits may have other paths that can mask a component’s real resistance. Try to test the part by itself. If a number seems off, do another test without the part or with the power off.
If dealing with mains and you’re not sure how to safely turn off the power, call a pro. For appliances that use sealed cooling systems, find an EPA-approved tech. And if an appliance acts in a way that could be dangerous, get a licensed electrician.
Don’t try to measure circuits with big capacitors or if you’re unsure about the energy they hold by yourself. If you’re not certain about the meter’s safety ratings or if working on it might pose risks, it’s time to ask for professional help. Safety first to avoid any harm.
Teaching someone to test appliances safely builds confidence and prevents accidents. Begin by showing them how to handle a multimeter. Make sure you cover basic instructions and stress the importance of safety.
Show them how to unplug power before starting. Explain choosing between AC or DC settings. Highlight the right ports for measuring different things.
Show them how to safely discharge capacitors. Teach the one-handed method for safe testing. Say that safety rules lessen risks while working on appliances.
Teach them about testing for continuity and resistance in parts. Practice safe methods for measuring current. Recommend using digital multimeters for accurate readings.
Highlight the importance of good documentation habits. Show how to use alligator clips for easier testing. These steps help both newbies and pros use multimeters better.
Encourage them to work with a buddy on tricky or live tests. Suggest seeking help from experts when needed. It’s smart to reach out to AppliancePartsPros or a certified technician if unsure.
Direct them to manuals, DIY guides, and videos for specific appliances. Stress the importance of following electrical codes and safety instructions for safe repairs.
| Teaching Topic | Practical Demo | Key Takeaway |
|---|---|---|
| Power Disconnection | Show turning off breakers and unplugging appliances | Always remove power before probing |
| Setting Selection | Select AC vs DC and correct range on meter | Right setting prevents meter damage and false readings |
| Probe Handling | One-handed live testing and probe order demo | Red last in, first out reduces shock risk |
| Current Measurement | Safe series insertion with fused port use | Proper insertion avoids blown fuses and hazards |
| Documentation | Photograph wiring, log values, note conditions | Good records speed troubleshooting and repairs |
| When to Seek Help | Contact parts suppliers or certified technicians | Professional support prevents costly mistakes |
Learning to use a multimeter safely is all about good habits. Always turn off the power first, if you can. Check your multimeter and wires for any damage. And make sure to set it for the right type of measurement at the correct range.
Be sure to discharge capacitors before you touch the terminals. Only measure current by connecting the multimeter in series. And don’t forget to wear the right safety gear, like insulated gloves and shoes with rubber soles.
Getting better comes with practice. Begin with simple tasks, like checking batteries and small devices. Then, you can move on to working on main power sources. Learn about Ohm’s Law and get to know common resistance levels to understand your readings better. Choosing an auto-ranging digital meter can help prevent mistakes. And remember to always stick to the guidelines for using a multimeter.
Find trustworthy information to increase your knowledge. Read guides from the manufacturer and technical sheets. Watch guide videos from reliable sources. And talk to experts like AppliancePartsPros for help with parts. If a job seems too risky or complicated, it’s best to call a professional technician or electrician for help.
To sum up, safe multimeter use comes down to three things. Proper setup of your tools, following the right steps, and being careful about any energy from batteries or the main supply. By following these safety tips for multimeters, you’ll not only keep yourself safe but also get more accurate results when checking appliances.