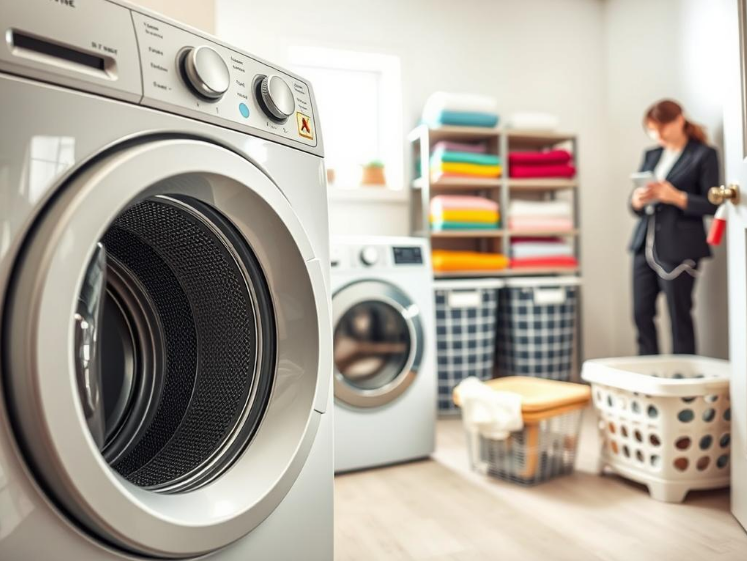
Our Location
1250 Beacon Street
Brookline, MA 02446
Struggling with a washer lid not locking? Learn how to diagnose and fix the issue using a multimeter with our step-by-step guide.
One in four homeowners finds their washer won’t start or stops mid-cycle. This often is due to the lid lock failing. Usually, it’s a simple switch issue, not a big problem with the transmission or motor.
This guide will teach you to test the lid switch with a multimeter. It helps decide if you need a new part or professional help. If your washer stops spinning, shows errors, or acts weird, it might think the lid is open when it’s not.
Testing the switch is crucial because it’s a common issue with brands like Whirlpool and GE. A continuity test can spot a bad switch early. This saves you both time and money on repairs.
We’re focusing on how to diagnose the switch and lock mechanism here. Remember to turn off the power before you start. If messing with electrical parts makes you nervous, it’s best to call an expert.
The washer lid lock keeps the drum safe and users from harm during operations. It won’t let the machine run if the lid is open. If it’s not working, your washer might stop suddenly or show an error.
The lid lock informs the control board about the lid’s status. It uses a physical switch to complete a circuit, showing the lid is closed. This lets the motor spin only when everything is safe.
Some machines use a lock that physically secures the lid, sending a status signal to the control board. Front-load washers from Samsung, LG, and Bosch use integrated locks. Top-load versions often have simple microswitches.
Microswitches are small, cost-effective, and easy to check. If there’s a problem, a multimeter can usually find it.
Magnetic switches work with a magnet in the lid and a sensor in the frame. They’re reliable but less common. Newer models may have electronic sensors that need special steps to diagnose.
Electromechanical locks are found on front-load washers. They often need replacing when they fail. Reasons for failure can include wear or broken parts. Sometimes, control board issues mimic a faulty switch, making diagnosis hard.
Knowing your washer’s type of lock is important. It helps decide how to fix it. Tests with a multimeter can identify simple switch issues. But, complex locks might need replacing.
You might first notice small hints that your washer lid isn’t locking right. Perhaps the machine sticks at the lock stage or acts up during wash cycles. Catching these early is key to figuring out if you need to check the switch.
Digital screens help find problems quickly. Watch for messages like “LID,” “Door,” “Ld,” or a blinking or steady lock image. Whirlpool washers might flash F7E1 for lid lock issues. Similarly, Samsung and LG models use “dL” or a padlock sign.
If you see a light that doesn’t stop blinking or stays on, it might mean a broken switch or lock part. Try putting the washer into diagnostic mode. This could show different codes that hint at what’s wrong.
Sometimes, the washer starts but then stops, or it skips spinning or draining steps. Or, it agitates but won’t spin at all. These inconsistencies are clues too.
There are also physical signs. The lid might feel off, make weird noises, or not stay locked. If closing the lid is hard, or if the lock releases too soon, those are big warning signs.
| Symptom | What It Means | Quick Check |
|---|---|---|
| Blinking lock icon or steady error | Control not seeing a locked lid; possible electrical fault | Run diagnostic mode, note code like LID, dL, F7E1 |
| Stops mid-cycle or won’t spin | Switch registers open intermittently, prevents spin/drain | Try closing lid firmly, observe if vibration affects behavior |
| Difficulty closing lid or loose latch | Mechanical wear or broken strike can prevent lock engagement | Inspect latch area for cracks, bent strike, or missing parts |
| Lock engages then releases quickly | Electrical fault or failing actuator motor | Listen for clicking, note if lock motor runs briefly then stops |
If any of these signs show up, it’s time to look into the washer lid lock. You might need to adjust things or check the switch with a multimeter. Recognizing these signs points you to the right fix and saves you from guessing.
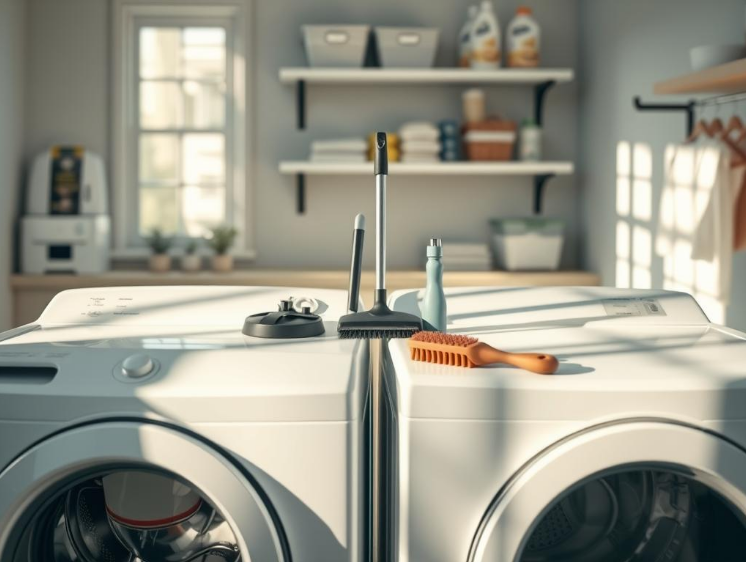
Before starting, make sure you have everything for safe troubleshooting. The right tools can make testing the washer lid lock simple and quick. Also, have your washer’s model and serial number ready for finding parts.
A reliable multimeter is key for testing the washer lid switch. Choose a digital one that can check continuity and ohms. Look into brands like Fluke, Klein Tools, and Amprobe for high-quality meters suitable for both homeowners and technicians.
Gather some basic hand tools as well. Include Phillips and flathead screwdrivers, hex or nut drivers, and a small socket set. Needle-nose pliers and wire strippers are also useful for carefully disconnecting connectors or checking wires.
Don’t forget a flashlight or headlamp to see in dark spots. Keep a spare lid switch or know how to find part numbers online. This is essential for moving smoothly from diagnosing to fixing the washer lid lock.
Wear gloves to protect against cuts and dirt. Safety glasses are also a must to guard against metal shavings and dust during disassembly.
Consider a non-contact voltage tester to ensure the power is off before starting. Always unplug the washer or turn off the circuit breaker first. If possible, lock the breaker to prevent accidental power return.
Make sure to work on a dry surface and wear shoes that cover your toes. Avoid overriding safety features unless you’re following approved steps. Following these tips lowers the risk during troubleshooting and repair.
Start with safety and a plan. Preparing your washer properly prevents shocks and damage. Here are simple steps to follow before working on wiring or terminals.
First, cut the power by either unplugging the washer or flipping the circuit breaker. Use a tester to make sure there’s no live voltage.
To get to the control console in top-load machines, open the lid. For front-load machines, you need to take off a panel to reach the door lock assembly. Keep screws and fasteners in a small tray.
Look for the lid switch. It’s a small piece with two or three wires. Take a photo and note the wire colors. Check for any damage like melted plastic or frayed wires.
Set your digital multimeter to measure continuity. If your switch is working, it should show nearly 0 Ω when closed. Open switches show OL or a high reading, but it varies.
For true readings, disconnect the switch first. Use your photo to track wires. This way, you won’t get mixed signals from the board.
Move the harness and actuator and watch the meter. Changes mean there might be an issue. Note your findings and keep your photos for later.
If everything seems fine but the washer won’t lock, check the wiring back to the control board. Look for blown fuses or tripped relays that could signal other issues.
Use these steps to troubleshoot lid switch problems. Detailed notes and accurate testing make repairs or part replacements faster. Plus, they’ll help you decide whether to fix it yourself or call a pro.
Before using your probes, know what the meter’s display means. This knowledge makes testing faster. It also reduces guessing during troubleshooting the washer lid lock.
Understanding ohm measurement
Resistance is measured in ohms (Ω). A mechanical lid switch in good condition should show 0–5 Ω. If the circuit is open, the meter reads OL or shows infinite resistance.
To quickly check if there’s a connection, use continuity mode. The meter will beep and show low ohms if the path is complete.
Polarity is not important for simple switches. But for electronic locks with diodes or sensors, check the manual. Even cheap multimeters are fine, as long as you have a good battery and proper contact.
What a passing or failing test looks like
If you’re testing a lid switch, close the lid or push the actuator. You should hear a beep or see low resistance on the meter. With the lid open, the meter should change to OL. Be careful, as the reading shouldn’t suddenly change when you move the actuator or wires.
A bad lid switch won’t show continuity when closed. A constant continuity signal when it should be open is also a problem. If the readings jump around with the actuator still, it could mean worn contacts or internal damage.
Solenoid locks should show resistance from tens to hundreds of ohms. Always compare with your washer’s specifications. If you find a short to ground or unexpected continuity, the lock or wiring may be to blame.
Still, there are unique cases. Some models work in reverse, using a normally-open setup. And for electronic modules, you might need to apply voltage for tests. Don’t mess with live voltage without knowing what you’re doing.
Clear test results guide you. A good test means you should check the wiring or control board next. A bad one suggests you might have to replace the switch or lock assembly.
Small faults in a washer’s lid lock can halt a cycle, leaving laundry undone. Use clear steps to check for issues and try easy solutions before ordering parts or calling for help.

Mechanical wear often leads to lock failure. Broken actuator tabs, a worn plunger, or a misaligned striker can block the lock from engaging properly.
Connector corrosion or dirt, especially in the latch area, can break electrical contact. Moisture and soap leftovers speed up this problem.
Wiring issues around the hinge, frayed cables, or melted insulation from heat can cause lock errors.
Faulty switches or lock modules can have internal damage, like burnt solenoids or bad sensors. Control boards might read the switch wrong, thinking there’s a lock failure.
Hard hits or forcing the lid shut can damage parts, stopping the system from working.
Always unplug the washer before you touch any electrical parts. Begin by cleaning the latch, switch connector, and the area around them. Use electrical contact cleaner and a soft brush to remove dirt.
Disconnect and reconnect connectors to ensure they fit tightly and aren’t corroded. This simple step can often fix intermittent issues.
If the striker doesn’t line up, carefully adjust it so the lock works. Make small changes and test the lid gently. Do this only if it’s safe.
To diagnose the problem, use a temporary jumper to simulate a closed switch. This checks if the washer works properly. Always do this with the power off and just for checking. Never use the washer without all safety parts in place.
Replace any snapped tabs or screws you can see. Many parts for brands like Whirlpool, GE, Maytag, and Samsung are cheap and easy to replace yourself.
Use the washer’s diagnostic setting, as the manual suggests, to test the lock and read error messages. This will help locate the issue, whether it’s the latch, switch, or control board.
| Symptom | Likely Cause | Quick Fix |
|---|---|---|
| Lid won’t lock but machine powers on | Dirty connectors or misaligned striker | Clean contacts; realign striker bracket |
| Intermittent locking during cycle | Frayed wiring at hinge or loose harness | Inspect/secure wiring; reseat harnesses |
| Lock clicks but washer won’t start | Faulty switch or control board relay | Jump test for diagnosis; check diagnostics |
| Physical damage to latch area | Cracked housing or broken tabs | Replace striker pieces or switch assembly |
If cleaning, reconnecting, and minor tweaks don’t fix the issue, it might be more serious. Then, replacing the switch or lock module is the best way to get your washer running right again.
It’s important to know when to replace your lid switch. This avoids wash failures and safety issues. First, run checks with a multimeter and look at the switch and wiring for problems. If the tests fail or you see damage, it’s best to replace it.
Failed multimeter tests or no change in continuity is a bad sign. Burn marks, melted plastic, or cracks show heat or mechanical damage.
If the switch works off and on or has loose parts, it may be wearing out. A switch plunger that doesn’t return shows failure.
Discolored wires or corroded terminals mean electrical issues. Repeated errors about the lid or door lock should make you consider replacing the switch.
First, find your washer’s model and serial number. They’re usually on the rating plate. Use this info to find exact parts on sites like RepairClinic, PartSelect, Sears PartsDirect, or brand pages like Whirlpool, LG, Samsung.
Decide on OEM or aftermarket parts. OEMs fit well and have warranties but can be pricier. Aftermarket parts may save money, but check they fit and work right.
Know your washer type. Top-loaders often need a basic microswitch. Front-loaders might need a full latch or lock assembly. Sometimes, just the striker or actuator tab needs replacing, not the whole thing.
Make sure the new part matches in connector style and size. Keep the old part to help with returns. Look for sellers with good return policies and warranties.
For installing, follow model-specific guides or watch OEM videos. Using resources like iFixit guides or forums helps. Ensure your replacement part and tools match what you need for the job.
If the washer’s lid lock is not working right, even after checking the lid switch, it’s best to get professional help. Hidden issues like complex electrical faults or control board failures are hard to find without the right tools. To ensure safety and get accurate results, calling a technician is a wise choice if problems continue.
Technicians look deeper than just the switch. They use a multimeter to check the lid switch, follow the wiring, and run tests. Diagnosing issues like control board or electronic module faults requires special tools and knowledge. Taking apart front-loaders without harming seals or gaskets needs extra care.
For problems that come and go, technicians use special tools to find and fix them. If your appliance is under warranty or leased, use an authorized service to keep your coverage. Getting professional help with the lid lock is important for safety and keeping your warranty valid.
Repair costs change based on the appliance model and where you live. Simple parts like microswitches can cost from $10 to $40. Whole lock assemblies for front-load washers may cost from $50 to $200, depending on the brand.
Service fees in the U.S. usually start from $75 to $120. Labor can cost from $80 to $150 per hour. So, fixing the lid or door lock might cost between $150 and $400, including parts and labor. If you need a new control board, the part alone can cost $200 to $500, plus labor.
For budgeting, it’s smart to get two quotes from local, licensed repair services. Check out their reviews on Yelp or Google. An itemized quote can help you understand the costs better, avoiding any surprises.
| Repair Item | Typical Parts Cost (USD) | Typical Labor / Visit | Estimated Total |
|---|---|---|---|
| Microswitch replacement | $10–$40 | $75–$120 visit + $80–$120/hr | $100–$200 |
| Complete lid/door lock assembly | $50–$200 | $75–$120 visit + $80–$150/hr | $150–$400 |
| Control board replacement | $200–$500 | $75–$120 visit + $80–$150/hr | $300–$800 |
| Diagnostic only (no parts) | N/A | $75–$120 | $75–$120 |
When unsure, it’s smart to talk to a licensed tech for a repair estimate on your washer’s lid lock. Telling them what you’ve already tried can make the diagnosis faster. This keeps your repair costs as expected, without surprises.
Start by keeping little issues from becoming big headaches with a quick, routine check. Follow the checklist below. This will help lower the chances of your washer lid not locking properly. These steps also keep your washer working well and help avoid urgent repairs.
Inspect your washer every month. Look at the strike, latch, and the area around them for any cracks or dirt. Remove any grime to ensure the latch fits securely.
Clean the areas you can see with a soft brush and electrical contact cleaner. Dirt and corrosion on the connectors can cause the lid to work incorrectly. This may also prevent the washer lid from staying locked.
Make sure the wiring isn’t being pinched by hinges or touching metal parts. Wires that are damaged could cause the washer to malfunction, making repairs more difficult.
Try running a quick cycle with no clothes to see if the lid locks correctly. Doing this check regularly helps catch issues before they affect your laundry routine.
Don’t overload the drum. Putting in too much can misalign the door or lid, causing the latch to fail. Loading it right helps the parts last longer.
Use the right detergent for your washer. Using too much can leave moisture, leading to corrosion. This increases the chance of the washer lid not locking.
If you have a front-loader, clean the door gasket. Keeping it free of debris helps the latch work better. It also prevents leaks that could damage electrical parts.
Keep your laundry area dry with good airflow. This reduces corrosion and helps maintain your washer’s condition.
Have a professional check your washer every year. They can find worn parts early and suggest repairs to help you avoid bigger problems later.
Keep a log with dates, replaced parts, and your washer’s model/serial numbers. This makes it easier to order parts and fix issues with a washer lid that won’t stay locked.
Let’s quickly go over what to do if your washer’s lid won’t lock. Issues usually come from a bad lid switch, a broken actuator, or sometimes loose wires. Checking the lid switch with a multimeter is a smart first move. It helps tell if you can fix it yourself or need an expert.
For a quick guide on fixing a washer lid lock: first, unplug your machine. Then, open it up to get to the switch. Use a multimeter to check for continuity and resistance. Look over the connections and the latch, too. If anything’s broken, you’ll need to replace those parts.
If your tests on the switch are okay but the problem’s still there, you might need to check the wiring more or get help from a professional. This method helps solve many common issues with washer lids not locking.
To avoid future problems, take care of your washer regularly. Simple things like cleaning the lid area and checking the latch every once in a while can make a big difference. This way, you can prevent many issues. If you’re comfortable with basic tools, you can fix many things by yourself. Just remember, for anything involving wires or the control board, it’s safer to call in a professional.
What to do next: get your washer’s model number and a multimeter ready. Review the steps we talked about before to test things out. This summary can help you decide whether you can fix it or if you need to call for help. By following these tips, you’ll be well-equipped to deal with washer lid lock problems—from figuring out the issue to fixing it.