Our Location
1250 Beacon Street
Brookline, MA 02446
Fix your microwave not heating issue with our quick DIY troubleshooting guide. Learn simple steps to diagnose and solve the problem in minutes!
About 30% of microwave problems come from simple mistakes. If your microwave isn’t warming up food, hold off on getting a new one. A lot of common issues can be fixed easily. Learning to solve these problems saves you time and money.
In just 10 minutes, you can pick up key tips to handle repairs yourself. Most repairs are simple and don’t need costly expert services. But first, let’s see how to find the issue safely using just a Phillips-head screwdriver and a multimeter. Always unplug your microwave before you start fixing it!
Finding out why your microwave isn’t heating can make fixing it easier. There are a few usual problems that could be the cause. Looking into these parts one by one can help you figure out why it’s not heating up right.
The magnetron is super important because it makes the energy that cooks the food. If it’s broken, your food won’t get hot. You might notice your microwave sounds strange or doesn’t heat your food at all.
If the high voltage diode is broken, it won’t let enough power get to the magnetron. This means your microwave won’t heat up well. You might see the inside light is dim or feel it’s not as powerful when you use it. It might need to be checked or replaced.
Capacitors are important because they store and release electrical energy. If one breaks, your microwave won’t heat up properly. If your microwave turns on but doesn’t cook, it could be a sign of a capacitor issue.
When your microwave stops working, simple steps can pinpoint the issue. Start by making sure the microwave is getting power. This first action saves you time and effort.
First, check if the microwave is plugged in. Then, test the outlet with a different device to see if it works. If the microwave still won’t turn on, further checks are needed. Look for tripped circuit breakers or blown fuses.
A broken door switch often causes microwave troubles. Even if everything else seems fine, a bad switch can stop it from running. Try opening and closing the door several times to ensure it locks properly. A multimeter can test if the door switch is working right.
Before fixing a microwave, knowing safety rules is key. These devices can be dangerous without careful handling. By following safety steps, you make repairs safer and avoid injuries.
The first step in fixing a microwave is to unplug it. This reduces the risk of electric shock. Make sure the microwave is disconnected before you start working on it.
Even when unplugged, microwaves can hold high voltage in capacitors. Be careful when you deal with them. Use tools with insulation and wear safety gear to avoid shocks. Knowing the dangers of microwave capacitors is vital for anyone trying to fix one.
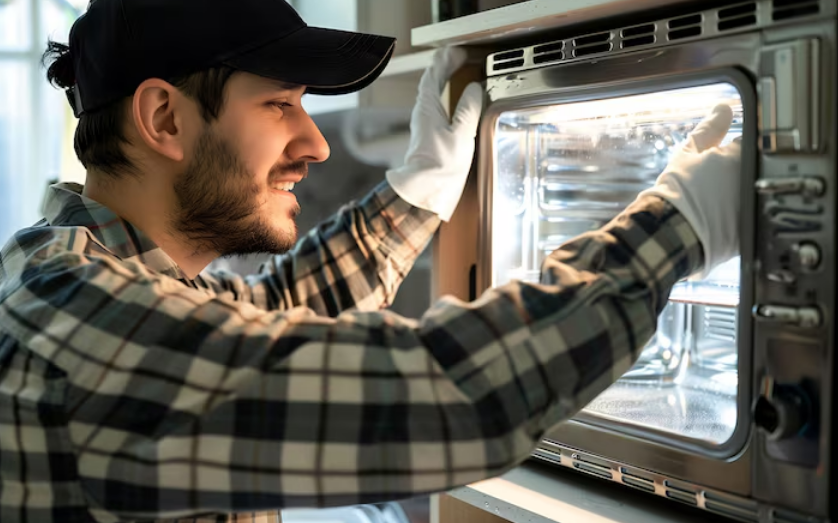
Testing microwave parts is key for fixing issues. Using a multimeter boosts your ability to check parts like door switches and diodes. We’ll show you how to use a multimeter properly and spot physical damage. This can help you find what’s wrong with your microwave.
A multimeter is essential for fixing microwaves. Make sure the microwave is unplugged before you start. Then, set your multimeter to test continuity to see if electricity flows through a component. Attach the multimeter probes to the component you’re testing.
If the readings are off, the part might be bad and need changing.
Looking at the parts is as important as testing them. Check for burn marks, melted areas, or rust, especially on the connections. These signs can point to bigger issues. While checking your microwave, remember any strange things you see. They might be linked to why it’s not working right.
Fixing your microwave’s heating ability is key, and that means replacing the magnetron. While it might look tough, you can definitely do it yourself with the right tools and a good guide. Let’s look at the tools you need and how to replace the magnetron step by step.
The high voltage diode is key to keeping your microwave working well. It changes AC into DC, crucial for the flow of microwave electricity. Checking the high voltage diode carefully can help you spot problems.
Start by looking closely at the high voltage diode for damage or burn marks. Look for changes in color or shape that show trouble. Signs of a bad diode are cracked cases or rust. If you see these, you might need a new diode.
To make sure the diode works right, use a multimeter for testing. Here’s how to do it right:
Regular checks keep the high voltage diode working well. This keeps your microwave’s electricity flowing properly and stops other problems.
The capacitor in your microwave is very important. It stores the electric power needed for the magnetron. The magnetron is what makes the microwaves. Knowing when the capacitor is failing helps fix microwave issues. Spotting a bad capacitor is key for good performance.
Finding issues early with your capacitor can stop bigger problems. Signs of a bad one include:
Be careful when replacing a microwave’s capacitor. It can still shock you even if it’s off. Here’s how to do it safely:
Sometimes, you need to fix microwave problems yourself. But, there are times when you should call an expert. Knowing when to do this keeps your microwave safe and working right.
Here are clues that something big is wrong:
Deciding to call for repairs involves thinking about costs. Here’s what you need to consider:
| Action | Estimated Cost |
|---|---|
| Professional microwave repair | $100-$300 |
| Replacement of a major component | $200-$400 |
| Replacement of the microwave unit | $200-$600 |
Weigh the repair costs against getting a new microwave. This helps you decide smartly. Often, asking a pro can avoid more costs later.
To keep your microwave running smoothly, regular upkeep is key. Following smart care tips can help make your microwave last longer. Keeping it clean and well-kept prevents common issues, boosting its performance.
Cleaning your microwave often is crucial for keeping it hygienic and odor-free. Begin by wiping the inside with water and vinegar to clean and deodorize. Also, clean the turntable and interior walls every few weeks to remove any food splatters. Use a bit of baking soda for tough stains.
The roller ring plays a big role in your microwave’s function. It’s vital to keep it clean and free from debris for even cooking. Take it out now and then to wash with gentle soap. Look for wear and tear, and replace it as needed. A well-kept roller ring means a better-working appliance.
Knowing how to deal with microwave repairs is key for homeowners. Quick fixes like checking the power or door switches can solve simple issues. This helps fix problems fast and cheaply, reducing inconvenience.
But, it’s also crucial to take care of your microwave over the long term. Regular upkeep, including cleaning and checking parts like the roller ring, helps your microwave work better for longer. This not only saves your money but also makes future issues easier to manage.
In sum, having the right knowledge and a proactive stance helps you tackle immediate and future microwave problems with confidence. A well-looked-after microwave doesn’t just heat food. It’s a reliable kitchen tool that runs smoothly with proper care.