Our Location
1250 Beacon Street
Brookline, MA 02446
Tackle iron leaking water with expert tips on sealing, managing temperature, and keeping your steam holes spotless for optimal performance.
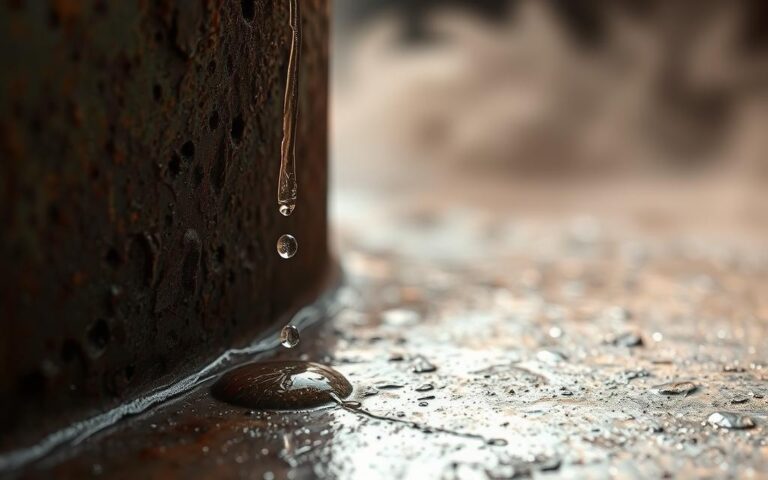
It may shock you, but over 30% of complaints about household irons are about brown drips. These drips often come from the back of the iron, not the steam holes.
When your iron leaks, it can cause minor damp spots or major stains on clothes and floors. Owners of Rowenta irons often find leaks at the back of the soleplate. This happens after a lot of use or when steam channels get blocked by minerals.
Leaks not only mess up your ironing but can also hint at bigger issues. Problems like internal scale, rust, or bacteria in the water are common causes. This article will show you how to fix these issues at home. We will cover sealing problem spots, how to manage temperature, clean steam holes and internal parts, treat the water your iron uses, and keep up with regular maintenance. We’ll also explore other household fixes like iron filters for well water and systems to remove iron and soften water.
You’ll learn daily tips as well. These include running self-clean cycles and using vinegar in steam to clean it, a method used by many with Rowenta irons. You should also empty the water after using your iron and turn off the steam to prevent leaks. We offer friendly advice focused on the U.S., perfect for homeowners and seniors who want easy steps before they might need a professional.
Knowing why your iron leaks can help you fix it quickly and keep your clothes clean. Leaks happen due to mechanical issues, mineral buildup, or different environmental factors. Learning about these triggers helps you care for your iron and clothes.
If screws are loose or the soleplate is not lined up right, water can leak out. People often find that the back panel doesn’t fit right after cleaning. Or maybe a screw wasn’t tightened enough. Hard water can cause scale and blockages inside, which leads to steam holes dripping or spitting water. Leaving water inside the iron can create deposits that push water out through cracks.
Rust and mineral deposits can make the water look brown and block flow paths. Brown marks on your clothes are usually from this problem. Minerals can damage seals or thin out the soleplate, causing leaks.
The quality of your water and how you store your iron affect its life. Hard water makes lime and scale build up faster. Humid places and bad storage can make metal parts rust. Steam generators can help by keeping water away from the heating element. Still, tanks need cleaning to avoid buildup.
Organic materials or iron bacteria in water can change the steam’s color and smell. Those using well water might notice brown steam due to bacteria. To avoid this, don’t use rainwater, softened water, or water from fridges for your iron.
Brands like Rowenta and Black+Decker suggest using regular tap water or mixing it with distilled water in areas with very hard water. Stay away from water that might be contaminated. This reduces the chances of needing to clean water stains from your iron and helps prevent leaks.
Finding a leak early can save your clothes and time. Watch for little hints when you start using the iron and as you go. These signs can show up before any big damage happens.
Look at the iron’s soleplate edges and back for drips. You might see brown streaks around steam holes or on the baseplate. This happens when rust or minerals and water mix.
If you notice water under the ironing board or on the ground, there’s an issue. Seeing water drip from the soleplate is a clear sign. Stop ironing and check the water tank and its seals.
Steam that sputters or has a brown color shows there are deposits inside. When steam acts odd, it might mean buildup is pushing water out.
If steam feels wet or makes clothes damp at low heat, the iron might be too cool. Philips and Rowenta’s guides say to wait for the ready light before starting steam.
Feeling wet spots on clothes after ironing points to a leak. Moisture on your garments or under the board means it’s leaking.
Leaks often happen when the iron is cool, hasn’t been used in a while, or water was left in it. Hearing metallic sounds or strange noises can be a sign, but not always a bad one.
A reliable seal keeps water from leaking at seams and screw holes. A loose screw at the back lets water escape. Proper sealing maintains steam paths and lessens repair needs.
Seals and gaskets act as barriers between metal and plastic. Tight fasteners and intact gaskets stop small drips from becoming big leaks. A strong external seal also keeps internal parts safe from harmful minerals.
Always use gaskets and parts recommended by the manufacturer. Companies like Rowenta and Philips provide specific rubber seals. Silicone gaskets are okay if the manual says so.
Don’t use DIY or harsh chemical sealants. They might damage plastic or hurt steam pathways. Using the wrong sealant might worsen the problem and void your warranty.
First, ensure the iron is unplugged and cool. Check the manual for how to take it apart.
1. Tighten any screws on the back plate that are loose.
2. Swap out old rubber seals with the right OEM parts.
3. Put it back together as the manual directs, then test it on low steam over a sink.
If you’re not confident with electrical parts or if the leak is inside, don’t take it apart further. If you’re not sure, like if you were a 67-year-old grandma, get help from a pro.
Leaking due to internal issues like a failed boiler, heavy scale, or broken valves needs more than a seal fix. In such cases, a pro’s inspection and maybe a water test kit will help find the right fix.
Keeping steam vents clear is key to a working iron and stopping leaks. Here’s a brief guide on gathering materials, safe cleaners to use, and dealing with hard deposits. Don’t use liquids inside the iron before checking the manual.
Collect soft sponges, cotton swabs, toothpicks, a small brush, a sink or bowl, possibly a pin or needle if it’s safe according to your manual, a towel, and gloves. Choose gentle tools to avoid scratching or damaging the iron’s soleplate.
Warm water and a gentle pad can clean external residue off. Some brands suggest special sticks for coated soleplates. For the inside, some suggest distilled white vinegar carefully used in a self-clean cycle. Rinse well with water after. Always check your iron’s manual first about vinegar or descalers.
First, unplug the iron and let it cool down. Clean the cold soleplate and vents with a damp pad or brush. Use swabs or a skewer to remove debris from the vents gently.
To clear inside blockages, use the iron’s self-clean function. Set it to high steam and temperature over the sink. Keep the iron upright and run self-clean until the water runs clean. If vinegar is allowed, one cycle should be okay, then rinse with water.
If a vent is clogged, a pin or needle might clear it if your manual says it’s okay. Be gentle to avoid damage. Finish by rinsing the iron with water to get rid of any loose bits or cleaner.
| Cleaning Task | Recommended Tool | Safe Solution | Tip |
|---|---|---|---|
| Outer soleplate and vents | Soft non-metallic sponge, soft brush | Warm water | Wipe gently in circular motions to avoid scratches |
| Single clogged steam hole | Cotton swab, toothpick or wooden skewer | None or dampened with water | Work while iron is cool; avoid metal tools |
| Internal mineral buildup | Manufacturer-approved self-clean or vinegar (if allowed) | Distilled white vinegar (one pass), then plain water | Flush thoroughly to prevent lingering taste or odor |
| Stubborn soleplate stains | Manufacturer-recommended stick cleaner | Follow brand directions (Philips, Tefal, Rowenta guidance varies) | Use products specific to your soleplate coating |
| Routine maintenance | Towel, bowl for rinsing | Iron in water solutions like distilled water for filling | Rinse boiler periodically to reduce iron water stain removal needs |
After cleaning, dry the soleplate and keep the iron in an upright position. Regular cleaning of steam holes improves its function and reduces leaks from mineral buildup. If clogging or smells keep happening, contact the manufacturer or a repair expert before doing more internal cleaning.
Using the right heat setting on your iron is crucial for its performance. It also helps to prevent water leaks. By slightly adjusting the temperature, you can stop water spitting and protect your clothes. Always check these tips before pressing that steam button.
Recommended temperature settings
Be sure to match the iron’s dial to what the fabric tag suggests. For delicate fabrics like silk, use low heat and minimal steam. When ironing cotton or linen, turn up the heat. Let the iron heat up fully before using heavy steam.
Understanding the temperature-steam relationship
Modern irons heat the soleplate and steam chamber separately. Using steam too early or with too high a setting can create water droplets. Also, frequent use of turbo steam can cool down the soleplate. This cooling might cause water to leak from the iron.
Tips for maintaining safe iron temperatures
Always wait for the iron’s ready-light before using steam. Lower the steam or increase the heat if you notice droplets. Try not to overuse turbo steam. Give the iron enough time to warm up between uses to keep its temperature steady.
Quick troubleshooting
| Fabric Type | Temperature Advice | Steam Setting |
|---|---|---|
| Silk / Synthetics | Low heat; wait for ready light | Minimum steam to prevent droplet formation |
| Cotton / Linen | High heat; let iron fully warm | Medium to high; use vertical steam per manual |
| Mixed fabrics | Start low, increase gradually | Reduce turbo; avoid sudden high steam bursts |
| Steam generators | Follow manufacturer’s max temp guidance | Allow boiler to reach pressure before heavy steam |
Regular upkeep makes an iron last longer and reduces leak risks. Always follow a simple checklist after using it. Doing this protects its seals, cords, and inside parts.
Look for any loose screws, broken seals, or worn-out cords. Also, check if the water tank has brown water or looks dirty. These issues suggest there’s dirt inside or mineral build-up that might cause leaks.
Always empty the water tank to prevent residue. Use your iron’s clean function or anti-scale feature sometimes. For steam irons, wash the boiler every ten uses to avoid sediment.
Follow the maker’s advice on what water to use. In places with hard water, mixing tap and distilled water usually works. Avoid using descalers unless the manual says it’s okay. A good tip is to switch from steam to dry mode when taking breaks and to empty the tank after ironing. This helps avoid leaks later.
If you think your water has lots of minerals, get a water testing kit for irons. It helps you know if you need special treatment for the water or a different mix for your iron.
If your iron still leaks after you clean it, stop using it and get in touch with a professional. Take it for repairs if it drips from the base, safety valves go off, or if there’s a constant warning light.
Don’t try fixing any electrical parts on your own. If there are cord problems or other ongoing issues, let skilled technicians deal with them. Choosing authorized repair shops keeps your warranty valid and ensures safe, correct fixes.
Small leaks in your iron are annoying but often easy to fix. First, unplug and let your iron cool down. Try tightening the screw on the back or use the self-clean function to remove scale. Make sure you regularly empty the water tank and adjust the steam setting according to the temperature.
To fix small leaks yourself, start with things you can see and are not electrical. Follow the manual’s directions to tighten any loose screws. Use the self-clean function and rinse the tank with distilled water to get rid of minerals. Clean the soleplate with a soft cloth and make sure the steam holes are clear. If your home uses well water, getting an iron filter can prevent scale and reduce the need for cleaning.
If parts like gaskets or seals look worn out, replace them with ones from reliable brands. When brown stains come from the soleplate holes, you might need to replace internal parts to stop leaks and stains.
Don’t try fixing boiler cracks, damaged valves, or electrical issues yourself. For these problems, it’s safer to take your iron to a professional repair shop.
After replacing or tightening parts, put your iron back together following the instructions. Start testing it with steam over a sink at a low setting. Run the self-clean cycle and look for leaks. Only use sealants or gaskets recommended by the iron’s manufacturer. Avoid regular glues that could be harmful.
| Issue | DIY Step | When to Replace | When to Seek Professional Repair |
|---|---|---|---|
| Loose back screw | Unplug, cool, tighten screw per manual | Strip or damaged screw threads | No, can be done at home |
| Scale in passages | Run self-clean, flush tank with distilled water | Persistent brown streaks from soleplate | Only if cleaning fails |
| Worn gasket or seal | Inspect visually, replace with OEM gasket | Cracked or flattened seals | No, unless near electrical parts |
| Anti-scale plug failure | Clean and reseat plug; replace if perished | Perished or leaking plug | Follow manufacturer guidance if internal valve affected |
| Boiler or valve crack | Not safe for DIY iron repair | Replace internal parts only by service | Yes; authorized service center required |
| Water quality issues | Use distilled water; empty tank after use | Consider installing iron filter for well water | No, unless sediment damages internal components |
Water quality affects how well an iron works and its maintenance needs. Hard water causes limescale buildup on the iron’s plate and inside boilers. If your water has iron, it can leave brown stains on fabrics and block steam vents. Testing water helps find the best treatment, making ironing easier.
Hard water contains minerals like calcium and magnesium, which build up scale. This scale affects appliance lifespan and reduces steam power. Soft water, on the other hand, is low in minerals, which prevents scale. However, using fully softened water is not always best as it might harm some irons.
For those in areas with very hard water, combining tap and distilled water is suggested. Do not use rain, scented, or household-filtered water unless it’s approved by the iron’s manufacturer.
Begin by testing your water for iron and hardness with a test kit. High iron levels might require an iron filter for well water or a specialized iron removal system. These help prevent stains and buildup that could damage boilers.
If you’re dealing with hard water, consider getting a water softener. It’s important to find a balance between what the appliance manual suggests and your water test results. This way, you can choose the most effective water treatment for your iron.
Using pure water means you won’t have to descale as often. Clean your iron’s boiler every ten uses and anti-calc rods as needed. Regular maintenance and treating your water right will ensure less trouble with brown water and iron bacteria.
If iron bacteria in well water is a problem, a high-grade removal system can help. Maintain your water tank well to avoid slimy residues. Good water care means less hassle and fewer repairs for your iron.
Small drips from an iron seem harmless at first. But letting leaks continue can lead to bigger problems quickly. It’s important to know the risks so you can act before the damage spreads.

Constant moisture speeds up the corrosion inside. It also damages seals in brands like Philips and Black+Decker. Mineral buildup clogs steam paths, forcing the boiler to overwork.
Brown stains on the soleplate hint at deeper issues. These can get worse and permanently block steam holes.
Water and electricity are a dangerous mix. A leaky iron could wet cords or plugs, putting anyone nearby at risk of a shock. Leaks might mean safety valves or thermal fuses are failing.
If these safety parts trip, stop using the iron and get professional help. Immediate repairs are needed for any damaged cords to prevent serious accidents.
Leaks mess up steam efficiency, leading to sputtering steam and poor ironing. Irons may produce weak steam and leave wet marks on clothes. Brown streaks from the iron can stain garments.
Condensation under the ironing board might damage floors and walls. Ignoring leaks can also hit your wallet hard. Repairing small issues is cheaper than replacing expensive irons from brands like Rowenta or Panasonic.
Doing simple things like emptying the iron after use, cleaning the boiler, and using distilled water can save money over time. These steps also prevent water stains.
| Problem | Likely Cause | Quick Action | Long-Term Fix |
|---|---|---|---|
| Brown staining on fabric | Internal corrosion or mineral residue | Stop ironing; test on old cloth | Rinse boiler, use distilled water, replace seals if needed |
| Sputtering steam | Clogged steam passages or low pressure | Lower temperature and drain water | Clean steam holes and descale boiler |
| Wet power cord or plug | External leak reaching electrical parts | Unplug immediately and do not use | Have cord and housing inspected by technician |
| Persistent floor or board moisture | Constant leak or poor drainage | Move iron to sink and dry area | Repair or replace iron; protect surfaces with waterproof mat |
If your steam iron leaks, sometimes home fixes won’t do. It’s safest to go professional. A technician can check everything, from safety systems to boilers, and use the right parts. For warranty and OEM parts, head to an authorized center.
Give a clear problem description and show any photos of issues. Technicians will inspect the iron’s tank, plugs, and more.
They’ll run tests, replace parts with branded ones if possible, and check safety features. They’ll even explain why the issue happened, like scale buildup.
Repair costs can vary, depending on the brand and the part’s availability. Simple tasks might be cheap, but bigger fixes can get pricey, sometimes near the cost of a new iron.
Always ask for a detailed estimate. It helps to see part and labor costs separately. This way, you can decide if repair or replacement is better.
Check if they use OEM parts and if your warranty stays intact. Ask about the repair’s cost, how long it’ll take, and who checks the work afterwards.
Also, get tips on preventing future problems. Maybe using certain kits or regular descaling helps. Picking an authorized center minimizes risks and supports you with parts and knowledge.
| Service Step | What It Covers | Typical Cost Range |
|---|---|---|
| Visual inspection & leak diagnosis | Check tank, seals, steam holes, and fasteners; document leaks | $20 – $50 |
| Seal or gasket replacement | Replace worn seals, anti-scale plugs, restore tightness | $30 – $90 |
| Boiler or valve repair | Repair or replace internal boiler, valves, or pressure components | $100 – $250+ |
| Electronic or thermal fuse repair | Diagnostics and replacement of thermal cutoffs or boards | $80 – $200 |
| Post-repair testing | Safety checks, steam testing, leak verification | Included or $15 – $40 |
To keep your iron leak-free, it’s all about regular care and using the right tools. Always empty its water tank after use. Also, run self-clean cycles often and rinse the steam generator every ten uses. Check seals and screws now and then. And pick the right water type based on manufacturer’s advice. In areas with hard water, mix tap and distilled water half-and-half. This reduces mineral build-up and helps avoid leaks.
Keeping up with simple routines helps keep your iron in top shape. Always empty it after use and store it in dry mode. Adjust the steam based on what you’re ironing. Staying away from steam on low heat and cleaning anti-scale filters can stop leaks. This also keeps your iron working well.
Go for trusted brands like Rowenta, Philips, or Tefal. They provide replaceable parts, easy-to-follow care tips, and strong warranties. Features to look for include anti-calc, removable rods, and specially coated soleplates that are easy to clean. Dealing with well water? Think about getting an iron filter or water treatment just for iron. Always test your water with a kit before choosing a solution for your whole house.