Our Location
1250 Beacon Street
Brookline, MA 02446
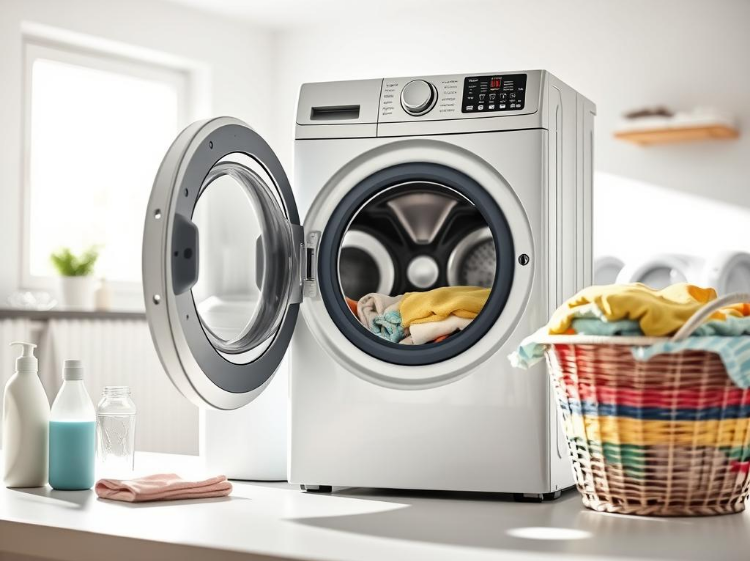
Get your dryer working efficiently with our Dryer troubleshooting tips. Learn what to check first when your dryer isn't drying clothes properly.
Did you know that experts at Mr. Appliance have identified 15 common reasons why a dryer won’t start? This fact highlights how a seemingly simple machine can fail in many ways. When your appliance stops working, it throws a wrench into your daily routine.
You need dry clothes now, not later. This time-sensitive issue is incredibly frustrating. Your household depends on this essential appliance running smoothly.
Fortunately, many of these problems have straightforward solutions. Some issues, like a tripped breaker, are simple fixes you can handle yourself. Other malfunctions are more complex and require a professional’s touch.
This guide will walk you through a systematic approach. We cover everything from basic power checks to mechanical repairs. Our goal is to help you diagnose the issue quickly and correctly.
Understanding the root cause saves you both time and money. You’ll know whether you can tackle the job or need to schedule professional repairs. Let’s get started and restore your laundry day efficiency.
Before diving into specific fixes, it helps to know why these appliances stop working correctly. A thorough understanding of the root causes allows for smarter, safer decisions.
These machines can fail for many reasons. Issues often start with the power supply, like a tripped breaker or faulty outlet.
Mechanical wear is another major factor. Belts can snap, and rollers wear out over time. Component failures, such as a blown thermal fuse, are also frequent.
Improper maintenance is a leading culprit. A simple lack of cleaning can trigger a chain reaction of failures.
Some problems are easy to fix yourself. Others need professional repairs. Knowing the difference saves time and money.
When a dryer malfunctions, your efficiency drops. Clothes take longer to dry, which hikes up your energy bills.
The safety risks are even more critical. The National Fire Protection Association reports over 15,500 home fires each year start in dryer vents.
Failure to clean is the top cause, responsible for 32% of these fires. A clogged vent makes the appliance overheat. This can lead to serious hazards.
Regular maintenance is not just about performance. It is a crucial safety practice for your home.
The first step in diagnosing any non-starting machine is checking its power source. Electrical problems are common culprits behind appliance failures.
Always start with the simplest solution. Confirm your appliance is securely connected to the outlet.
Check that the plug is fully inserted. Look for any visible damage to the cord. This quick visual inspection takes seconds but can prevent unnecessary service calls.
Test the outlet’s functionality by plugging in another device. If that device also fails, the issue lies with your power supply rather than the machine itself.
A tripped circuit breaker is another frequent cause of power problems. Locate your home’s electrical panel to investigate.
Look for switches in the “off” position or misaligned with others. The dryer circuit typically uses a 240-volt double-pole breaker.
Reset any tripped breakers by switching them completely off then back on. If breakers trip repeatedly, this indicates underlying electrical issues requiring professional attention.
Safety is paramount when working with electricity. Call an electrician if you notice damaged outlets or feel uncomfortable with electrical systems.
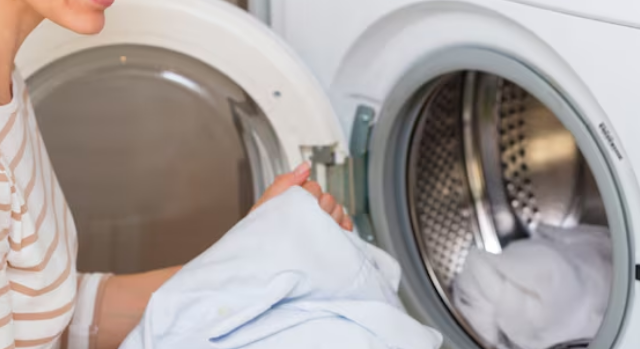
A common frustration occurs when the drum turns, but your clothes remain damp after a full cycle. This often points to problems with the heat generation system. Two specific components are usually responsible.
The thermal fuse acts as a safety device. It cuts power if the appliance overheats, preventing potential hazards. You can typically find this component on the blower housing or near the heating element.
Always unplug the machine before any inspection. Locate the small, white fuse on the housing. Carefully remove it for testing.
Use a multimeter to check for electrical continuity. A functioning fuse will show a continuous circuit. If the meter reads no continuity, the safety device has blown and requires replacement.
A blown fuse is often a symptom of a clogged vent system. Restricted airflow causes overheating, triggering the safety mechanism. Addressing the root cause is crucial after a repair.
The heating element is the part that generates warmth. If it fails, the appliance runs cold. This component is usually accessible from the rear panel.
Visually inspect the element for any breaks or dark burn marks. Then, use your multimeter to test it for continuity, just like the fuse. A lack of continuity confirms the part needs replacement.
When replacing either component, ensure the new part matches the original specifications. This guarantees proper operation and maintains safety standards for your appliance.
The unseen buildup in your machine’s airflow system poses significant risks that demand regular attention. Proper maintenance of these components ensures efficient operation and household safety.
Regular care prevents common problems and extends your appliance’s lifespan. Focus on two key areas: the filtration screen and exhaust pathway.
Remove visible accumulation before each cycle. This simple habit improves drying efficiency and reduces fire hazards.
Fabric softener residue creates an invisible film on the screen. This buildup restricts airflow and poses serious risks.
Consumer Reports recommends cleaning the lint screen after every use to reduce fire risk and improve efficiency.
For deep cleaning, wash the filter with hot soapy water every six months. Use a soft brush to remove stubborn residue. Always let it dry completely before reinstalling.
Don’t forget the moisture sensors inside the drum. Wipe them occasionally with rubbing alcohol for accurate operation.
| Vent Material | Safety Rating | Durability | Fire Containment |
|---|---|---|---|
| Metal (rigid) | Excellent | High | Superior |
| Metal (flexible) | Good | Medium | Good |
| Plastic/Vinyl | Poor | Low | Minimal |
Check your exterior vent while the machine runs. You should feel strong airflow. Weak movement indicates restrictions needing immediate attention.
Clogged pathways cause longer drying times and higher energy costs. Proper maintenance saves money and prevents hazards.
Sometimes the simplest mechanical parts cause the most frustrating appliance failures. When your machine refuses to start, the problem often lies with two critical components that control basic operation.
The door switch acts as a safety mechanism. It prevents the motor from running when the door is open.
Locate this component around the door frame. Press it manually and listen for a distinct click sound.
If you hear no click, the mechanism may be faulty. Use a multimeter to test for electrical continuity.
No continuity indicates a broken switch that needs replacement. This simple check can resolve many starting issues.
The start switch initiates the drying cycle when you press the button. A faulty component here means complete silence when you try to start the unit.
Find this switch on the control panel. Test it with a multimeter just like the door component.
If either switch fails the continuity test, replacement is necessary. These repairs often require removing access panels.
Homeowners uncomfortable with electrical testing should contact professional repair services for accurate diagnosis.
The physical components that enable drum movement experience significant stress during normal operation. These mechanical parts work together to rotate your laundry load efficiently.
A broken or worn drive belt prevents the drum from spinning properly. This rubber component connects the motor to the rotating mechanism.
Check for cracks, fraying, or complete breaks. Replacement parts must match your appliance’s specifications for safe operation.
Proper drum alignment ensures smooth rotation. Misalignment can cause additional wear on supporting components.
Support rollers bear the drum‘s weight during rotation. Worn rollers create friction and unusual noises.
Test each roller by spinning it manually. They should move freely without resistance or grinding sounds.
Consider professional repair if you notice significant wear. Proper installation ensures long-term performance and safety.
When mechanical components check out but problems persist, the issue may lie with the electronic control systems. The main control board serves as the appliance’s central processor, coordinating all functions.
Start by checking individual switch components on the control panel. Listen for unusual clicking sounds when pressing buttons. Test each switch with a multimeter for proper continuity.
Some models feature built-in diagnostic modes. For example, Whirlpool Duet units can enter test mode by pressing specific button sequences. This illuminates all indicator lights to verify control board function.
Timer mechanisms require special attention. A loose-feeling knob or free-spinning dial indicates internal mechanism failure. These symptoms often point to timer motor issues rather than full board replacement.
| Symptom | Likely Cause | Recommended Action |
|---|---|---|
| Complete non-operation | Main control board failure | Professional diagnosis required |
| Erratic cycle behavior | Faulty timer or switches | Individual component testing |
| Partial function loss | Specific switch failure | Targeted replacement |
| Unusual display readings | Display circuit issue | Control board inspection |
Control board diagnostics represent advanced repair territory. Most homeowners should consider professional service for accurate diagnosis and safe repair.
Many laundry frustrations stem not from mechanical failures but from improper usage habits that strain your appliance. Proper loading and cycle selection significantly impact drying efficiency and component longevity.
Overloading your machine with too many items creates multiple problems. The drum struggles to tumble properly, reducing airflow and drying effectiveness. This practice also places excessive stress on the motor and belt.
For regular fabrics, fill the drum only halfway full. Heavy materials like towels and jeans need more space—aim for one-third capacity. This allows proper air circulation and thorough drying.
Unbalanced loads cause excessive vibration and noise. When heavy items bunch together, the drum cannot rotate smoothly. This uneven distribution accelerates wear on support rollers and other components.
Modern appliances offer various cycle options designed for different fabric types. Selecting the appropriate setting improves results and energy efficiency. Moisture sensor technology automatically ends the cycle when clothes reach the desired dryness level.
Separate heavy and lightweight items for better results. Shake out garments before loading to prevent tangling. These simple practices ensure efficient operation and extend your machine’s lifespan.
The most effective approach to appliance longevity combines regular preventative care with knowing when expert intervention is necessary. This balanced strategy protects your investment and ensures household safety.
Regular vent maintenance prevents serious hazards. Statistics show over 15,500 home fires start in dryer vents annually.
Failure to clean accounts for 32% of these incidents. Proper care extends your machine’s lifespan significantly.
Begin by unplugging the unit and disconnecting the duct. Use a vacuum to remove accumulated material from both ends.
Inspect the exterior vent surface for obstructions. Check for strong airflow during operation.
Schedule professional cleaning when you notice significant buildup. Complex vent systems often require specialized service.
Some situations demand expert attention. Electrical issues always warrant professional service.
Complex component replacements need specialized skills. These include motor and control board repairs.
| Situation | DIY Option | Professional Service Needed |
|---|---|---|
| Basic lint removal | Yes | No |
| Electrical problems | No | Yes |
| Component replacement | Maybe | Recommended |
| Recurring issues | No | Yes |
Attempting complex repairs risks personal injury and additional damage. Professional technicians have proper training and genuine parts.
They can identify underlying problems homeowners might miss. This saves time and money in the long run.
Modern laundry machines have evolved significantly from their purely mechanical ancestors. Today’s units incorporate sophisticated electronics that change how homeowners approach maintenance and repairs.
Quality dryers now feature moisture sensor technology. These sensors detect when clothes reach the desired dryness level. They automatically end the cycle, improving energy efficiency.
Many modern appliances include built-in diagnostic modes. Technicians can run system tests using specific button sequences. These tests identify failures through error codes or indicator patterns.
Gas dryers contain specialized components like ignition systems. These parts require specific knowledge for safe handling. Professional service is often recommended for these complex repairs.
Safety features like child lock functions can sometimes appear as operational problems. Understanding these modern conveniences helps avoid unnecessary service calls.
Electronic complexity means some dryer parts must come from manufacturers. Generic replacements may not work with sophisticated control systems. This makes qualified technicians more essential than ever.
Successfully restoring your laundry routine depends on a clear diagnostic strategy. This guide has provided comprehensive dryer troubleshooting tips to help you identify common problems efficiently.
Remember that issues range from simple power checks to complex component replacements. Regular maintenance, like cleaning lint filters, prevents hazards and extends your appliance‘s life.
Proper usage habits ensure your clothes dry efficiently while reducing energy costs. Approach each situation systematically, starting with basic checks before moving to advanced diagnostics.
While many repairs are DIY-friendly, know when to call professionals for safety and complex issues. Investing time in understanding your dryer pays off with faster resolutions and greater confidence.
Keep this resource handy for future reference. Effective troubleshooting saves money and keeps your laundry day running smoothly.
This is often caused by a faulty heating element in electric models or a malfunctioning igniter in gas units. A blown thermal fuse or a tripped circuit breaker can also interrupt the power supply to the heating system. Checking these components is a good first step.
You should clean the lint filter after every single load to maintain proper airflow. The dryer vent hose and exterior vent cap should be thoroughly cleaned at least once a year to prevent dangerous lint buildup and improve efficiency.
First, ensure the appliance is plugged in and the door is firmly closed, activating the door switch. Next, check your home’s circuit breaker or fuse box for a tripped breaker or blown fuse. A faulty start switch on the control panel could also be the culprit.
This typically points to an airflow restriction. A clogged lint filter or a blocked vent hose are the most common reasons. Overloading the drum can also prevent clothes from tumbling properly and drying evenly. Ensure you’re not exceeding the machine’s capacity.
If you’ve checked simple issues like the power source, lint filter, and vent but the problem persists, it’s time to call a technician. Complex electrical repairs involving the control board, motor, or gas valves should always be handled by a qualified service professional for safety.
A burning odor is a serious warning sign. It can be caused by lint trapped near the heating element, a frayed drive belt, or a failing motor. Immediately turn off and unplug the machine. Inspect for lint buildup and call for repairs if the source isn’t easily visible and safe to address.