Our Location
1250 Beacon Street
Brookline, MA 02446
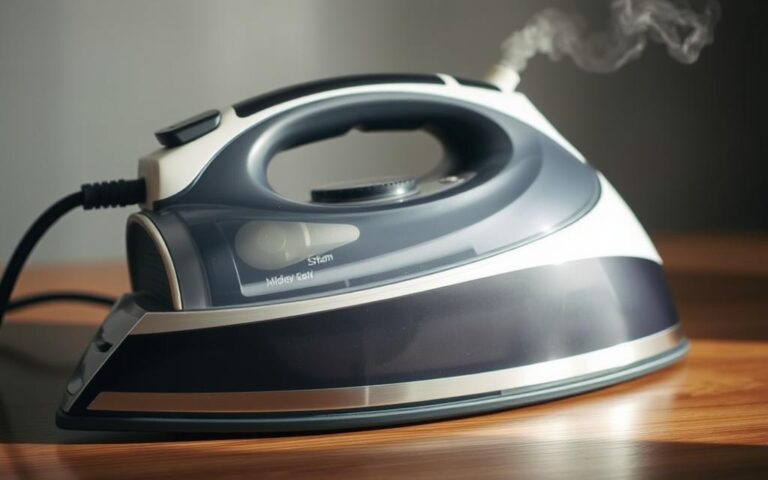
Revitalize your blending with our guide on fixing a hand blender dull blade, including expert tips for maintenance and blade replacement.
Oftentimes, 40% of hand blender issues come from the blade or shaft, not the motor. This means you might not need to buy a new one if yours is acting weak.
Feeling like your hand blender isn’t as strong as it should be? It could be because of a dull blade or a stuck shaft. Even if the motor spins, a frozen shaft can ruin gears, turning a fixable problem into trash.
In this guide, we’ll show you how to figure out if you need to replace the blade or just oil the shaft. We also talk about how to find parts, and why it’s essential to check with the blender’s maker—especially for certain Cuisinart models.
We’re going to look at how to tell if there’s a problem, simple checks you can do, and the good points of keeping your blender in shape. We’ll walk you through how to change parts and oil the shaft correctly. Plus, we’ll tell you when it’s time to get help from an expert. Our aim is to make your blender work like new, save you money, and cut down on waste.
The sharpness of a hand blender’s blade is key for kitchen tasks. When the blade is dull, it can make blending slow, strain the motor, and cause uneven textures. Knowing when a blade is just worn or really needs fixing can help you decide whether to fix, replace, or just keep using it.
A dull blade might make the blender hum without chopping food. You might notice the food moves away from the blades, blending takes longer, and the blender often overheats or stops.
Check for wear on the blade or leaks from the blade area. These signs can mean more than just a dull blade. They might show bearing or seal issues that need quick attention.
Sharp blades cut ingredients cleanly, making smoother blends quickly. This means less stress on the motor. It also prevents the blender from working too hard, which can reduce heat and make it last longer.
Such care stops the blender from overworking. This means fewer breakdowns and extends the life of the blender’s parts.
Get a new cutting part if the blade is visibly damaged. If you see leaks or the blade won’t spin easily, it’s time for a change. Replacing parts can prevent further motor problems.
If you find leaks or can’t move the blade, replace it right away. Brands like OmniBlend offer parts for this. But with older models, you might need a whole new blender.
| Symptom | Likely Cause | Action |
|---|---|---|
| Blender hums but no cutting | Rounded or dull blade edge | Sharpen or replace blade assembly |
| Mixture pulls away from blades | Blade worn or incorrect loading | Adjust technique; consider replacement if persistent |
| Frequent overload trips | Motor strain from dull blade or bearing drag | Troubleshoot dull hand blender blade; replace bearings or assembly |
| Rust-colored liquid under jar | Bearing seal failure | Immediate replacement of blade/bearing assembly |
| Drive socket slippage or burning smell | Wear in drive interface | Replace cutting unit or entire blender |
| Visible nicks or chips on blade | Physical damage from hard items | Replace blade and follow tips for sharp hand blender blade |
A dull blade can make kitchen tasks longer and mess up food texture. Just looking and doing a few simple tests can tell you if you need to fix your blender’s dull blade. Or if you need other repairs. Before buying new parts or calling for help, try these checks.
First, unplug your blender and take off the blending shaft or jar. Look for rounded edges, small cuts, or clear signs of wear on the blade. If the metal looks corroded or discolored, the blade isn’t as sharp anymore.
Also, check for any damage like cracks or bends on the bottom plate and the silicone seal. A greasy or rusty liquid around the base or rubber parts means the seal might be broken. If the blade assembly can be taken apart, try tightening the nuts and bolts. A loose blade can make it seem dull.
Blend some soft fruit with water to see how it does. Note how long it takes to become smooth and compare it to when it was new. If it’s taking longer, you might need to sharpen or replace the blade.
If the motor makes noise but the blade won’t move, turn it off right away. This could mean the blades are stuck, something’s blocking them, or the drive socket is damaged. Try spinning the blade or socket by hand with everything turned off. It should move easily and smoothly. If it’s rough, the bearings might be bad.
Lastly, pay attention to any unusual smells or sounds. A strange smell like burning rubber could mean it’s time to check the drive socket. If the blender vibrates more than usual or wobbles, it could be a problem with the shaft. These signs help you decide whether to fix or replace blender parts.
Keeping a hand blender in top shape leads to better blending and fewer fixes. Simple routines can protect the motor, prevent overheating, and keep blades sharp. Follow these tips to care for your hand blender’s blade, making it work like new every time.
Sharp blades mean quicker, smoother purees and soups. With sharp edges, the motor doesn’t work as hard, reducing the risk of it burning out. Regular blade care offers you consistent texture, saves time, and cuts down on replacements.
Proper care prevents food from dulling the blades. A quick rinse or a short soap-and-hot-water blend after use keeps residue away. If needed, take apart the blade assembly to wash it gently with soap and a soft brush.
Regular checks can extend your blender’s life, both the blade and the drive socket. Every few months, look at the bearing assemblies and drive collar for signs of wear. Replace any blade assembly if you notice wobbling or rust to protect the motor.
Certain practices will help maintain your blender. Don’t blend without contents, overload it, or mix very hard objects or non-food materials. Avoid pouring boiling liquids into the blender or soaking its motor base to dodge seal and electrical issues.
Not all parts should go in the dishwasher. Dishwasher soap can damage seals and affect warranties. Whenever you can, hand wash the parts you can remove, and dry them well before putting them back together.
| Maintenance Task | Frequency | Benefit |
|---|---|---|
| Quick rinse or 30-second soap blend | After every use | Prevents buildup and keeps blades sharp |
| Hand wash blade assembly with soft brush | Weekly or after heavy use | Removes stuck food and protects seals |
| Inspect bearings and drive socket | Every 3 months | Detects wear before motor damage |
| Trim solids and add liquid before blending | Before each use | Reduces torque and motor strain |
| Avoid dishwasher for blade assemblies | Always | Preserves seals and warranty |
For keen blade care, chop solids small, mix in enough liquid to lessen the load, and pause if the blender strains. These steps ensure your blender stays dependable, simplifying every recipe you tackle.
Replacing a worn or damaged blade can make your hand blender work like new. Read the short steps below before you start. Be sure to gather your tools, clear a work space, and follow safety tips closely.
Tools You Will Need
Removing the Old Blade Assembly
First, unplug the unit and put on gloves. Then, turn the jar upside down so the blade faces the cloth inside. Unscrew the bottom plate counter-clockwise using the wrench.
If the bottom plate won’t budge, tap it lightly or push to free the assembly. Let the blade fall onto the dishcloth to avoid damage. After that, take off the silicone seal and check the groove for wear.
Inspect and Clean
Look over the bottom plate, silicone seal, and the groove. Clean these parts with a soft brush and make sure they’re dry. If you find any cracks or warped seals, replace them to stop leaks later on.
Installing the New Blade
Put the new blade assembly into the jar from the bottom. Add the silicone seal, then screw on the bottom plate. Tighten it well with the wrench so it seals right.
To check for leaks, fill the jar with water and press a paper towel against the outside seam. If it gets wet, tighten the plate more or get a new seal. If your blender’s assembly can’t be removed, reach out to the manufacturer for help or parts. Brands like OmniBlend have spare parts for some models.
| Task | Typical Tools | Time | Common Issue |
|---|---|---|---|
| Remove bottom plate | Bottom-plate wrench, dishcloth | 5–10 minutes | Seized plate due to dried food |
| Clean seal groove | Soft brush, cloth | 5 minutes | Hidden debris causing leaks |
| Replace blade assembly | Replacement blade, gloves, wrench | 10–15 minutes | Misaligned plate or loose fit |
| Leak test | Water, paper towel | 2 minutes | Worn seal or loose plate |
If you’re not sure which part you need, it’s best to go with official parts from your blender’s maker or check the manual. When looking for the best hand blender to avoid dull blade problems, choose one with easy-to-service bottom plates and available spare parts.
Lubricating the shaft of a hand blender makes it run smoothly. It stops the device from weakening over time. By reducing friction, it cuts down heat and wear, helping the blades last longer.
Grease in ball-bearing chambers keeps things moving. If it breaks down, you may feel grinding or rough movement. A stuck shaft makes the blender feel dull, and the motor can overload if bearings don’t move well.
Choose a food-safe, high-temperature grease meant for sealed bearings. Manuals often suggest the right type. Avoid regular household oils as they can harm seals. Don’t try to lubricate a blade assembly if it’s sealed and not meant to be serviced.
Only work on the assembly if the maker says it’s okay. Follow the product guide to remove the blade assembly. If you can, open up the bearing chamber. Lightly grease the bearing surfaces as directed. Put it back together with new seals if they’re needed to stop leaks.
Don’t use too much lubricant and keep it away from food areas. Stay clear of non-food-grade products near the blender. If seals leak or grease looks bad, get a new blade assembly instead of just adding grease.
Below is a quick guide on whether to lubricate or replace blender parts.
| Condition Observed | Action | Notes |
|---|---|---|
| Grinding or rough rotation | Inspect bearings and lubricant | May respond to cleaning and proper shaft lubrication |
| Leaking greasy or rusty liquid | Replace blade assembly | Contaminated grease signals seal failure; do not service |
| Seized shaft or immovable drive socket | Disassemble if serviceable; otherwise replace | Forced lubrication can damage sealed units |
| Blender feels weak but bearings turn smoothly | Check blade sharpness and motor load | Hand blender dull blade may require sharpening or replacement to fix dull blade on hand blender issues |
| Manufacturer lists serviceable bearings | Use recommended food-grade grease | Follow manual for hand blender blade care and reassembly |
Maintaining a good condition of your hand blender is straightforward. Just follow a few easy steps regularly. These exercises will keep the blades sharp, seals tight, and motor running smoothly. They will also help you save both time and cash in the long term.

Always disconnect the blender before starting to clean. Make sure to wash the jar and shaft right after using to avoid food drying and sticking. A quick 30-second blend with hot soapy water will make it clean and residue-free.
For any food that’s stuck, gently use a soft brush. If the blades come off, you can wash them separately with a gentle soap and then rinse thoroughly. Make sure everything is dry before putting it away to prevent any rust or mold from forming.
Keep the motor base away from water to avoid damage. Simply wipe it with a slightly damp cloth and then dry it right away. Be cautious about using a dishwasher for blade assemblies unless it’s recommended by the producer. The harsh chemicals in dishwasher detergent can damage parts and may void the warranty.
Always put your blender together correctly, making sure everything fits securely. Chop food into small, 2-square-inch pieces for easier blending. Remember, adding enough liquid helps everything blend smoothly and keeps the motor from wearing out too quickly.
Begin blending on a low setting and increase speed as necessary. Use quick pulses for hard-to-blend items. Avoid trying to blend very hard or fibrous materials unless your blender is specifically designed for those tasks. Also, never run it empty or put boiling liquids in it.
Let the blender rest after heavy use to prevent it from getting too hot. Changing old rubber parts and seals helps everything run better and stops the motor from working too hard. Store all parts in a cool, dry place after they have been thoroughly dried.
Regularly check parts like seals, the bottom plate, nuts that hold the blade, and the drive socket. Change any parts that look worn out to avoid leaks and keep the motor safe. Small checks like these help keep your blender working right and prevent expensive fixes.
If the blades become dull, either sharpen them properly or get new ones from the blender’s maker. Knowing how to care for the blades can make your blender last longer and work better.
| Task | Frequency | Why It Helps |
|---|---|---|
| Rinse and 30-sec hot soap run | After every use | Prevents buildup and reduces wear on cutting edges |
| Soft brush clean removable blades | Weekly or as needed | Removes stuck food without scratching or dulling metal |
| Inspect seals and drive socket | Monthly | Detects wear early to avoid leaks and motor strain |
| Replace rubber cushions or worn parts | When wear is visible | Prevents slipping and prolongs motor life |
| Sharpen or replace blade | When performance drops | Restores cutting efficiency; learn how to sharpen hand blender blade or fit a new assembly |
If your hand blender isn’t working right, the problem might not be a dull blade. Start by checking the basics. Then, try simple solutions before getting a new blade or calling for help.
First, unplug the blender and check the blade area. Look for stuck food or tough build-up. This could stop the blades and make the motor seem weak.
Next, see if the blade assembly or retaining nut is loose. A loose blade can reduce performance without looking dull. Also, a burning rubber smell suggests a drive socket issue or a worn rubber cushion.
Check the drive socket and rubber cushion closely. Problems here can make the motor run but not the shaft. Also, electrical issues like a bad switch might make the machine stop or not run smoothly.
For models with overload protection, try the reset button. If the motor still won’t work after you’ve cleaned it, the problem might be with the wiring or the motor itself.
Stop using the blender if there’s water in the motor area or if things look wet. Repairs for motor rewinding or complex issues should be done by experts. Brands like KitchenAid, Braun, or Cuisinart have authorized centers.
Sometimes, finding replacement parts can be tough. Always check with the brand first. If you can’t find the parts or the repair needs special tools, it’s best to go with a professional.
| Symptom | Quick Check | Possible Fix |
|---|---|---|
| Sluggish motor but blades turn | Inspect for food buildup and heavy load | Clean, reduce load, retry; consider hand blender dull blade or replacement |
| Motor runs but shaft doesn’t | Check drive socket and rubber cushion for wear | Replace drive socket if user-serviceable; consult manual for safe replacement |
| Motor does not run at all | Try overload reset and test switch function | Contact authorized service for electrical repair or motor work |
| Burning rubber smell | Turn off and unplug immediately | Stop use; likely drive socket failure or motor damage, seek professional help |
| Leaking around blade hub | Inspect bottom plate and seals | Replace bottom plate or seal; consider hand blender blade replacement if assembly compromised |
Choosing the right blade is key for good performance and saving money. Brands that offer spare cutting pieces, bottom plates, and seals are best. They also include drive sockets and easy-to-find part numbers. When your hand blender’s blade gets dull, go for models with available spare parts and simple instructions.
Top recommendations in the market
OmniBlend shines by providing replacement blades, bearings, and service guides. Braun and KitchenAid have many parts for their blenders. Cuisinart makes dependable blenders, but finding parts for old models can be tough. Always check if you can get bottom plates, seals, and sockets before buying.
Comparing features and prices
Look at the blade material, bearing setup, and the spare-part policy. Blades made of stainless alloy last longer with frequent use. Choose blenders with replaceable bearings to avoid buying a whole new device. Sealed bearings lessen upkeep but might increase the cost of new blades.
| Brand | Spare Parts | Blade Material | Bearing Type | Typical Price (assembly) |
|---|---|---|---|---|
| OmniBlend | Cutting units, bottom plates, seals | Stainless alloy | Replaceable bearings | $40–$80 |
| Braun | Drive sockets, bottom plates, seals | Hardened stainless | Sealed or replaceable (model dependent) | $25–$70 |
| KitchenAid | Blade assemblies, seals, sockets | Stainless steel alloys | Mostly sealed bearings | $30–$65 |
| Cuisinart | Selected parts; limited for older models | Stainless steel | Sealed bearings common | $20–$60 |
Cost and value are important in replacing blender blades. A complete set with bearings and a plate is pricier than just a blade. Compare part costs with the value and age of a new blender. If you blend tough stuff often, choose a brand with sturdy bearings and available parts. This reduces downtime and waste.
Regular care makes a hand blender reliable and cuts down on waste. Watch out for signs like longer blending times, a loud motor, or the blender struggling with ingredients. Check it visually and by touch. Wash it with hot water and soap for 30 seconds after use. Don’t use the dishwasher for delicate parts. Check seals, bearings, and the drive socket regularly for wear.
Important steps are simple: notice when there’s a problem, look it over carefully, and check how well it works. Replace any worn parts like blades or bearings when necessary. Only use food-safe grease if the maker says it’s okay. Making sure it’s put together right, loading it correctly, and cleaning it often helps keep it in good shape.
If your hand blender’s blades are dull and it has removable parts, you might be able to fix it yourself. With some common tools, like a wrench and screwdriver, you can change blades or other parts. Then check for any leaks. Don’t try to fix the motor or parts that are sealed up. If you can’t get replacement parts, or if the motor’s still not working right, get in touch with the service center or look for official parts.
Taking steps like checking the assembly, using it right, cleaning it often, and replacing parts when necessary keeps your blender working great. These easy steps help maintain the blades, make the blender last longer, and save money over time.